

Are you tired of using the same old fonts that everyone else has on their WordPress site? If you want to elevate your website’s design and make it stand out from the crowd, custom fonts are the way to go! Adding unique typography can enhance your brand identity, improve readability, and create a more engaging experience for your visitors. But if you’re not a tech wizard, you might be wondering how to get started. Don’t worry—we’ve got you covered! In this article, we’ll explore four easy methods to add custom fonts to your WordPress site, no coding experience required. So grab a cup of coffee, sit back, and let’s transform your site with the power of custom typography!
Choosing the Right Custom Fonts for Your Brand Identity
Selecting the perfect custom font for your brand is more than just a design choice; it’s a powerful tool that can speak to your audience and establish your identity. A well-chosen font reflects your brand’s personality, values, and aesthetics. When navigating the myriad of options available, keep in mind the following elements to ensure you make the right decision:
- Brand Personality: Your font should embody your brand’s character. Are you modern and sleek, or traditional and timeless? Choose a font that aligns with these traits.
- Readability: No matter how beautiful a font may be, if it’s difficult to read, it won’t serve your audience well. Ensure your font is legible across different devices and sizes.
- Versatility: Consider how the font will perform in various contexts, from your website to social media graphics. A versatile font can enhance your brand’s visual presence in multiple formats.
- Emotional Impact: Fonts evoke emotions. For example, serif fonts often convey trust and reliability, while sans-serif fonts may feel more contemporary and approachable. Think about the feelings you want to evoke.
Once you have a shortlist of potential fonts, it’s crucial to test them in real-world applications. Create mockups of your website, business cards, and other marketing materials to see how the fonts work together. Examine how different weights and styles complement your overall design. This process can help you visualize how the font enhances your brand identity.
Don’t overlook the importance of pairing fonts. Effective font pairing can elevate your brand’s aesthetic significantly. Choose a primary font for headings and a secondary font for body text to create a cohesive look. A balanced combination can enhance readability and retain visual interest.
| Font Type | Best For | Examples |
|---|---|---|
| Serif | Traditional Brands | Times New Roman, Georgia |
| Sans-Serif | Modern & Clean Look | Arial, Helvetica |
| Display | Creative & Artistic Ventures | Impact, Lobster |
| Monospace | Tech & Coding | Courier New, Consolas |
Lastly, remember to consider licensing. Ensure that the fonts you choose are legally compliant and suitable for commercial use, especially if you’re planning to expand your brand in the future. Investing time in choosing the right custom fonts can significantly impact how your audience perceives and interacts with your brand.
Exploring the Benefits of Custom Fonts for Your WordPress Site
Custom fonts can transform the look and feel of your WordPress site, making it more engaging and visually appealing. When you choose the right typography, you’re not just enhancing aesthetics; you’re also improving readability and user experience. Here are some compelling benefits of using custom fonts:
- Brand Identity: Custom fonts help establish and reinforce your brand’s identity. A unique typeface can create a memorable impression that distinguishes you from competitors.
- Improved Readability: Using fonts that are easy to read on various devices ensures your content is accessible to all users, enhancing their overall experience on your site.
- Increased Engagement: A well-chosen font can draw visitors in, creating a more immersive experience. This can lead to longer page visits and lower bounce rates.
- Personal Expression: Custom fonts offer a way to express personality and creativity, allowing your site to reflect your style and message more effectively.
Moreover, integrating custom fonts can also have a positive impact on your site’s performance. By choosing fonts that are optimized for web use, you can improve loading times and reduce the chances of layout shifts, which can frustrate users. Here’s a quick comparison of the different methods you can use to add custom fonts to your WordPress site, along with their benefits:
| Method | Benefits |
|---|---|
| Google Fonts | Free, easy to implement, and extensive selection. |
| Adobe Fonts | High-quality fonts and great for brand consistency. |
| Custom Uploads | Complete control over unique and specific font choices. |
| CSS @font-face | Flexibility and support for various font formats. |
By exploring these methods, you can effortlessly enhance your website’s design and functionality. Remember that the choice of font can evoke specific emotions and reactions from your audience, so take the time to select the ones that best embody your brand’s voice. The right font can be a game-changer for your site’s success.
Easy Method One: Uploading Fonts Directly to Your Theme
If you’re looking to infuse your WordPress site with a unique flair, uploading custom fonts directly to your theme is a fantastic way to get started. This method is straightforward and allows you to personalize your site’s typography without the need for complex plugins. Here’s how you can do it with ease.
First, you’ll need to choose your font. Websites like Google Fonts or Font Squirrel offer a plethora of options that you can download for free. Once you’ve found the perfect font, download the font files, which usually come in a .zip format. After extracting the files, you’ll typically find various formats like .woff, .ttf, or .eot.
Next, navigate to your WordPress dashboard and head over to Appearance > Theme Editor. Here, you’ll want to locate the style.css file within your theme’s directory. Before making any changes, consider creating a backup of your current stylesheet. Once that’s done, you’ll need to upload your font files to your theme’s directory using an FTP client or through your hosting file manager.
After uploading, it’s time to declare your font in the CSS. Add the following code to your style.css file:
@font-face {
    font-family: 'YourCustomFont';
    src: url('path/to/your/font.woff') format('woff'),
         url('path/to/your/font.ttf') format('truetype');
    font-weight: normal;
    font-style: normal;
}
Make sure to replace 'YourCustomFont' with the name of your font and 'path/to/your/font' with the actual URL where your font files are stored. Now, you can apply this font throughout your site! For instance, you can specify it in your CSS like so:
body {
    font-family: 'YourCustomFont', sans-serif;
}
To summarize, uploading fonts directly to your theme involves:
- Choosing and downloading your desired font.
- Uploading font files to your theme’s directory.
- Declaring the font using the @font-face rule in your CSS.
- Applying the font to your elements in the stylesheet.
This method not only gives your site a personalized touch but also enhances the overall user experience. Dive in and start playing with typography—your website deserves it!
Method Two: Using a WordPress Plugin for Hassle-Free Integration
If you’re looking for a straightforward way to add custom fonts to your WordPress site, using a plugin is a fantastic option. Not only do plugins simplify the process, but they also provide a user-friendly interface that allows even beginners to easily integrate custom typography into their designs.
Here are some popular plugins that make font integration a breeze:
- Easy Google Fonts: This plugin allows you to add Google Fonts to your WordPress theme without any coding. You can customize font settings through the WordPress Customizer, enabling you to see your changes in real-time.
- Custom Fonts: With this plugin, you can upload your own font files and use them across your site. It’s perfect for those who want to use unique fonts that aren’t available in Google Fonts.
- Typekit Fonts for WordPress: If you prefer Adobe Fonts, this plugin lets you easily integrate them into your website, ensuring your branding stays consistent.
To get started with a plugin, follow these simple steps:
- Go to your WordPress dashboard and navigate to Plugins > Add New.
- Search for the font plugin you want to use (e.g., Easy Google Fonts).
- Click Install Now and then Activate the plugin.
- Go to the plugin settings and choose your custom fonts.
- Save your changes and preview your site to see the new fonts in action!
Using a plugin not only saves you time but also minimizes the likelihood of errors that can occur with manual coding. Plus, many plugins come with built-in support and documentation, making it easy to troubleshoot any issues you might encounter.
if you want to enhance your website’s visual appeal without diving into coding, opting for a WordPress plugin is a smart choice. With just a few clicks, you can transform your site’s typography and create a more engaging user experience.
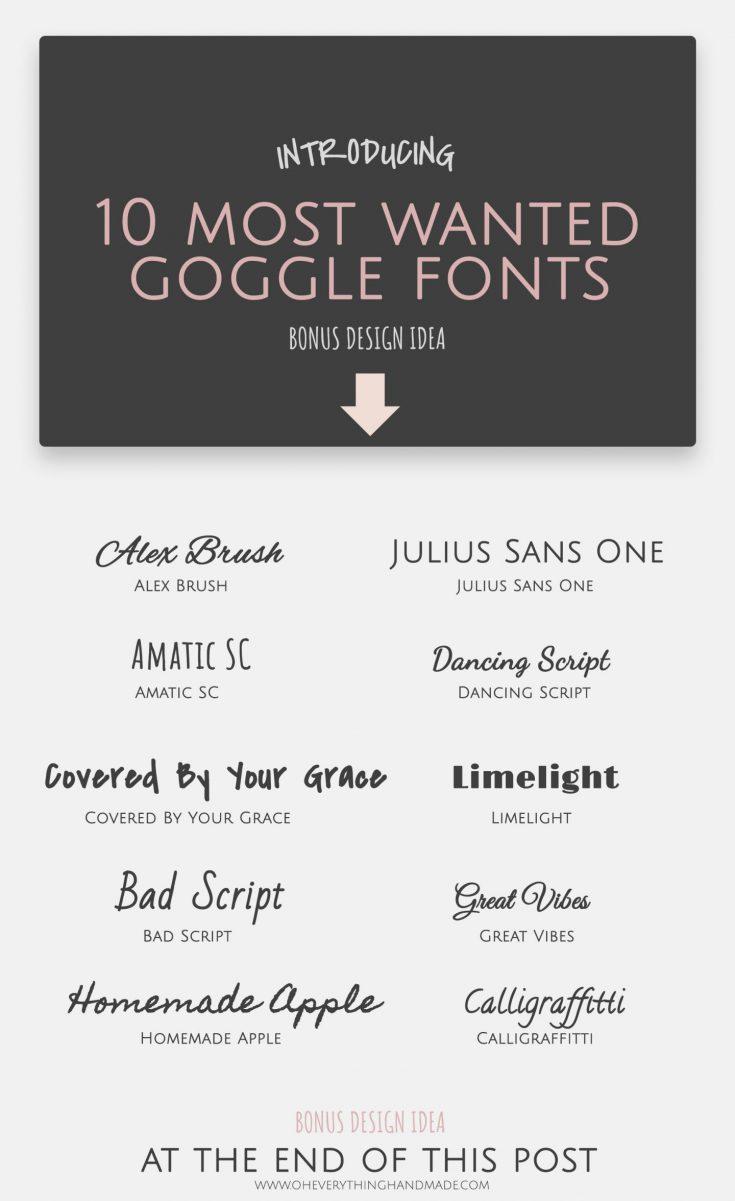
Method Three: Leveraging Google Fonts for Stylish Typography
Using Google Fonts is one of the simplest and most effective ways to enhance the typography of your WordPress site. With a vast library of font styles, you can effortlessly create a unique visual identity that resonates with your brand. Here’s how you can tap into this resource to elevate your website’s aesthetic.
First, visit the Google Fonts website, where you can browse thousands of font options. You can filter fonts by categories, such as Serif, Sans Serif, Display, and Handwriting. This flexibility allows you to find the perfect font style that matches the tone and personality of your site. Once you’ve selected your desired fonts, simply click on the “+” icon to add them to your collection.
After gathering your chosen fonts, a prompt will appear at the bottom right corner of the screen with an embed code. Copy this tag and navigate to your WordPress dashboard. Here’s how to integrate it:
- Go to Appearance > Theme Editor.
- Select the header.php file from the list of theme files.
- Paste the copied
tag within thesection of your theme.
Once the fonts are embedded, you need to apply them using CSS. You can do this by navigating to Appearance > Customize > Additional CSS. Here is a basic example of how you might set your new fonts:
body {
    font-family: 'Roboto', sans-serif;
}
h1, h2, h3 {
    font-family: 'Merriweather', serif;
}
This simple CSS snippet will apply your selected fonts across your site. Feel free to customize your headings, paragraphs, and other text elements to truly make your typography stand out. To ensure you’re making the most out of your choices, consider creating a small table to keep track of the fonts being used:
| Element | Font Family | Style |
|---|---|---|
| Body Text | Roboto | Regular |
| Headings | Merriweather | Bold |
| Links | Open Sans | Italic |
With just a few steps, Google Fonts can transform the look and feel of your website. By carefully choosing and applying your typography, you can create a cohesive and engaging experience for your visitors. Let your content shine with the perfect typeface!
Method Four: Adding Custom Fonts via CSS for Advanced Users
For those who have a solid grasp of CSS and are looking to elevate their WordPress site’s typography further, adding custom fonts directly through CSS offers a high level of customization. This method not only gives you control over the font styles but also allows you to manipulate them without relying on additional plugins that may bloat your site. Here’s how to get started.
Before diving into the code, you’ll want to choose a custom font. There are numerous sources available, such as Google Fonts, Adobe Fonts, and other font libraries. Once you’ve selected your preferred font, you’ll typically receive a link or a code snippet that enables you to include the font in your site. Here’s an example of how to embed a Google Font:
Next, you’ll need to add this link to your theme’s section. You can do this by editing your theme’s header.php file, but be cautious—direct edits may be lost during updates. A safer alternative is to include it via the functions.php file by using the wp_enqueue_style function:
function custom_fonts() {
    wp_enqueue_style('custom-google-fonts', 'https://fonts.googleapis.com/css2?family=Roboto:wght@400;700&display=swap', false);
}
add_action('wp_enqueue_scripts', 'custom_fonts');
Once the font is embedded, you can start applying it using CSS. Navigate to Appearance > Customize > Additional CSS in your WordPress dashboard. Here, you can specify the elements that will use your new font. For instance:
body {
    font-family: 'Roboto', sans-serif;
}

h1, h2, h3 {
    font-family: 'Roboto', sans-serif;
    font-weight: 700;
}
Furthermore, consider utilizing a simple table to show how different elements are styled with your custom font. The following example showcases various heading levels and their corresponding styles:
| Element | Font Family | Font Weight |
|---|---|---|
| Body Text | Roboto, sans-serif | 400 |
| H1 | Roboto, sans-serif | 700 |
| H2 | Roboto, sans-serif | 700 |
By following these steps, you can successfully integrate custom fonts into your WordPress site, adding a unique flair that aligns perfectly with your brand identity. This method not only enhances aesthetics but can also improve readability, making your content more engaging and attractive to visitors.

Tips for Ensuring Your Fonts Load Fast and Look Great
When it comes to enhancing your website’s aesthetics, custom fonts can make a world of difference. However, if not properly managed, they can hinder your site’s performance. Here are some effective strategies to ensure that your fonts not only look stunning but also load quickly.
- Choose the Right Font Formats: Utilize modern font formats like WOFF2, which offer better compression and faster loading times compared to traditional formats like TTF or OTF. This ensures users experience smooth loading as they navigate your site.
- Limit the Number of Fonts: While it may be tempting to use multiple fonts, it’s essential to keep it simple. Aim for a combination of one or two font families that encompass various styles (regular, bold, italic). This reduces the number of HTTP requests and speeds up loading times.
- Use Font Subsetting: If your font has multiple character sets, consider subsetting it to include only the characters you need. This significantly decreases file size and enhances loading speeds, especially for multilingual sites.
Another smart approach is to leverage font-display properties in your CSS. By using the font-display property, you can control how fonts are loaded and displayed. Options like swap allow text to be rendered quickly while the custom font loads in the background, preventing the dreaded flash of invisible text (FOIT).
| Font Display Options | Description |
|---|---|
| auto | Default behavior, may cause FOIT. |
| block | Text is invisible until the font is loaded. |
| swap | Text is shown immediately with fallback font. |
| fallback | Similar to swap, but with a shorter block period. |
| optional | Font may not load if it takes too long. |
consider employing a Content Delivery Network (CDN) to serve your font files. CDNs cache your assets across various geographical locations, ensuring that users experience faster loading times, no matter where they are accessing your site from. This is especially beneficial for global audiences.
By implementing these strategies, you can ensure your custom fonts not only enhance your design but also contribute to a seamless user experience. Fast loading times paired with visually appealing typography can significantly improve user engagement and retention on your site.

Troubleshooting Common Issues with Custom Fonts in WordPress
When adding custom fonts to your WordPress site, you may encounter several common issues that can disrupt the user experience. Here are some troubleshooting tips to help you resolve these challenges effectively.
Font Not Displaying: One of the most frequent problems is when the custom font simply doesn’t show up. This can often be attributed to:
- Incorrect URL Paths: Ensure that the links to the font files are correct in your CSS or plugin settings. A typographical error in the path can prevent the font from loading.
- Browser Cache: Clear your browser cache and refresh the page. Sometimes, old versions of your site may be cached, making it seem like changes aren’t applied.
- Plugin Conflicts: Disable other plugins temporarily to identify if there are any conflicts preventing the custom font from displaying.
Font Not Applying to Specific Elements: If the font appears to be uploaded correctly but isn’t applying to certain elements, consider the following:
- CSS Specificity: Check if other CSS rules are overriding your custom font styles. Specificity hierarchy can prevent your styles from being applied as intended.
- HTML Structure: Ensure that the elements you want to style are correctly targeted in your CSS. Sometimes, structural issues in HTML can lead to unexpected results.
- @font-face Declaration: Verify that your @font-face styles are correctly defined, especially if you’re using multiple font weights or styles.
Performance Issues: Custom fonts can impact your site’s loading speed. To mitigate this:
- Use Font Subsetting: If your font includes multiple character sets, consider using subsetting to reduce file size.
- Optimize Fonts: Utilize services like Google Fonts or Adobe Fonts, which are optimized for performance and can load faster than self-hosted fonts.
Cross-Browser Compatibility: Different browsers may render fonts differently. To ensure consistent appearance across platforms, consider the following:
- Use Web-Safe Fonts: Pair your custom font with a web-safe fallback to maintain readability in case the custom font fails to load.
- Test Across Browsers: Regularly test your site on various browsers to identify any discrepancies and resolve them promptly.
| Issue | Solution |
|---|---|
| Font not displaying | Check URL paths and clear browser cache |
| Font not applying | Inspect CSS specificity and HTML structure |
| Performance issues | Optimize fonts and use subsetting |
| Cross-browser compatibility | Test fonts in multiple browsers |
By applying these troubleshooting steps, you can ensure that your custom fonts enhance your WordPress site’s aesthetics without causing any technical issues. Happy customizing!
Best Practices for Maintaining Consistency Across Different Devices
Maintaining consistency across different devices is crucial for providing a seamless user experience. When implementing custom fonts on your WordPress site, it’s important to ensure that your chosen fonts look great on desktops, tablets, and smartphones alike. Here are some effective strategies to achieve this:
- Choose Web-Safe Fonts: Opt for fonts that are widely supported across all devices. Web-safe fonts ensure that users will see your content as intended, regardless of their device or browser.
- Utilize Font Services: Consider using font services like Google Fonts or Adobe Fonts. These platforms automatically adjust font rendering for different devices and screen sizes, allowing for a consistent look and feel.
- Set Fallback Fonts: Always define fallback fonts in your CSS. This way, if a custom font fails to load, the website will revert to a pre-defined alternative, maintaining readability.
Another vital aspect is to define font sizes, weights, and styles in relative units rather than absolute ones. Using em or rem units ensures that your text scales properly across various screen sizes, enhancing readability on both small and large displays.
To exemplify how font sizes can differ across devices, consider the following table:
| Device Type | Recommended Font Size | Fallback Font Example |
|---|---|---|
| Desktop | 16px | Arial, sans-serif |
| Tablet | 14px | Verdana, sans-serif |
| Mobile | 12px | Georgia, serif |
Additionally, regularly test your website on multiple devices and browsers to identify any inconsistencies. Tools like BrowserStack or responsive design testing features in browsers can help you quickly assess how your fonts perform across platforms.
keep your website’s loading speed in mind. Large font files can slow down your site, especially on mobile devices. Optimize your font files and only include the styles and weights you need. This not only aids in maintaining consistency but also enhances overall performance for a more enjoyable user experience.
Wrapping Up: Elevate Your WordPress Site with Unique Typography
In the world of web design, typography is more than just text; it’s a vital element that can transform the visual identity of your WordPress site. By integrating custom fonts, you not only enhance the aesthetic appeal but also significantly improve user engagement. Unique typography can convey your brand’s personality, ensuring that your site stands out in a sea of sameness.
When choosing fonts, consider the following aspects:
- Brand Consistency: Ensure the fonts align with your brand identity, whether modern, classic, playful, or serious.
- Readability: Even the most beautiful font loses its charm if it’s hard to read. Prioritize clarity, especially for body text.
- Web Compatibility: Use web-safe fonts or ensure that your custom fonts load seamlessly across all devices.
To make the most of your typography, explore various methods for adding custom fonts to your site. Whether you prefer using plugins or modifying CSS, each approach offers a unique way to enhance your text. For example, Google Fonts provides a vast library of options that can be easily integrated with just a few clicks. Alternatively, if you have a specific typeface in mind, consider uploading it directly through your theme’s settings or using a child theme to maintain customization during updates.
Here’s a quick comparison of popular methods to add custom fonts:
| Method | Ease of Use | Customization |
|---|---|---|
| Google Fonts | Easy | Moderate |
| Adobe Fonts | Moderate | High |
| Custom Uploads | Advanced | Very High |
| Page Builder Integration | Easy | Moderate |
Don’t forget to test how your chosen fonts look across different devices and screen sizes. A font that shines on a desktop might not have the same impact on mobile. By ensuring consistency and readability, you can keep your audience engaged and encourage them to explore every corner of your site.
Ultimately, the right typography can make a significant difference in user experience and perception of your brand. Elevate your WordPress site’s design by embracing unique fonts and watch as it becomes an extension of your creative vision, captivating visitors and enhancing your brand’s narrative.
Frequently Asked Questions (FAQ)
Q&A: How to Add Custom Fonts to Your WordPress Site (4 Methods)
Q1: Why should I consider adding custom fonts to my WordPress site?
A1: Great question! Adding custom fonts can transform the look and feel of your website. They help reinforce your brand identity, enhance readability, and ultimately create a more engaging user experience. Plus, a unique font can set your site apart from the competition, making it more memorable to your visitors!
Q2: What are the four methods to add custom fonts to my WordPress site?
A2: You’re in for a treat! Here are the four methods you can explore:
- Using a Plugin: This is the easiest way! Plugins like “Easy Google Fonts” or “Custom Fonts” allow you to add and manage fonts without any coding.
- Adding Google Fonts Manually: If you’re comfortable with a bit of code, you can directly link Google Fonts in your theme’s header file.
- Uploading Custom Fonts via CSS: For advanced users, you can upload font files to your server and use CSS to style them on your site.
- Using a Page Builder: If you’re using a page builder like Elementor or WPBakery, you can easily access and add custom fonts through their settings without any hassle.
Q3: Which method is the easiest for beginners?
A3: If you’re just starting out, using a plugin is your best bet! It’s user-friendly, requires no coding skills, and lets you experiment with different fonts in a matter of clicks. You can focus on what really matters—creating stunning content—while the plugin handles the font details for you.
Q4: Are there any potential downsides to using custom fonts?
A4: While custom fonts can enhance your site’s aesthetic, they can also impact load times, especially if you’re using multiple font styles. It’s essential to strike a balance between design and performance. Stick to a few well-chosen fonts, and always optimize your site for speed!
Q5: Can I use any font I want, or are there restrictions?
A5: Good question! While many fonts are available for free, some require licenses for commercial use. Google Fonts is a fantastic resource because it offers a wide array of fonts that are free and easy to use. If you’re using a custom font, make sure to check its licensing agreements to avoid any legal issues.
Q6: How can I ensure the custom fonts display correctly on all devices?
A6: To maintain consistency across devices, always use web-safe fonts as fallbacks. This means if the custom font doesn’t load, the browser will display a standard font instead. Also, test your website on various devices and browsers to ensure everything looks great!
Q7: Is there anything else I should keep in mind when adding custom fonts?
A7: Absolutely! Always prioritize legibility. Choose fonts that are easy to read, especially for body text. Also, consider your overall design and branding—make sure your font choices align with your site’s aesthetic. Lastly, keep user experience in mind; after all, your visitors should find navigating your site enjoyable!
Q8: Ready to dive in? What’s my next step?
A8: You’re all set to elevate your WordPress site! Start by choosing the method that suits your skill level, and experiment with different fonts until you find the perfect match. Remember, your website is your canvas—let your creativity shine through! Happy font hunting!
In Summary
And there you have it! You’re now equipped with four effective methods to add custom fonts to your WordPress site. Whether you choose to go the easy route with plugins, dive into the code with CSS, or upload your fonts directly, the power to create a unique and engaging visitor experience is in your hands.
Custom fonts can enhance your brand’s personality and make your content more appealing, setting you apart from the competition. So why wait? Start experimenting today!
If you find yourself needing guidance or have any questions, don’t hesitate to drop a comment below or reach out to the community. And remember, the right font can make all the difference—let your creativity shine! Happy designing!