Are you looking to enhance your WordPress site with interactive elements that improve user experience? Tooltips are a fantastic way to provide extra information without cluttering your content. Whether you want to explain a term, give users helpful hints, or simply add a touch of flair to your text, tooltips can do the trick! In this article, we’ll delve into three effective methods for adding tooltips to your WordPress site: using a free plugin for a quick and easy solution, and leveraging CSS for more customization. Whether you’re a beginner or a seasoned developer, we’ve got something for everyone. So, let’s unlock the potential of your website together—read on to discover how simple it is to enhance your content with tooltips!
How Tooltips Can Enhance Your WordPress Site
Tooltips serve as an unobtrusive method to provide users with additional information without cluttering your website’s design. By simply hovering over an element, visitors can gain context or further details about a product, service, or feature. This subtle enhancement can significantly improve user experience, making navigation intuitive and informative.
Imagine a situation where your visitors are unsure about a specific term or feature on your site. Instead of forcing them to search elsewhere or click away, a tooltip can provide immediate clarity. This can be particularly beneficial for e-commerce sites, where concise explanations can lead users toward making informed purchasing decisions. Consider these advantages:
- Improved User Engagement: Tooltips encourage users to interact more with your content, which can lead to longer site visits.
- Reduction in Bounce Rate: When visitors find the information they need quickly, they are less likely to leave your site.
- Enhanced Accessibility: Tooltips can assist users with varying levels of expertise, making your content approachable for everyone.
To illustrate the effectiveness of tooltips on your WordPress site, here’s a comparison of engagement metrics before and after their implementation:
| Metric | Before Tooltips | After Tooltips |
|---|---|---|
| Average Time on Page | 1:30 min | 2:45 min |
| Bounce Rate | 60% | 40% |
| Click-Through Rate | 5% | 12% |
Moreover, tooltips can be customized to fit the design and branding of your site. You can adjust colors, fonts, and animations to create a seamless integration with your overall aesthetic. Whether you opt for a free plugin or decide to dive into CSS for a more tailored solution, the impact of tooltips can be transformative.
Incorporating tooltips isn’t just about adding another feature; it’s about enhancing the overall usability and functionality of your site. With the right approach, you can make your content more interactive and engaging, leading to a more satisfying experience for your users. So, why not take the next step and implement tooltips today? Your visitors will thank you!
Exploring the Benefits of Using Tooltips for User Engagement
Incorporating tooltips into your website can significantly enhance user engagement by providing additional context without overwhelming the user interface. When you think about it, tooltips act as subtle guides, offering explanations or definitions right when users need them, thereby improving their overall experience. By adopting this feature, you can transform complex information into digestible snippets that keep users interested and informed.
One of the primary benefits of using tooltips is their ability to reduce cognitive load. Instead of bombarding users with paragraphs of text or cluttering your layout with excessive information, tooltips allow you to present relevant details on demand. This not only makes your site cleaner but also encourages users to explore content more thoroughly. With less information displayed at once, users can focus on their tasks without feeling overwhelmed by unnecessary details.
Additionally, tooltips can enhance accessibility. By providing definitions or clarifications, you can cater to a broader audience, including those who may not be familiar with specific terminology. For example, if you’re running a blog related to technology, using tooltips on industry jargon can make your content more approachable for beginners. This inclusivity can foster a sense of community among your readers, encouraging them to return for more insights.
Moreover, integrating tooltips into your WordPress site can lead to improved SEO performance. Search engines value user experience, and when users engage more with your content—exploring tooltips and gaining a better understanding of your site—they are likely to spend more time on your pages. This increased dwell time can signal to search engines that your content is valuable, potentially boosting your website’s ranking in search results.
Here’s a quick comparison of the three methods to add tooltips to your WordPress site:
| Method | Ease of Use | Customization | Cost |
|---|---|---|---|
| Free Plugin | Very Easy | Moderate | Free |
| CSS | Moderate | Highly Customizable | Free |
| Premium Plugin | Easy | Extensive | Paid |
adding tooltips to your WordPress site is not just a design enhancement; it’s a way to create a more engaging, user-friendly experience. By simplifying complex information, improving accessibility, and boosting SEO, tooltips can play a vital role in keeping your audience captivated and returning for more. Whether you choose a plugin or opt for a bit of custom CSS, the benefits of adopting this feature are clear. So, why not start exploring these options today?
Choosing the Right Method: Free Plugin vs. Custom CSS
When it comes to enhancing your WordPress site with tooltips, you face a choice between leveraging a free plugin or crafting your own custom CSS solution. Each option has its merits, but understanding their differences can help you make an informed decision that aligns with your specific needs.
Using a free plugin is often the most straightforward approach. With a few clicks, you can install a tooltip plugin from the WordPress repository. This option typically offers:
- Ease of Use: Most plugins come with user-friendly interfaces that simplify the process of creating and managing tooltips.
- Rich Features: Many plugins offer additional features like customizable styles, animations, and positioning, all without needing to touch a line of code.
- Support and Updates: Many popular plugins are actively maintained, meaning you benefit from regular updates and support from the developer community.
On the flip side, opting for custom CSS gives you unparalleled control over the design and functionality of your tooltips. Here are some reasons why you might choose this route:
- Unique Styling: Custom CSS allows you to create tooltips that perfectly match your site’s branding, giving you the flexibility to implement any design you envision.
- Performance Optimization: Avoiding unnecessary plugins can sometimes lead to faster loading times, as fewer resources are used in the background.
- Learning Opportunity: Implementing custom CSS can be a valuable learning experience, enabling you to improve your web development skills while tailoring your site to your preferences.
Here’s a quick comparison to help you visualize the key factors:
| Feature | Free Plugin | Custom CSS |
|---|---|---|
| Installation Time | Quick and easy | Time-intensive |
| Customization | Limited to plugin settings | Fully customizable |
| Learning Curve | Minimal | Moderate to high |
| Performance | May slow down site | Optimized |
Ultimately, the decision boils down to your technical skills, design preferences, and performance priorities. If you’re seeking convenience and quick implementation, a free plugin might be the way to go. Conversely, if you have the skills and desire to craft a unique user experience, custom CSS could be your best bet. Consider your project requirements carefully to choose the method that will best serve your website’s goals.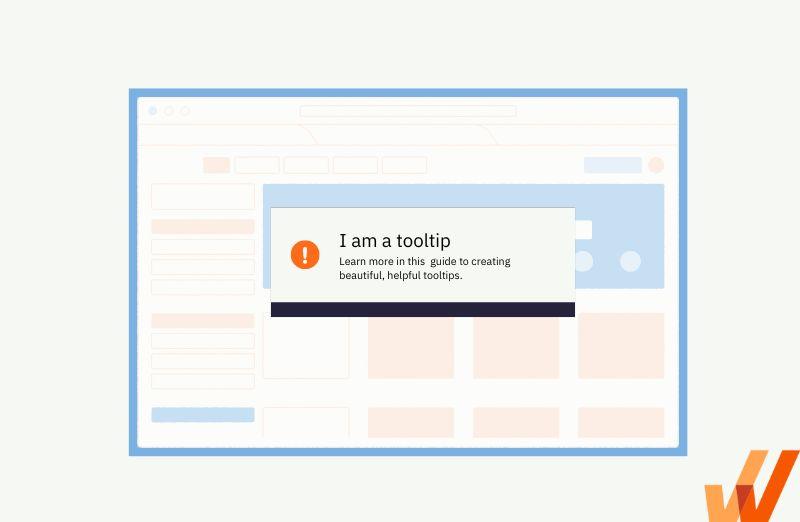
Step-by-Step Guide to Adding Tooltips with a Free Plugin
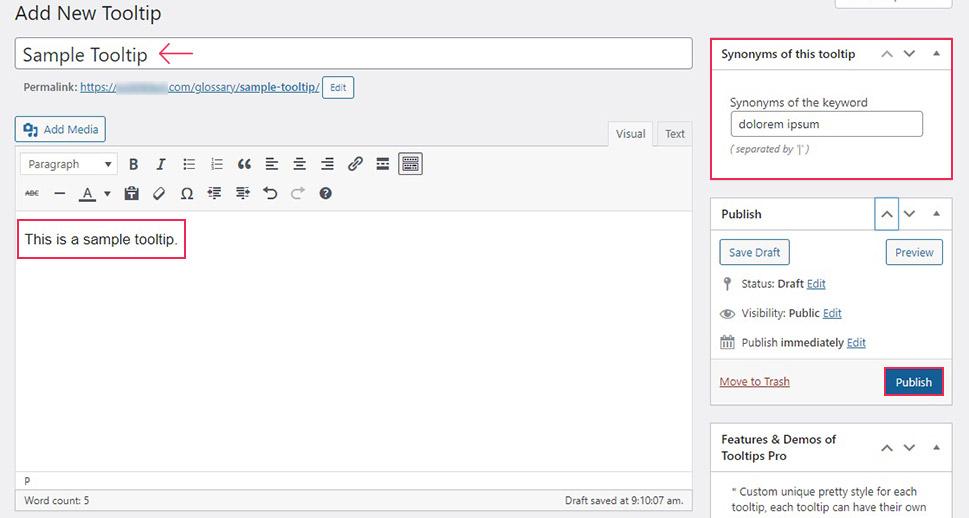
Using a free plugin to add tooltips to your WordPress site is not only an efficient way to enhance user experience but also a straightforward process. Here’s how you can do it step-by-step:
- Choose a Plugin: Start by selecting a reliable tooltip plugin. Some popular options include WP Tooltips, Simple Tooltips, and Tooltipy. Ensure to check the reviews and compatibility with your WordPress version.
- Install and Activate: Navigate to your WordPress dashboard. Go to Plugins > Add New, search for your chosen plugin, and click Install Now. After installation, activate the plugin by clicking the Activate button.
- Configure Settings: Once activated, access the plugin settings. You can typically find it under the Settings or Tools menu. Customize the appearance and behavior of your tooltips to match your website’s design. Adjust settings like tooltip color, size, and animation effects.
- Add Tooltips to Content: Now, it’s time to create your tooltips. Depending on the plugin, you may need to wrap your tooltip text within a shortcode or use a specific HTML tag. For example, with WP Tooltips, you might write something like this:
- Preview and Adjust: After adding the tooltips, preview your content to see how they appear. Make any necessary adjustments to the tooltip settings to ensure they provide value without overwhelming your visitors.
[tooltip title="This is the tooltip text"]Hover over me![/tooltip]
With these straightforward steps, you can effectively add informative tooltips to your WordPress site, enriching your content and guiding your readers effortlessly through your material. Remember, the right tooltip can significantly enhance your site’s usability!
Customizing Your Tooltip with CSS for a Unique Look
Customizing your tooltip with CSS can elevate the user experience on your WordPress site, making it not just informative but also visually appealing. By tweaking a few styles, you can create a tooltip that fits seamlessly with your site’s design aesthetic. Here’s how you can achieve a unique look for your tooltips.
Start by defining a class for your tooltip in your CSS file. This will allow you to customize its appearance easily. Here’s a simple example:
.tooltip {
    position: relative;
    display: inline-block;
    cursor: pointer;
}

.tooltip .tooltiptext {
    visibility: hidden;
    width: 120px;
    background-color: #555;
    color: #fff;
    text-align: center;
    border-radius: 6px;
    padding: 5px 0;
    position: absolute;
    z-index: 1;
    bottom: 125%; / Position the tooltip above the text /
    left: 50%;
    margin-left: -60px; / Center the tooltip /
    opacity: 0;
    transition: opacity 0.3s;
}

.tooltip:hover .tooltiptext {
    visibility: visible;
    opacity: 1;
}
In the example above, the tooltip is designed to appear when you hover over the text. You can modify the background color, text color, and size to ensure it matches your site’s branding. Here are a few additional customization ideas:
- Font Style: Change the font family to something that aligns with your website’s typography.
- Arrow Design: Add a pseudo-element to create a small arrow pointing to the tooltip trigger.
- Shadow Effects: Incorporate box-shadow for a more dynamic feel.
For those who prefer a more structured approach, you might want to consider a table for your tooltip content. Here’s a simple example that can be styled using WordPress classes:
| Feature | Description |
|---|---|
| Custom Colors | Enhance visibility with your brand colors. |
| Transitions | Smoothly fade in and out for a polished effect. |
| Text Alignment | Center your tooltip text for a balanced look. |
Experimenting with these CSS customizations will not only make your tooltips stand out but also engage your visitors. A well-designed tooltip can significantly enhance user interaction and provide additional context without cluttering your content. Remember, the key is to keep it simple and consistent with your design theme!
Troubleshooting Common Issues When Adding Tooltips
When integrating tooltips into your WordPress site, you might encounter some common hiccups that can disrupt the user experience. Here’s how to effectively troubleshoot these issues, ensuring your tooltips enhance rather than hinder your content.
One prevalent issue is tooltips not displaying at all. This can often be attributed to a conflict with other plugins or theme scripts. To resolve this, first, disable all other plugins temporarily to see if the tooltip appears. If it does, reactivate the plugins one by one to identify the culprit. Additionally, ensure that your theme supports the tooltip plugin you are using. If it doesn’t, consider switching themes or customizing your current one.
Another common problem is the tooltip’s positioning being off, which can make it hard for users to read. This usually results from CSS conflicts. Checking the CSS properties like z-index, position, and margin can help adjust the tooltip’s placement. Here’s a quick CSS example to ensure your tooltip displays correctly:
css
.tooltip {
    position: relative;
    z-index: 1000;
    margin-left: 5px;
}
If you find that your tooltips are functioning but lacking in style, there are a few easy adjustments you can make. Use custom CSS to enhance their appearance. For instance, you can change the background color or text format to make them stand out more. Here’s a simple example:
css
.tooltip {
    background-color: #333;
    color: #fff;
    border-radius: 5px;
    padding: 5px;
}
if you’re using a free plugin, keep in mind that some may have limitations regarding functionality. If you experience issues that aren’t resolved through standard troubleshooting, it may be worth exploring premium options or using custom CSS solutions. Here’s a quick comparison table of popular tooltip plugins:
| Plugin Name | Free Version | Premium Version | Features |
|---|---|---|---|
| WP Tooltip | ✔️ | ✔️ | Customizable, Responsive |
| Easy Tooltip | ✔️ | ❌ | Simple Setup |
| Tooltips Pro | ❌ | ✔️ | Advanced Styling, Animations |
By addressing these common issues methodically, you can ensure that your tooltips are not only functional but also a visually appealing addition to your WordPress site. Remember that clear and concise tooltips can greatly enhance the user experience when implemented correctly.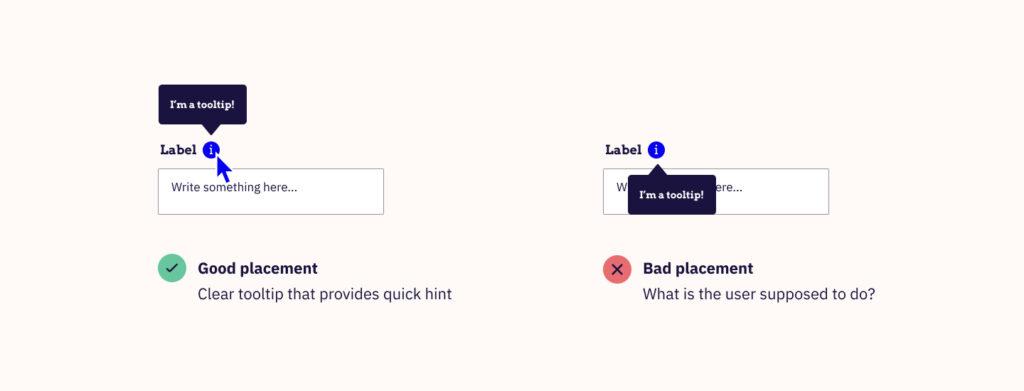
Best Practices for Using Tooltips Without Overloading Your Content
Tooltips are a powerful tool for enhancing user experience, but using them excessively can lead to a cluttered and overwhelming interface. To strike the right balance, consider the following best practices that will help you integrate tooltips effectively without overloading your content.
- Keep it concise: Tooltips should provide just enough information to clarify a term or offer a brief explanation. Aim for a maximum of two sentences to ensure users can quickly grasp the content without feeling lost.
- Use triggers wisely: Choose simple actions to activate tooltips, such as hovering or clicking. Avoid overwhelming users with tooltips that appear on every mouse movement—this can lead to frustration and reduced engagement.
- Prioritize important content: Not every term needs a tooltip. Reserve them for complex terms or concepts that require additional context. This selective approach helps maintain focus on the primary content.
Consider the positioning and design of your tooltips as well. They should be visually appealing and blend in with your site’s overall aesthetic while ensuring readability. Use contrasting colors for text and background to make sure users can easily read the information presented. CSS can help you customize the appearance and animation of your tooltips, adding a touch of sophistication without overwhelming the viewer.
| Tooltip Best Practices | Benefits |
|---|---|
| Concise Information | Improves clarity and minimizes distraction. |
| Smart Triggering | Enhances user experience without annoyance. |
| Selective Use | Makes essential concepts stand out. |
test the effectiveness of your tooltips through user feedback or A/B testing. Observe how users interact with the tooltips and adjust based on their responses. This iterative approach allows you to refine your tooltips, ensuring they serve their purpose without becoming a burden. By keeping these practices in mind, you’ll create a user-friendly experience that enhances content rather than detracts from it.

Real-Life Examples of Effective Tooltip Usage in WordPress
Tooltips can significantly enhance the user experience on your WordPress site by providing additional context without cluttering your layout. Let’s explore some real-life examples of how effective tooltip usage has transformed websites.
One standout example comes from a popular educational platform that uses tooltips to clarify terminology. When users hover over specific jargon throughout the course materials, a tooltip appears, offering concise definitions. This not only promotes better understanding but also keeps learners engaged without the need for constant dictionary searches. The implementation can be achieved seamlessly using a lightweight tooltip plugin or custom CSS.
Another inspiring case is an e-commerce website that utilizes tooltips to enhance the product discovery process. Each product image features a “quick view” tooltip that displays key information such as prices, ratings, and a brief description. This clever tactic encourages customers to explore products without navigating away from the current page, thus reducing the bounce rate and increasing conversion opportunities.
Here’s a simple example of how tooltips can be visually represented in a table format:
| Feature | Tooltip Example |
|---|---|
| Educational Content | Hover for definition of terms |
| E-commerce Product Info | Hover for quick view of features |
| Form Fields | Hover for tips on filling out |
Moreover, a personal blog implemented tooltips for its recipe section. Each ingredient listed in the recipes features a tooltip with information about potential substitutions or cooking tips. This addition not only enriches the content but also makes the blog more interactive, encouraging users to try new cooking techniques without the intimidation of complex recipes.
Incorporating tooltips is a small yet impactful design element that can significantly elevate the usability and functionality of your WordPress site. By providing additional context and information in a user-friendly manner, you create a more engaging experience that can lead to better retention and satisfaction among your visitors.
Taking Your Tooltips to the Next Level with Advanced Features
Once you’ve mastered the basics of adding tooltips to your WordPress site, it’s time to explore some advanced features that can significantly enhance user experience. Tooltips are not just simple pop-ups; they can be transformed into a powerful tool for delivering contextual information that enriches your content.
Consider implementing the following advanced features to make your tooltips stand out:
- Custom Styling: Use CSS to personalize the appearance of your tooltips. You can adjust colors, fonts, and sizes to ensure they align with your site’s branding.
- Dynamic Content: Leverage JavaScript to load tooltip content dynamically based on user interactions or specific conditions, making them more relevant and engaging.
- Animation Effects: Utilize CSS transitions or animations to create smooth effects when tooltips appear or disappear, adding a modern touch to your site.
To illustrate the impact of advanced tooltip features, here’s a simple table showcasing different tooltip styles and effects:
| Tooltip Style | Description | Use Case |
|---|---|---|
| Info Box | A simple box with plain text. | Basic definitions or explanations. |
| Image Tooltip | Includes an image alongside text. | Product details or visual aids. |
| Clickable Tooltip | Allows users to interact with the tooltip. | Links to additional resources or pages. |
Incorporating these features not only makes your tooltips more informative but also encourages users to engage with your content. Remember, the key to effective tooltips is not overwhelming your visitors; instead, aim for subtle enhancements that make navigation and understanding easier.
Create a consistent and user-friendly experience by ensuring that your tooltips are mobile-friendly. Use media queries in your CSS to adapt the tooltip size and position depending on the device, ensuring accessibility for all users. With these advanced techniques, your tooltips can become an invaluable component of your WordPress site, offering clarity and context where needed.
Wrapping Up: Making the Most of Tooltips for a Better User Experience
Tooltips are a powerful yet often underutilized feature in web design, particularly within WordPress. By providing contextual assistance without cluttering the interface, tooltips can significantly enhance user engagement and comprehension. When implemented well, they can transform a mundane browsing experience into an interactive learning journey. Here’s how you can maximize their effectiveness:
- Keep it concise: Tooltips should deliver information at a glance. Aim for clarity and brevity to ensure users grasp the message quickly. Long-winded explanations can frustrate users and defeat the purpose of tooltips.
- Use active language: Engage users by using action-oriented language. Phrases like “Learn more” or “Click here for tips” can encourage interaction and make the tooltip feel more dynamic.
- Design for accessibility: Ensure that your tooltips are easy to read and navigate. Utilize contrasting colors and legible font sizes. Additionally, consider screen readers to make sure your content is accessible for everyone.
Another effective strategy is to prioritize tooltip placement. Position them around key elements where users might struggle or have questions. This not only aids understanding but also guides users smoothly through their journey on your site. For example, placing tooltips near complex forms or terms can drastically reduce abandonment rates.
| Tooltip Element | Ideal Content |
|---|---|
| Form Fields | Brief descriptions or examples |
| Buttons | Action-related prompts |
| Technical Terms | Simple definitions |
don’t forget to test and iterate. Monitor user interactions with your tooltips and make adjustments based on feedback and analytics. A/B testing different styles or content can provide insights into what resonates best with your audience. By continually refining your approach, you’ll create a more polished and effective user experience.
Frequently Asked Questions (FAQ)
How to Add a WordPress Tooltip in 3 Ways: Free Plugin or CSS
Q&A Section
Q: What exactly is a tooltip in WordPress?
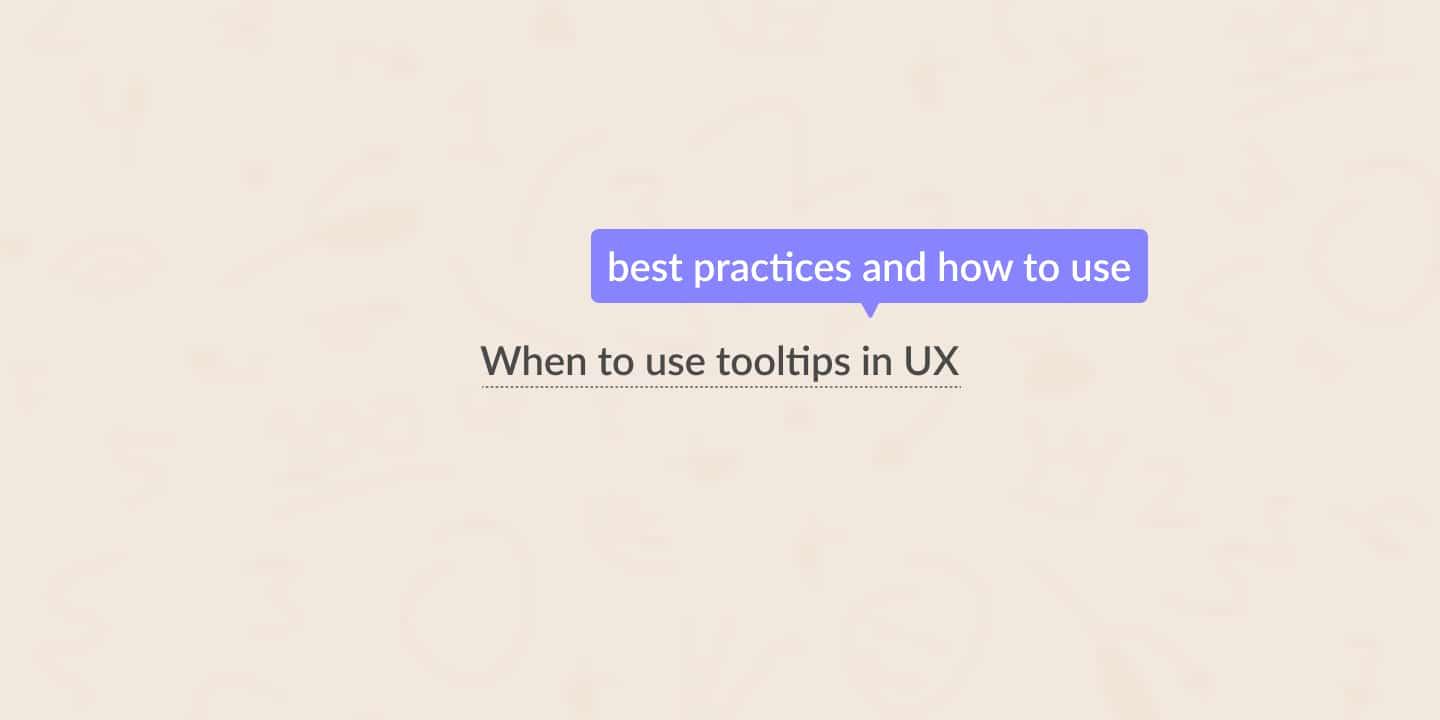
A: Great question! A tooltip is a small pop-up box that appears when a user hovers over or clicks on an element, like a word or image. It typically provides additional information, helping to clarify content or enhance user experience without cluttering your page. Imagine it as a helpful little assistant that pops up just when your visitors need it!
Q: Why should I consider adding tooltips to my WordPress site?
A: Tooltips can significantly improve user engagement and comprehension. They allow you to provide extra context without overwhelming your audience with text. Plus, they can help with SEO by offering detailed information while keeping your layout clean. Ultimately, tooltips can make your site more interactive and user-friendly, leading to higher satisfaction and retention rates.
Q: What’s the easiest way to add tooltips to my WordPress site?
A: If you’re looking for simplicity, using a free plugin is the way to go! There are many user-friendly plugins available that allow you to create tooltips with just a few clicks. No coding knowledge is required—just install the plugin, configure your settings, and you’re all set! It’s perfect for those who want quick results without the fuss.
Q: Can I add tooltips without using a plugin?
A: Absolutely! If you have a bit of coding knowledge and prefer a more customized approach, adding tooltips via CSS is a fantastic option. With some simple HTML and CSS, you can create tooltips that match your site’s design perfectly. It’s a great way to have full control over how your tooltips look and behave!
Q: What are the best plugins for adding tooltips?
A: There are a few standout plugins to consider. “WP Tooltips” and “Simple Tooltips” are both user-friendly and highly rated. They come equipped with various customization options and seamless integration with your existing content. Plus, they often come with support and updates, making them a reliable choice for your site.
Q: Are there any downsides to using tooltips?
A: While tooltips are generally beneficial, moderation is key. Overusing them can lead to a cluttered interface, confusing your visitors instead of helping them. It’s essential to ensure that the additional information enhances the user experience rather than complicating it. Choose your tooltip placements wisely!
Q: How can I make my tooltips stand out?
A: Great question! Use contrasting colors, clear fonts, and concise text to ensure your tooltips are easily readable. You can also experiment with animations to draw attention, like fading in or sliding from the side. Just remember that a tooltip should be a helpful nudge, not a distraction.
Q: Is it possible to track tooltip interactions?
A: Yes, you can track user interactions with tooltips if you’re using a plugin that offers analytics features. Additionally, you might consider integrating Google Analytics to monitor clicks on elements with tooltips. This can provide valuable insights into how users engage with your content and help you refine your strategy.
Q: Ready to enhance your site with tooltips?
A: Absolutely! With the methods we’ve discussed, you’ll be well on your way to creating a more interactive and informative WordPress site. Whether you choose a plugin for ease or CSS for customization, adding tooltips can elevate your content and improve user experience. So, why wait? Dive in and start enhancing your site today!
In Summary
And there you have it! You’re now equipped with three effective ways to add tooltips to your WordPress site, whether you prefer the simplicity of a free plugin or the control of custom CSS. Tooltips are a fantastic way to enhance user experience, providing extra information without cluttering your content.
By incorporating tooltips, you not only make your website more interactive but also ensure that your visitors have all the information they need at their fingertips. So why wait? Dive in and start experimenting with tooltips today! Your readers will appreciate the effort, and you’ll be one step closer to a more polished website.
Remember, the choice is yours: go for the ease of a plugin or the flexibility of CSS. Whichever method you choose, you’re sure to elevate your content and engage your audience like never before. Happy tooltipping!

