Unlocking the Power of Online Learning: Where to Host Course Videos & How to Embed Them in LearnPress
In today’s digital landscape, online education is more than just a trend—it’s a revolution. As educators and entrepreneurs, we have the incredible opportunity to share our knowledge with a global audience, and video content is at the heart of this educational experience. But with so many hosting options available, where do you begin? And how do you seamlessly integrate those videos into your LearnPress courses? Fear not! In this article, we’ll guide you through the best platforms for hosting your course videos and provide step-by-step instructions on embedding them in LearnPress. Whether you’re a seasoned instructor or just starting your online teaching journey, this comprehensive guide will empower you to create engaging, visually compelling courses that captivate your students and elevate their learning experience. Let’s dive in and unlock the full potential of your online courses!
Where to Store Your Course Videos for Maximum Accessibility
When it comes to hosting your course videos, the right platform can make all the difference in accessibility, ease of use, and viewer engagement. Here are some top options to consider:
- YouTube – A well-known platform, YouTube offers extensive reach and accessibility. With its robust search capabilities, your videos can attract a wider audience. The ability to embed videos into your course seamlessly makes it an attractive option.
- Vimeo – Known for high-quality video hosting, Vimeo delivers a more professional feel. It offers privacy options, allowing you to control who can view your content, which is vital for course creators.
- Wistia – Tailored for businesses and educational platforms, Wistia provides advanced analytics that can help you track viewer engagement. Its customizable player enhances branding while allowing for video embedding without ads.
Accessibility is not just about where your videos are stored but also how easily your students can access them. Consider these factors:
- Load times – Ensure your chosen platform has fast load times to prevent frustrating delays for your students.
- Mobile compatibility – Many learners prefer accessing content on their mobile devices. Choose a hosting service that offers responsive designs.
- Accessibility features – Look for platforms that support closed captions and transcripts, ensuring all students can engage with the material.
Additionally, embedding videos into LearnPress is straightforward. By using the video URL or embed code from your chosen hosting platform, you can easily integrate your videos into your course layout. Here’s a quick table summarizing the embedding process:
| Platform | Embedding Method |
|---|---|
| YouTube | Simply copy the embed code from the share options. |
| Vimeo | Use the ‘Share’ button to get the embed code. |
| Wistia | Access the embed options in your video settings. |
Choosing the right hosting platform and ensuring your videos are easily accessible in LearnPress will create a more engaging experience for your students. The more streamlined and user-friendly your course is, the better your students can focus on learning and achieving their goals.
Choosing the Right Video Hosting Platform for Your Needs
When it comes to hosting your course videos, selecting the right platform is crucial for ensuring a smooth experience for both you and your students. With various options available, each offering different features and pricing structures, it’s essential to evaluate what best fits your specific needs. Here’s what to consider:
- Storage Capacity: Assess how much video content you plan to upload. Some platforms limit storage, which can affect your course if you exceed the quota.
- Streaming Quality: A high-quality streaming experience is vital. Ensure the platform can handle HD or 4K video to provide an engaging learning experience.
- Integration Capabilities: Look for platforms that easily integrate with LearnPress. This will save you time and effort when embedding videos directly into your courses.
- Analytics Features: Understanding viewer engagement is essential. Choose a platform that offers detailed analytics to help you improve your content over time.
- Cost: Consider your budget. Compare the pricing of different platforms and look for any hidden fees that might arise as you grow your course library.
| Platform | Storage | HD Streaming | Integration | Price |
|---|---|---|---|---|
| Vimeo | 5GB/month | ✅ | Easy | Starting at $7/month |
| Wistia | 200 videos | ✅ | Seamless | Starting at $99/month |
| YouTube | Unlimited | ✅ | Limited | Free |
| Brightcove | Custom | ✅ | Robust | Contact for pricing |
Each platform offers unique advantages, so think about your priorities. For example, if budget constraints are significant, YouTube might seem like the best choice at first glance. However, it comes with ads and less control over branding, which could detract from your professional image. On the other hand, platforms like Wistia provide excellent branding options but come at a higher price point.
Consider your long-term goals as well. If you plan to expand your course offerings, a platform with scalable options and robust analytics will serve you better in the long run. Also, ensure that the platform you choose allows for easy embedding into LearnPress, as this integration will save you time and maintain a seamless user experience for your students.
Ultimately, the right video hosting platform should align with your needs, budgets, and future aspirations. Take the time to explore these options, compare their features, and choose the one that will not only meet your current requirements but also grow with you as your course content evolves.
Comparing Free and Paid Video Hosting Options
When it comes to hosting your course videos, the choice between free and paid options can significantly impact your overall experience and the quality of your content delivery. Each option has its perks and drawbacks, and it’s essential to weigh them based on your specific needs.
Free Video Hosting: Free platforms can be incredibly appealing, especially for educators just starting out or those on a tight budget. Here are a few advantages:
- Cost-effective: You won’t need to spend any money upfront.
- Easy to use: Most free platforms are user-friendly and intuitive.
- Basic analytics: Many offer limited analytics to help you track viewer engagement.
However, these options often come with limitations that could hinder your course’s success:
- Advertisements: Free hosts often display ads, which can distract or annoy viewers.
- Storage limits: You might encounter restrictions on how much content you can upload.
- Less control: Feature availability may be limited, affecting customization.
Paid Video Hosting: Investing in a paid service can provide numerous benefits that make it a worthwhile consideration, especially for serious course creators:
- Ad-free experience: Users enjoy seamless viewing without interruptions from ads.
- Higher storage capacity: You can upload extensive course content without worry.
- Advanced analytics: Gain insights into viewer behavior and engagement to refine your courses.
There are a variety of paid hosting options available. Below is a comparison of some popular choices:
| Service | Price | Key Features |
|---|---|---|
| Vimeo | Starting at $7/month | Ad-free, advanced privacy settings, and customization |
| Wistia | Starting at $99/month | Detailed analytics, call-to-action features, and branding options |
| Uscreen | Starting at $49/month | Video monetization, comprehensive user management, and marketing tools |
Ultimately, the decision comes down to your goals and budget. If you’re looking to build a professional image and provide your learners with a superior experience, investing in a paid video hosting service may be the way to go. However, if you’re just getting started, a free option could suffice until you’re ready to scale your offerings.

The Benefits of Using YouTube for Course Videos
When it comes to hosting course videos, YouTube stands out as a leader in the field, offering an array of benefits that can significantly enhance your online teaching experience. First and foremost, YouTube is free, which means you can upload and share your content without worrying about hosting fees. This is particularly advantageous for educators and course creators who are just starting and may have a limited budget.
Another compelling advantage is YouTube’s vast audience reach. With billions of active users, your course videos have the potential to reach a global audience. This can lead to increased visibility for your courses and help you attract more students. Moreover, YouTube’s advanced algorithms can help surface your content to users who may be interested in your subject matter, thereby expanding your audience organically.
Furthermore, the user-friendly interface of YouTube makes it easy for both creators and viewers. You can effortlessly upload videos, add descriptions, and organize your content into playlists. For students, accessing course materials is straightforward, allowing them to focus on learning rather than navigating complicated systems. Additionally, you can include interactive elements such as links to other videos, resources, or your website, enhancing the learning experience.
Another noteworthy feature is the robust analytics tools provided by YouTube. As a course creator, you can track viewer engagement, watch time, and demographics, helping you understand your audience better and tailor your content accordingly. This data-driven approach can lead to improved course offerings and higher satisfaction rates among your students.
embedding YouTube videos in your Learning Management System (LMS) like LearnPress is seamless. This integration allows you to engage students directly within the platform, ensuring they have immediate access to video content without any hassle. With just a few clicks, your course can be enriched with engaging video tutorials, lectures, or supplementary materials to deepen students’ understanding.
Unlocking the Power of Vimeo for Professional Presentation
When it comes to hosting course videos, Vimeo stands out as a robust platform that caters specifically to professionals seeking quality and control. By utilizing Vimeo, you can ensure that your videos not only look stunning but also maintain the integrity of your content. With a range of privacy options, you can effortlessly safeguard your intellectual property while still providing access to your audience.
One of the key features that make Vimeo an excellent choice is its customization capabilities. With tools to tailor video players to match your brand, your course videos can maintain a cohesive aesthetic. Here are some of the standout features you can leverage:
- Privacy Settings: Choose who can view your videos, making it easy to restrict access only to your students.
- Call to Action Buttons: Enhance engagement by adding buttons that direct viewers to your website or other resources.
- Embedding Options: Seamlessly integrate your videos into your LearnPress courses with just a few clicks.
Embedding Vimeo videos into LearnPress is a straightforward process that enriches your course offerings. To get started, simply follow these steps:
- Upload your video to Vimeo and adjust your privacy settings.
- Copy the embed code provided by Vimeo.
- In your LearnPress course editor, select the location where you’d like the video to appear and paste the embed code.
- Save your changes and preview the course to ensure everything looks perfect!
| Feature | Benefit |
|---|---|
| HD Quality | Exceptional video clarity enhances the learning experience. |
| Analytics | Track viewer engagement and improve your content based on insights. |
| Custom Thumbnails | Create eye-catching previews to draw in students. |
By choosing Vimeo for your course videos, you unlock a world of possibilities that can transform how you deliver content. With its user-friendly interface and powerful features, you set the stage for an engaging and professional learning environment that will keep your students coming back for more.
Step-by-Step Guide to Embedding Videos in LearnPress
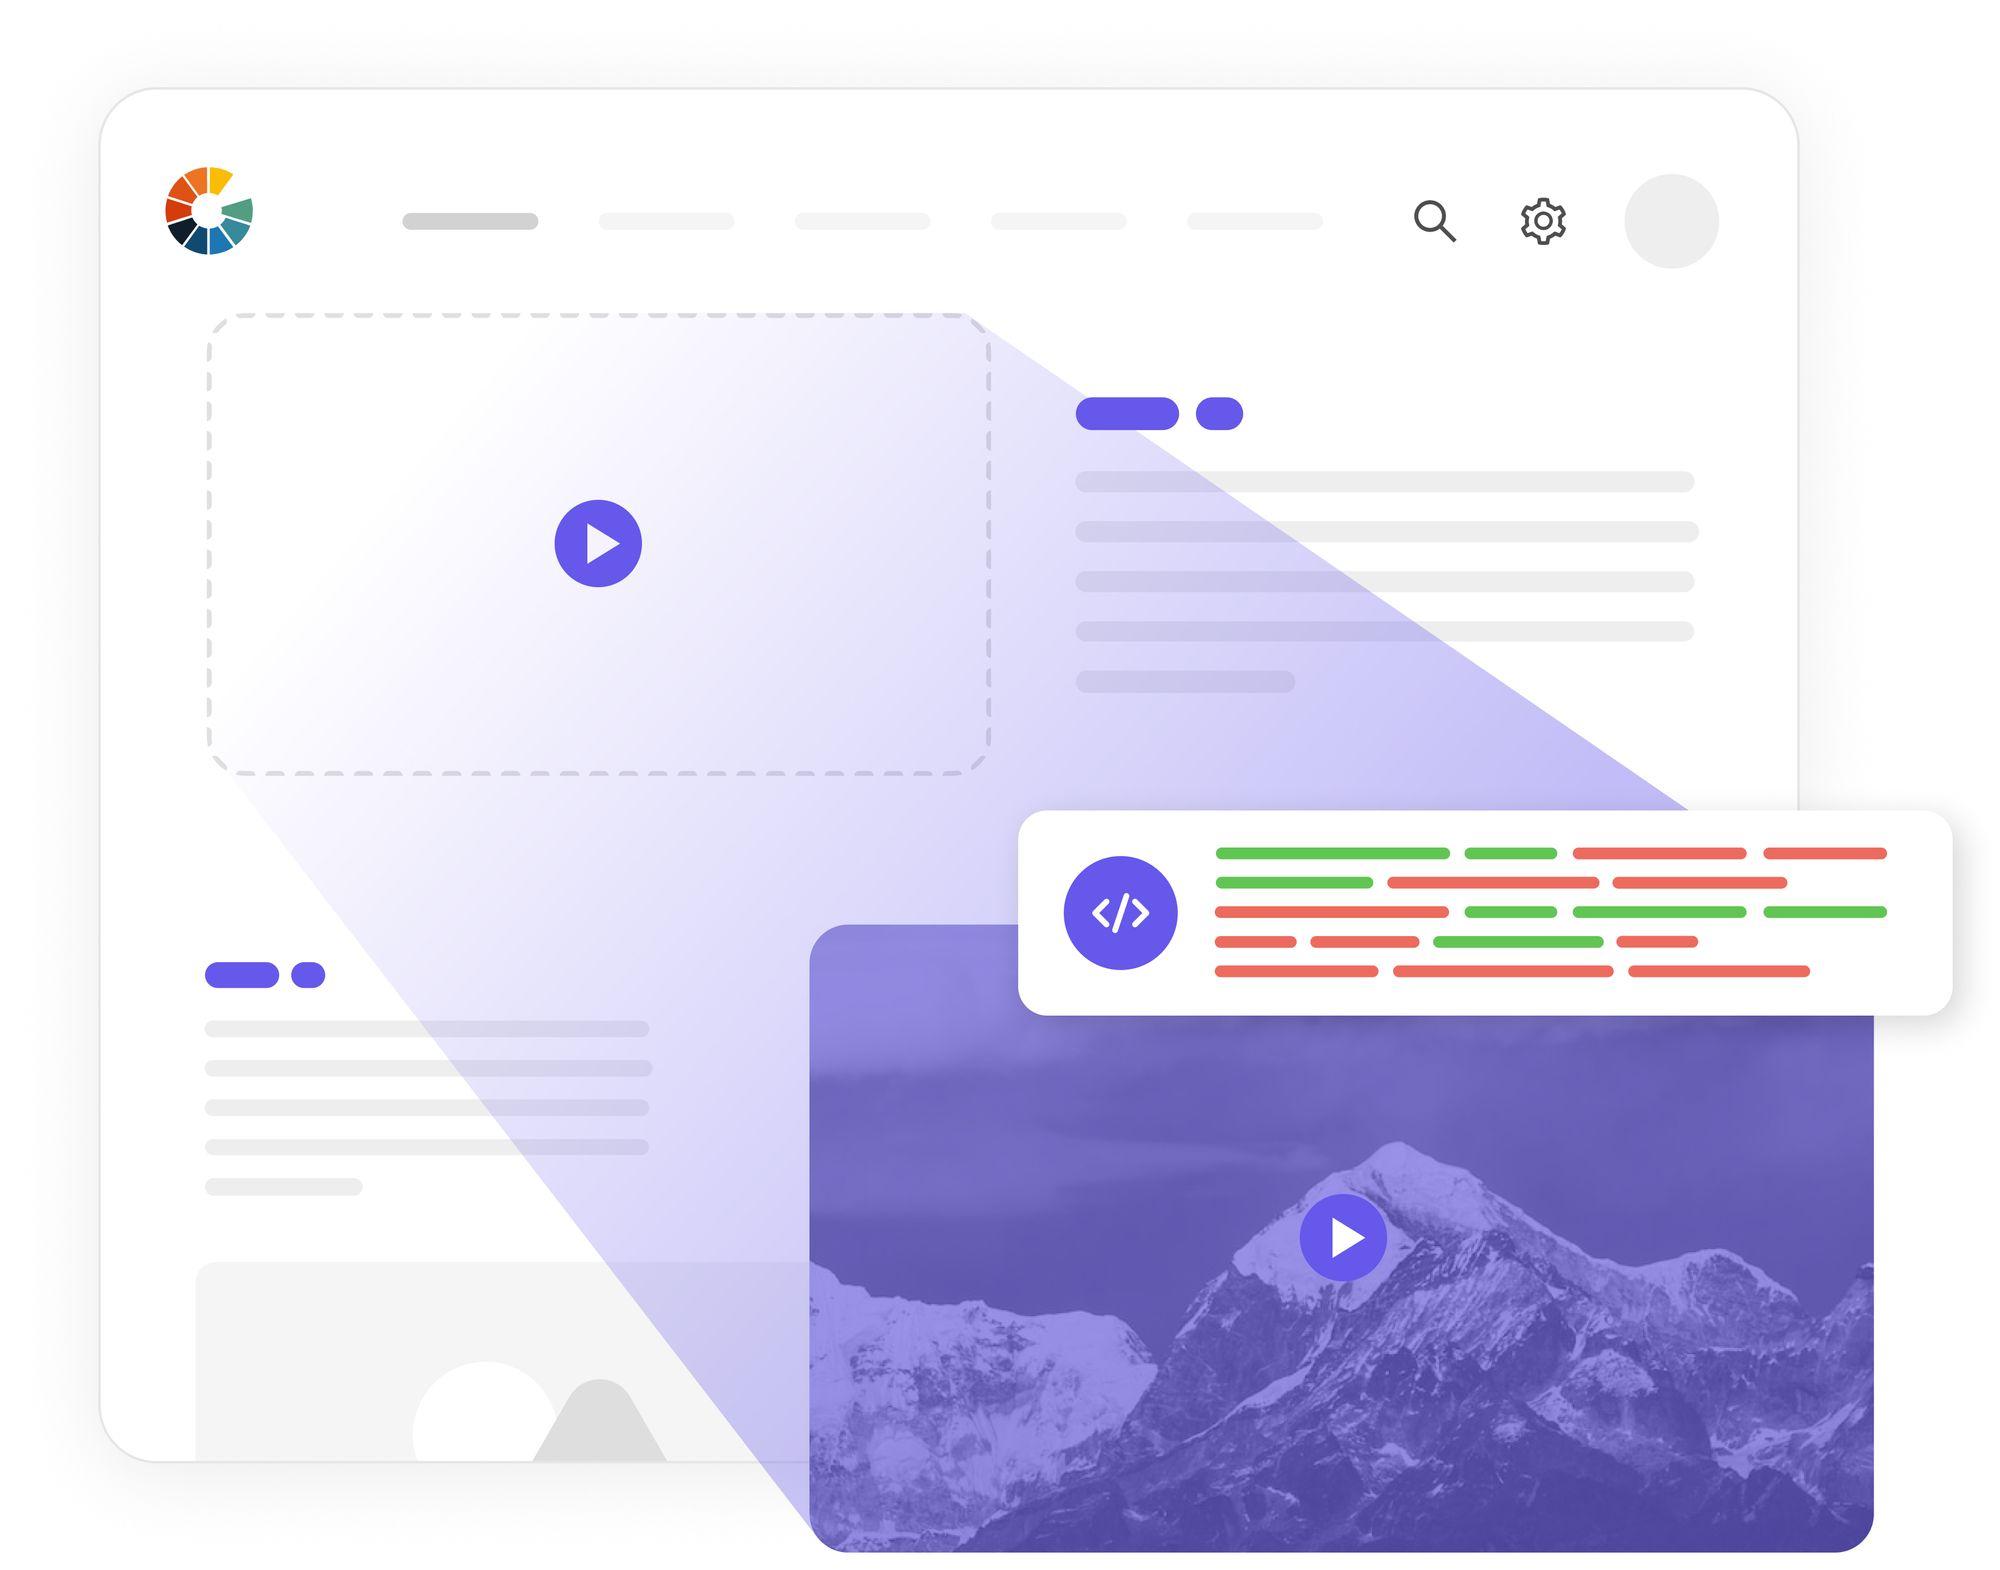
Embedding videos in your LearnPress courses can significantly enhance the learning experience. Whether you’re using YouTube, Vimeo, or a self-hosted solution, the process is straightforward and effective. Follow these steps to ensure your videos are integrated seamlessly into your course content.
Step 1: Choose Your Video Hosting Platform
Before embedding your videos, you need to decide where to host them. Here are some popular options:
- YouTube: Great for reach and ease of use.
- Vimeo: Ideal for professional-quality videos with privacy controls.
- Self-hosted: Provides full control but requires more bandwidth.
Step 2: Get the Embed Code
Once you’ve uploaded your video, it’s time to grab the embed code:
- Go to your video on the hosting platform.
- Look for the “Share” option, then select “Embed”.
- Copy the provided HTML code.
Step 3: Embed the Video in LearnPress
With the embed code ready, you can now add it to your LearnPress course:
- Log in to your WordPress dashboard.
- Navigate to LearnPress > Courses and select the course you want to edit.
- In the course editor, find the section where you want to add your video.
- Switch to the “Text” or “HTML” mode in the content editor and paste the embed code.
- Update or publish your course.
Step 4: Test Your Video
After embedding, it’s crucial to check that your video works as expected:
- Preview the course and navigate to the section with your video.
- Ensure that the video plays correctly and displays as intended.
- Check the responsiveness on both desktop and mobile devices.
And there you have it! Following these steps ensures your course videos are not only engaging but also easily accessible to your learners. Remember, a well-placed video can make your course much more dynamic and effective!
Enhancing Your Course Experience with Video Thumbnails
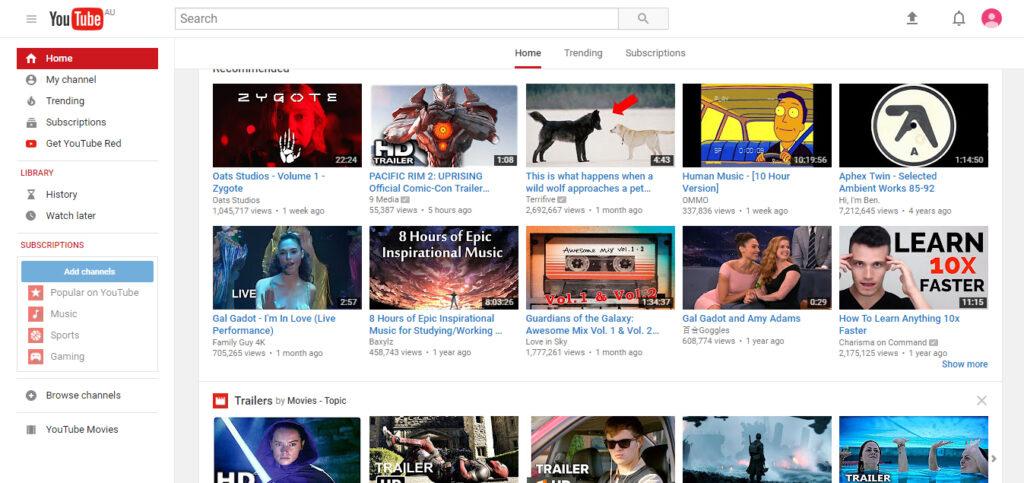
Incorporating video thumbnails into your course can dramatically enhance the visual appeal and engagement of your content. These small but impactful images serve as the first impression for your videos, enticing students to click and dive into the material. A well-designed thumbnail can convey information about the video’s content, set expectations, and reflect the quality of your course.
When designing your video thumbnails, consider the following tips:
- Use High-Quality Images: Ensure that the images are clear and professional. Grainy or pixelated images can deter potential viewers.
- Include Text: Adding a brief title or key concept from the video can help viewers understand what to expect.
- Maintain Consistency: Use a uniform style and color palette that aligns with your course branding to create a cohesive look.
- Utilize Contrasting Colors: Make your thumbnails eye-catching by using colors that contrast with each other, drawing attention immediately.
Don’t underestimate the power of a captivating thumbnail. Research shows that videos with attractive thumbnails receive significantly higher click-through rates. By investing time in creating compelling visuals, you increase the likelihood of students engaging with your content. This can lead to better retention rates and a more successful learning experience overall.
To effectively embed your videos in LearnPress, ensure that you utilize an intuitive approach. Here’s a quick reference table for hosting platforms and their ease of integration with LearnPress:
| Hosting Platform | Integration Ease | Video Quality |
|---|---|---|
| YouTube | Easy | Up to 4K |
| Vimeo | Moderate | Up to 8K |
| Wistia | Simple | High Definition |
| Self-Hosted | Advanced | Varies |
By choosing the right platform and utilizing eye-catching thumbnails, you can create an enriching course environment where students feel motivated to engage and learn. Remember, the first impression can make all the difference, so don’t overlook this crucial aspect of your course delivery!

Tips for Optimizing Video Playback on Your Course Site
To ensure your course videos offer the best experience for your users, consider the following tips for optimizing video playback:
- Choose the Right Hosting Platform: Select a video hosting service that prioritizes speed and reliability. Popular choices include YouTube, Vimeo, and Wistia. These platforms offer robust features like adaptive bitrate streaming, which adjusts video quality based on the user’s internet connection.
- Enable Video Compression: Compress your videos before uploading to reduce loading time without sacrificing quality. Tools like HandBrake or online compressors can significantly decrease file sizes while maintaining acceptable visual fidelity.
- Optimize Video Formats: Use formats like MP4 or WebM that provide high quality with smaller file sizes, ensuring compatibility across different devices and browsers.
- Implement Lazy Loading: Integrate lazy loading for videos on your course site, so videos only load when they come into the viewport. This practice enhances page speed and improves user experience.
- Provide Multiple Quality Options: Allow users to select their preferred video quality. This adaptability ensures that those with slower internet connections can still access your content smoothly.
Additionally, embedding your videos effectively is crucial for seamless playback:
| Embedding Method | Pros | Cons |
|---|---|---|
| Direct Embed Code | Great control over video display | Requires manual updates if the video changes |
| WordPress Block Editor | User-friendly, no coding needed | Limited customization options |
| Plugins | Additional features like analytics | May slow down site loading speed |
By following these strategies, you can enhance the user experience on your course site significantly. Focusing on video optimization will not only improve engagement but also reduce drop-off rates, ensuring your learners stay connected and productive. Remember, a seamless video experience can be a game-changer for your online courses!
Troubleshooting Common Video Embedding Issues in LearnPress
Encountering issues while embedding videos in LearnPress can be frustrating, but understanding common problems can help you troubleshoot effectively. Here are some frequent hurdles and their solutions:
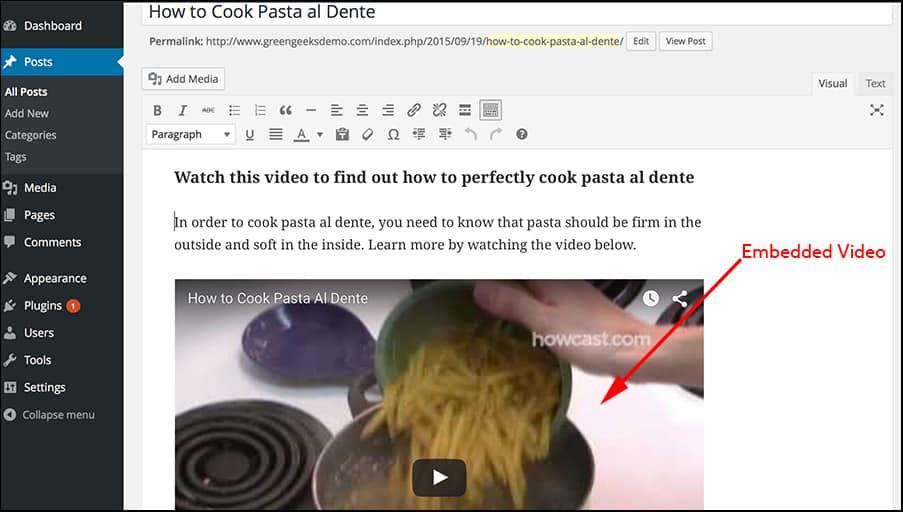
- Incorrect Embed Code: Ensure you’re using the correct embed code provided by your video hosting platform. For platforms like YouTube or Vimeo, use the “Share” option and copy the embed code. Check that you’re pasting it in the HTML view of the LearnPress editor.
- Video Privacy Settings: If your videos are set to “Private” or “Unlisted,” they may not play correctly for your course users. Adjust the privacy settings to “Public” or change them to allow embedding.
- Browser Compatibility: Sometimes, browser issues can prevent videos from displaying correctly. Always test your course on multiple browsers (Chrome, Firefox, Safari) to ensure functionality across the board.
Another common issue is related to the responsive design of your embedded videos. If your videos don’t resize properly on different devices, they may appear cut off or not visible at all. To address this:
- Ensure you’re using a responsive embed code. Many platforms offer this option directly.
- Use CSS to make sure the video container respects the viewport size. Adding a class like
embed-responsivecan help you achieve a seamless look on all devices.
Additionally, it’s essential to check the Load Times of your videos. Slow-loading videos can lead to a poor user experience. Consider the following points:
| Hosting Platform | Load Speed | Recommended for |
|---|---|---|
| YouTube | Fast | General Courses |
| Vimeo | Very Fast | Premium Content |
| Self-Hosted | Medium | Control over content |
keep in mind that user permissions might be a stumbling block. Ensure your users have the necessary permissions to view the embedded content. If you’re using third-party video hosting, make sure that sharing settings allow visibility for everyone enrolled in your course. Adjust these settings within your hosting account as needed.

Best Practices for Organizing Your Video Library
Organizing your video library is crucial for a seamless user experience, especially when it comes to educational content. To make your videos easily accessible and engaging, consider implementing the following strategies:
- Use Descriptive Titles: Ensure that each video title clearly reflects its content. This helps users quickly identify what they need.
- Create Categories: Group your videos into relevant categories or modules. This allows learners to navigate through related content without confusion.
- Add Tags: Utilize tags to highlight key topics or themes within your videos. This can enhance searchability, making it easier for users to find specific content.
- Implement a Consistent Naming Convention: Stick to a uniform format for video titles and descriptions. Consistency instills trust and familiarity in your audience.
Consider using a content management system that allows for easy embedding and organization of videos. A user-friendly interface can significantly improve the experience for both instructors and learners:
| Platform | Features | Best For |
|---|---|---|
| YouTube | Easy sharing, analytics, SEO opportunities | Wider audience reach |
| Vimeo | Privacy controls, professional appearance | Professional content creators |
| Wistia | Marketing tools, detailed analytics | Businesses focused on video marketing |
Furthermore, don’t forget the importance of providing thumbnails for each video. A visually appealing thumbnail can capture attention and encourage users to click. Additionally, including video descriptions enhances context, giving viewers a clear understanding of what to expect.
Lastly, regularly review and update your video library. As content evolves, so should your organization methods. Conducting periodic audits can help ensure that outdated videos are archived and new additions are categorized accurately. This ongoing effort will keep your library fresh and relevant for your audience.
Frequently Asked Questions (FAQ)
Q&A: Where to Host Course Videos & How to Embed Videos in LearnPress
Q1: Why is video hosting important for my online course?
A1: Great question! Video hosting is crucial because it ensures your course videos are delivered smoothly to your students without buffering or interruptions. A reliable host provides fast loading times, better quality, and security for your content. Essentially, you want your students to focus on learning, not waiting for videos to load!
Q2: What are the best platforms for hosting course videos?
A2: There are several excellent options out there! Some of the most popular are Vimeo, Wistia, and YouTube. If you’re looking for a professional touch and advanced customization, Vimeo is a fantastic choice. Wistia offers tools for businesses that want insights into viewer engagement. If you prefer a free option, YouTube is great, but keep in mind that it might not be as customizable and can expose your content to a wider audience than you might want.
Q3: Can I use free platforms for my course videos?
A3: Absolutely, you can use free platforms, but they come with trade-offs. YouTube is widely accessible, but it can complicate your branding and risk exposing your students to unrelated content. If you’re serious about your course and want a polished professional image and privacy, investing in a paid platform can be worthwhile in the long run.
Q4: How do I embed my course videos in LearnPress?
A4: Embedding videos in LearnPress is a breeze! First, go to your video hosting platform and copy the embed code of your video. Then, in your LearnPress course builder, simply paste that code into the lesson or section where you want the video to appear. It’s that simple! Your students will be able to watch the videos without leaving the course platform, providing a seamless learning experience.
Q5: What if I want to protect my videos from unauthorized access?
A5: Protecting your videos is a valid concern, especially if you’re pouring your heart and soul into your course! Platforms like Vimeo and Wistia allow you to set privacy settings, such as domain restriction, where your videos can only be embedded on specific sites. This feature helps keep your content secure and ensures that only your enrolled students can access the material.
Q6: Can I track how my students are engaging with my videos?
A6: Yes, you can! Platforms like Wistia offer detailed analytics that show how long students watched your videos and where they might have dropped off. This data is invaluable for improving your course content and understanding your students’ learning habits. Knowing how your videos perform can help you refine your teaching methods and make your courses even more effective.
Q7: What tips do you have for creating engaging course videos?
A7: Engaging videos are all about connection! Start with a strong introduction that outlines what students will learn. Keep your videos concise and focused—aim for clarity, and use visuals to enhance understanding. And don’t forget to add some personality—your enthusiasm will resonate with your students and keep them engaged!
Q8: Is it worth the effort to embed videos instead of just linking to them?
A8: Definitely! Embedding videos creates a seamless experience for your learners. It reduces the friction of navigating away from the course platform and helps maintain their focus. Plus, it adds a professional touch, making your course feel more cohesive and well-structured. Your students will appreciate the effort, and it’ll enhance their overall learning experience!
With the right hosting platform and embedding techniques, you can transform your LearnPress courses into an engaging, professional learning environment. So, why wait? Start planning where to host your videos and make your course shine today!
Insights and Conclusions
As we wrap up our journey through the ins and outs of hosting course videos and embedding them in LearnPress, it’s clear that choosing the right platform and mastering the embedding process can significantly enhance your online teaching experience. Whether you’re a seasoned educator or just starting out, having the right tools at your disposal can make all the difference in delivering engaging, high-quality content to your students.
So why wait? Start exploring the various hosting options we’ve discussed, weigh their pros and cons, and pick the one that best suits your needs. Remember, the right video hosting service will not only improve the streaming quality but also provide you with valuable analytics and user management features.
Once you’ve decided on a platform, embedding your videos in LearnPress is a breeze. With the straightforward steps provided, you’ll have your course set up in no time, ready to captivate your learners and elevate their educational experience.
Don’t forget, your course content is your unique selling point. So invest the time to ensure your videos are not only accessible but also compelling. By taking these steps, you’re not just creating a course; you’re crafting an engaging learning environment that will keep your students coming back for more.
Ready to take your online courses to the next level? Dive in, get your videos hosted, and start embedding today. Your students deserve it, and so do you! Happy teaching!


