Are you looking to enhance your website by easily accessing and downloading images from your WordPress Media Library? Whether you’re a seasoned blogger, a small business owner, or a creative professional, having the ability to retrieve and utilize your media files effortlessly can save you time and frustration. In this article, we’ll guide you through three simple yet effective methods to download images directly from your WordPress Media Library. Say goodbye to the confusion and hassle—let’s make your image management a breeze! With our straightforward tips, you’ll be well on your way to optimizing your content and showcasing your visual masterpieces in no time. Ready to dive in? Let’s get started!
Understanding the WordPress Media Librarys Layout
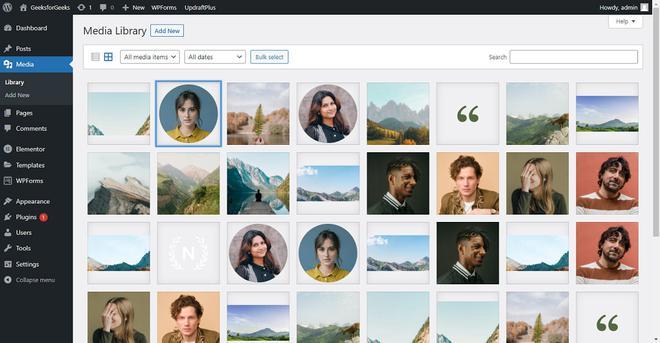
The WordPress Media Library serves as the central hub for all your media files, making it easy to manage your images, videos, and documents. When you first enter the Media Library, you’ll notice a user-friendly layout designed to streamline your experience. The interface is divided into two primary views: the Grid View and the List View. Each offers unique benefits depending on what you need to do.
In Grid View, media files are displayed as thumbnails, allowing you to quickly visually scan your images and videos. This layout is particularly useful for photographers or content creators who need to find and select images rapidly. Each thumbnail is clickable, which opens up a detailed view where you can edit, download, or delete files. This view also highlights important details like the file name, file type, and date uploaded right beneath each thumbnail.
On the other hand, the List View provides a more detailed breakdown of your media files in a traditional list format. This view includes columns such as:
| File Name | Type | Date Uploaded | File Size |
|---|---|---|---|
| example-image.jpg | Image | March 15, 2023 | 500 KB |
| video-clip.mp4 | Video | April 22, 2023 | 2 MB |
This format allows you to sort through files based on various attributes, making it easier to locate specific items, especially when your media library grows. To switch between views, simply click the respective icons at the top left of the Media Library screen. This flexibility in layout ensures that whether you prefer a visual overview or a detailed list, you can manage your media in a way that suits your workflow best.
Additionally, the Media Library includes a search bar that allows for quick access to specific files by typing keywords or file names. You can also filter media by type, such as images, videos, or audio files, further enhancing your ability to find what you need without sifting through countless files. Understanding how to navigate the Media Library effectively not only saves you time but also enhances your overall experience when managing your website’s content.
Discovering the Best Reasons to Download Images
Downloading images from your WordPress Media Library can be a game-changer for your website or blog, and here are some compelling reasons why you should consider doing it:
- Enhanced Creativity: Having direct access to your images allows you to manipulate and utilize them in different projects. Whether it’s for social media posts or presentations, controlling your visuals can spark greater creativity.
- Improved Performance: Optimizing your images before uploading them can significantly speed up your website. By downloading and compressing images in advance, you can ensure that your pages load faster, enhancing user experience and SEO.
- Backup Security: Keeping a local copy of your images is essential. If your website ever experiences issues, having your images stored securely on your device ensures that you won’t lose valuable content.
- Customization: When you download images, you can easily edit them to fit your brand’s aesthetic. Tailoring graphics and photos to match your style enhances brand consistency across all platforms.
- Offline Access: Downloading images allows you to work on them without needing an internet connection. Whether you’re traveling or in an area with limited connectivity, your creative process remains uninterrupted.
To illustrate the benefits of downloading images, consider the following table that outlines the differences in website performance with optimized versus unoptimized images:
| Image Type | Load Time (seconds) | SEO Impact Score (1-10) |
|---|---|---|
| Unoptimized | 5.2 | 4 |
| Optimized | 2.1 | 9 |
By understanding the advantages of downloading your images, you’ll not only enhance your workflow but also elevate the overall quality of your content. Take the leap and control your media resources more effectively!
Navigating Directly from the Media Library
When you’re looking to download images directly from your WordPress Media Library, the process is both straightforward and efficient. This method allows you to swiftly access your media files without the need for plugins or external tools. All you need to do is navigate to your Media Library, where all your uploaded images are neatly organized.
To get started, simply follow these steps:
- Log in to your WordPress admin dashboard.
- Click on Media in the left-hand menu to open the Media Library.
- Find the image you wish to download; you can use the search bar if you have many files.
- Click on the image thumbnail to open the attachment details.
- On the right side, you’ll see a Download link below the image. Click it, and the image will start downloading to your computer.
This method is not only quick but also ensures that you are downloading the original file in its best quality. If you are working with a large number of images, it can be helpful to use the bulk select option in the Media Library. Here’s how:
| Select Images | Action |
|---|---|
| Click on the checkbox next to each image. | Select Bulk Actions from the dropdown. |
| Select Download. | Click Apply. |
Using the Media Library to download images not only streamlines your workflow but also keeps your files organized and easily accessible. You can quickly find what you need without sifting through endless folders on your computer. By familiarizing yourself with this feature, you will save time and enhance your overall productivity when managing your online content.
Utilizing the Bulk Download Feature for Efficiency
For those managing a large WordPress site, the bulk download feature can transform the way you handle your media library. Instead of downloading images one by one, which can be tedious and time-consuming, this feature allows you to select multiple files and download them all at once. This not only saves time but also streamlines your workflow, making it easier to manage your content efficiently.
To get started, navigate to your Media Library. You can switch to the List View to easily identify the images you need. Once you’re in list view, simply check the boxes next to the images you want to download. This visual approach helps you quickly select all relevant files, whether you’re prepping for a site redesign or just organizing your assets.
After you’ve made your selections, look for the Bulk Actions dropdown menu. Here, you can choose the option to download your selected images. This feature is particularly beneficial for content creators and marketers who frequently update their images and need to keep a local backup of their media. By utilizing this tool, you can ensure that your workflow remains uninterrupted and efficient.
Here’s a quick checklist to optimize your use of the bulk download feature:
- Organize your media: Tag or categorize images to make selection easier.
- Regularly clean your library: Remove unused files to reduce clutter.
- Back up regularly: Use the bulk download feature as part of your routine backup strategy.
Moreover, if you’re working with a specific set of images, consider creating a temporary folder or collection. This way, you can easily locate the images you frequently use or need to download together. By leveraging the bulk download functionality, you can maintain an organized media library while saving valuable time that can be better spent on content creation and marketing strategies.

Exploring FTP Access for Advanced Users
For those who are more familiar with the technical side of things, accessing your WordPress media library through FTP can be a game changer. FTP, or File Transfer Protocol, allows you to connect directly to your server, giving you a different level of control over your files. This method not only provides an alternative way to retrieve images but also offers a sense of security and direct interaction with your server’s file structure.
Before diving into the process, ensure you have an FTP client installed. Some popular options include:
- FileZilla – A free, open-source solution that’s user-friendly and widely used.
- Cyberduck – Another robust option that supports various protocols, including FTP and SFTP.
- WinSCP – Perfect for Windows users, it offers a clean interface and great functionality.
Once you have your FTP client ready, connecting to your WordPress site is straightforward. You’ll need your FTP credentials, which typically include:
| Credential | Description |
|---|---|
| Host | Your website’s domain name or IP address. |
| Username | The username for your FTP account. |
| Password | The password associated with your FTP account. |
| Port | Usually port 21 for FTP or 22 for SFTP. |
After logging in, navigate to the wp-content/uploads directory. This folder contains all the images and media files you’ve uploaded to your WordPress media library, organized by year and month. You can easily locate your desired images here, and downloading them is as simple as dragging and dropping them to your local drive.
Additionally, using FTP gives you the ability to manage your files more efficiently. You can delete old images, rename files for better organization, or even upload new images that you want to add to your media library without using the standard WordPress uploader. It’s a flexible tool that, once mastered, can save you time and enhance your workflow.
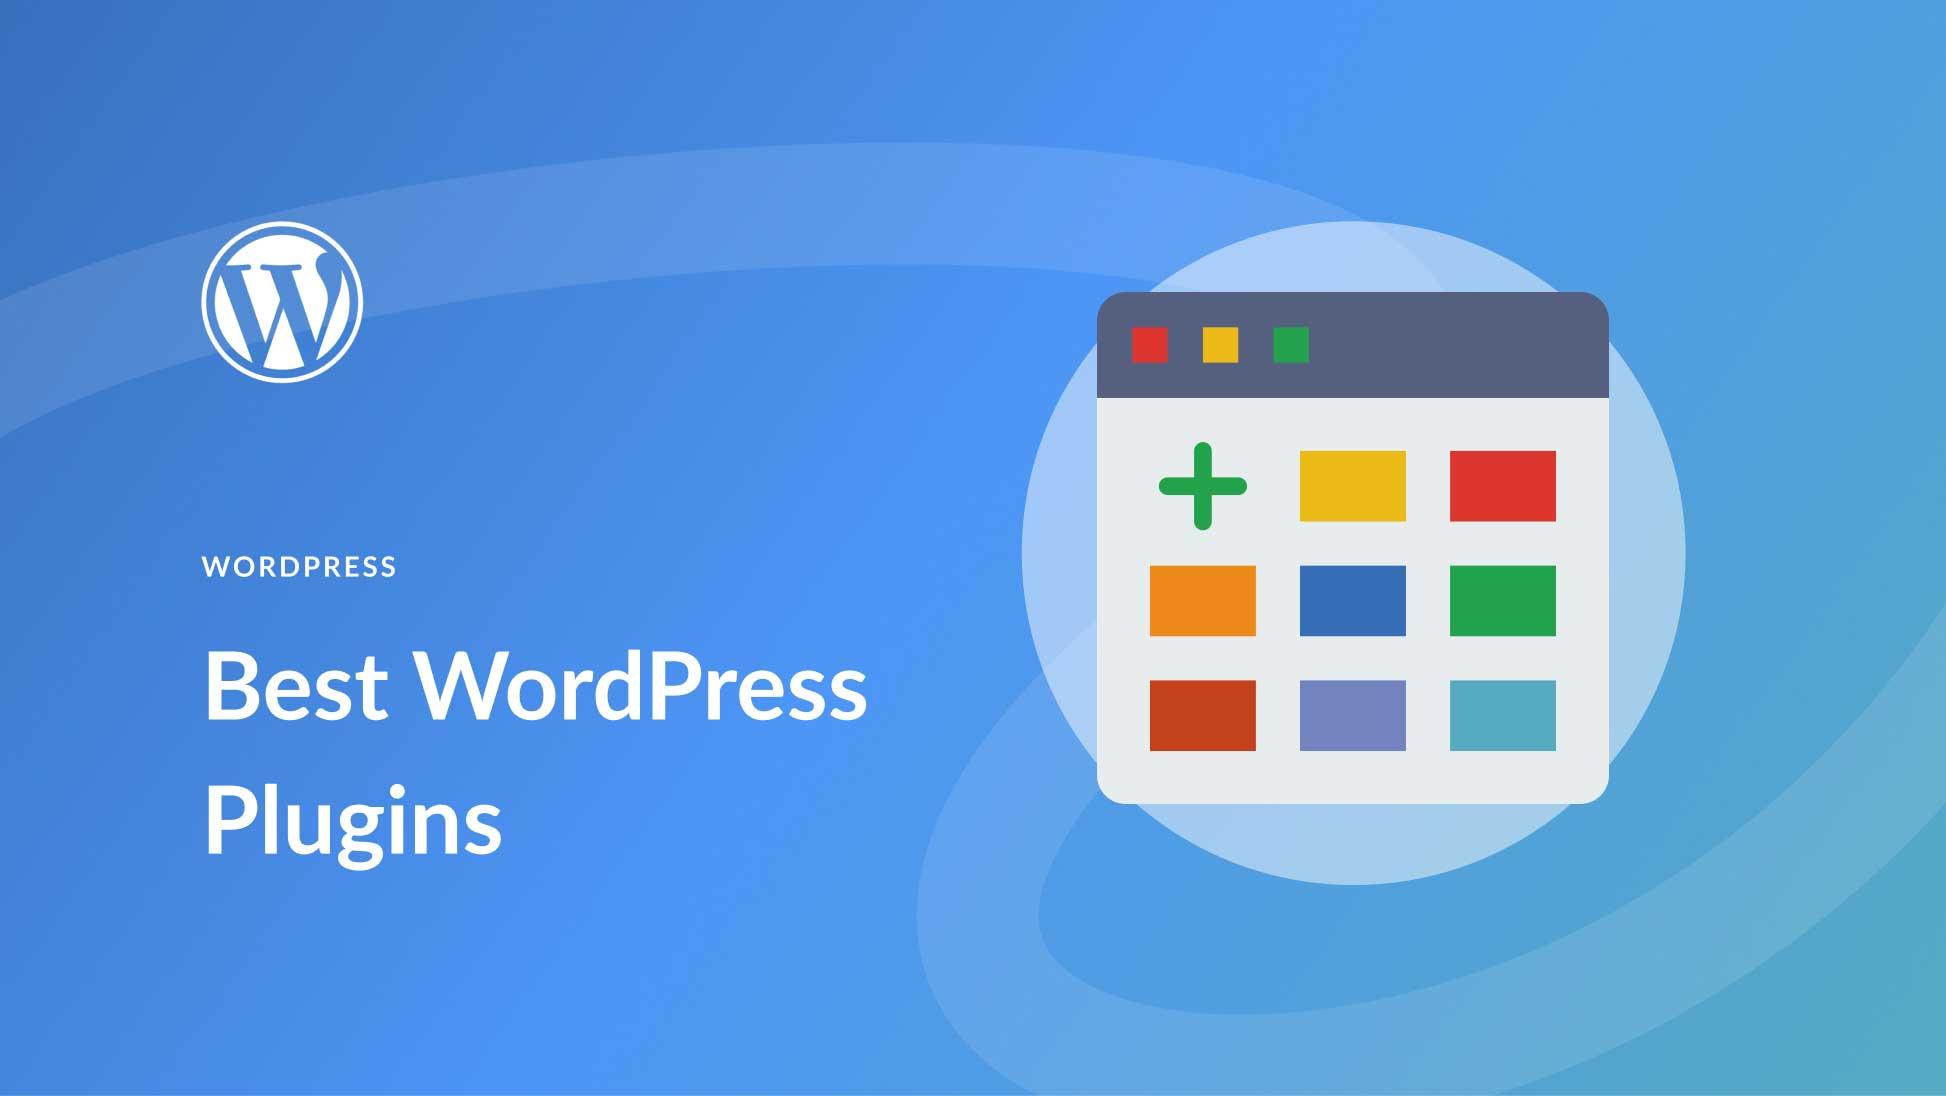
Leveraging WordPress Plugins for Hassle-Free Downloads
When it comes to handling downloads from the WordPress Media Library, plugins can be a game-changer. With the right tools at your disposal, you can streamline the process and avoid the usual hassles associated with file management. Here are a few ways plugins can enhance your experience:
- Simplified User Interface: Many plugins offer a user-friendly interface that makes finding and downloading images a breeze. No more digging through folders!
- Bulk Downloads: Some plugins allow you to select multiple images and download them in one go, saving you precious time.
- Access Control: If you need to restrict downloads to certain users, specific plugins can help you manage permissions effectively.
Consider using a plugin that integrates seamlessly with your existing WordPress setup. This ensures compatibility and reduces potential conflicts with your current theme or other plugins. Popular options like Download Monitor or File Away not only make your image downloads easier but also provide additional features such as file tracking and user statistics.
| Plugin Name | Key Features | Ideal For |
|---|---|---|
| Download Monitor | File tracking, statistics, download logs | Content creators, eCommerce sites |
| File Away | Organized file structure, user access control | Portfolio sites, membership sites |
| Easy Digital Downloads | Payment gateways, discount codes, analytics | Online stores, digital product sellers |
By implementing these plugins, not only will you improve the download experience for your users, but you’ll also empower yourself with better control over your media files. With hassle-free downloads, you can focus on what truly matters—creating and sharing stunning content with your audience!
Ensuring Image Quality During the Download Process
When downloading images from the WordPress Media Library, maintaining quality should be a priority. It’s all too easy to compromise image integrity during the download process, resulting in pixelated or distorted visuals that can detract from your site’s aesthetic. Here are some tips to ensure that what you download is as stunning as what you uploaded.
Choose the Right File Format: Different file formats serve various purposes. For instance:
- JPEG: Ideal for photographs where color depth and gradients are crucial. It balances quality and file size well.
- PNG: Perfect for images needing transparency, such as logos or icons. It offers lossless compression, ensuring no quality is lost.
- GIF: Best for simple animations or images with fewer colors. However, be cautious with its limited color palette.
Download at Full Size: Always opt to download images at their original resolution. WordPress often creates multiple sizes of an image upon upload, but downloading a smaller version can lead to a loss in detail. Look for the full-size option in the Media Library for the best quality. This can be particularly important for high-resolution displays that showcase your images in their full glory.
Check Your Internet Connection: A stable and fast internet connection can also influence the quality of your downloads. An interrupted or slow connection may lead to corrupted files. Ensure you have a reliable connection to avoid downloading incomplete files that can compromise image quality.
| Image Format | Best Use Case | Quality Retention |
|---|---|---|
| JPEG | Photographs | Good |
| PNG | Logos/Icons | Excellent |
| GIF | Simple animations | Fair |
Lastly, consider using plugins that enhance image handling in WordPress. Some plugins can optimize images without losing quality during uploads and downloads. These tools often provide options to compress files while preserving their visual integrity, ensuring that every image you download retains its appeal and effectiveness on your website.

Tips for Organizing Your Downloaded Images
Keeping your downloaded images organized can save you time and enhance your productivity, especially when you’re working with a large library. Here are some effective strategies to help you achieve a clutter-free folder.
- Create Folders by Category: One of the simplest ways to stay organized is to categorize your images. Create folders based on themes, such as Nature, Events, Products, or Marketing. This way, when you’re searching for a specific image, you won’t have to sift through countless files.
- Use Descriptive File Names: Instead of default names like IMG_1234.jpg, rename your files to describe the content. For example, use sunset-beach-holiday.jpg or product-launch-promo.jpg. This makes it easier to locate images later without opening each file.
- Implement a Consistent Naming Convention: Adopting a specific format for naming files can enhance your organization. For instance, you might use YYYY-MM-DD_projectname_description.jpg. This method not only keeps your files orderly but also allows for quick chronological sorting.
Additionally, consider utilizing tags or metadata to add another layer of organization. Many image management tools allow you to attach tags to your images. This can include details like location, event type, or usage rights. Here’s a simple table to illustrate how you might tag your images:
| Image Name | Tags |
|---|---|
| sunset-beach-holiday.jpg | Nature, Beach, Holiday |
| product-launch-promo.jpg | Marketing, Launch, Product |
| team-building-event.jpg | Events, Team, Corporate |
Lastly, make it a habit to regularly review and purge your image library. Set aside some time each month to remove duplicates or images that no longer serve a purpose. This ongoing maintenance ensures your collection remains relevant and streamlined, allowing you to focus on creating compelling content without the distraction of clutter.
Troubleshooting Common Download Issues
Downloading images from your WordPress Media Library should be a straightforward task, but sometimes users encounter hiccups. Here are a few common issues you might face and how to resolve them.
1. Permissions Problems:
If you’re unable to download images, it might be due to file permission settings on your server. Make sure that the wp-content/uploads directory has the correct permissions set. Generally, permissions should be set to 755 for folders and 644 for files. If necessary, you can change these settings using an FTP client or through your hosting provider’s file manager.
2. Browser Issues:
Sometimes the issue lies within your browser. Try these steps:
- Clear your browser cache and cookies.
- Disable any active browser extensions that might interfere with downloads.
- Attempt the download in a different browser.
These simple steps can often resolve unexpected download problems.
3. Plugin Conflicts:
Conflicts with plugins can cause issues with file downloads. Here’s how to troubleshoot:
- Temporarily deactivate all plugins and try downloading the image again.
- If it works, reactivate plugins one by one to identify the culprit.
- Consider reaching out to the plugin developer for support or finding alternative plugins.
If the problem persists despite trying the above solutions, it may be wise to contact your hosting provider. They can help identify server-related issues that could be impacting your ability to download images seamlessly.

Enhancing Your Workflow with Image Management Tools
When it comes to managing your media library in WordPress, having the right tools can significantly streamline your workflow. Efficient image management not only saves time but also enhances your overall productivity. Here are three effective methods to download images from your WordPress Media Library, allowing you to choose the one that best fits your needs.
- Direct Download from Media Library: Simply navigate to your Media Library, find the image you want, and click on it. A new window will pop up, displaying the image details. Right-click on the image and select “Save image as” to download it directly to your computer. This method is straightforward but may require more time if you’re dealing with multiple images.
- Using a Plugin: For those who frequently download images, a plugin like Media Library Assistant or Envira Gallery can be a game changer. These plugins often come with bulk download options and allow you to manage your images more effectively. Simply install the plugin, navigate to the settings, and follow the prompts to download images in batches.
- FTP Access: If you’re comfortable with a bit of technical work, accessing your site via FTP can be an efficient way to download images. Use an FTP client like FileZilla to connect to your server. Navigate to the /wp-content/uploads/ directory where all your media files are stored. From here, you can download multiple images simultaneously by selecting the desired files and transferring them to your local machine in one go.
Each of these methods can help enhance your workflow, making image management more efficient and less time-consuming. Depending on your specific needs—whether it’s downloading one image or managing a large library—choosing the right approach can make all the difference. With these tools in your arsenal, you’ll be better equipped to handle your WordPress media library like a pro.
| Method | Best For | Ease of Use |
|---|---|---|
| Direct Download | Single images | Easy |
| Using a Plugin | Bulk downloads | Moderate |
| FTP Access | Advanced users | Challenging |
By mastering these downloading techniques, you’ll not only enhance your image management capabilities but also free up time to focus on other important aspects of your website. Each method brings its own advantages, so consider what aligns best with your workflow and start optimizing your media management today!
Frequently Asked Questions (FAQ)
Q&A: How to Download Images From WordPress Media Library: 3 Ways
Q1: Why would I want to download images from my WordPress Media Library?
A1: Great question! Your WordPress Media Library is like a treasure chest of all the images you’ve uploaded to your site. There could be various reasons you want to download them—maybe you want to create a backup, use the images for a different project, or simply edit them in an external program. Whatever your reason, knowing how to download images efficiently can save you time and hassle.
Q2: What are the three main ways to download images from the WordPress Media Library?
A2: You’re in for a treat! There are three simple methods to download images from your WordPress Media Library:
- Direct Download from Media Library: This is the most straightforward way. Just navigate to your Media Library, find the image you want, click on it, and hit the “Download” button. Easy peasy!
- Using the Bulk Download Plugin: If you have a lot of images to download, consider using a plugin like “Export Media Library.” This allows you to download multiple files at once, saving you valuable time.
- Via FTP (File Transfer Protocol): For those who are a bit tech-savvy, using FTP can be a powerful solution. You can connect to your website’s server and download any image files directly. It’s a bit more involved, but it opens up a world of possibilities for managing your files.
Q3: Are there any limitations to downloading images this way?
A3: Absolutely! One limitation could be related to user permissions—if you don’t have the right access level, you may find yourself unable to download files. Additionally, if you’ve uploaded images in certain formats that are not supported by your computer, you might run into issues. Lastly, while bulk downloading is convenient, it might not always include images that are not in your Media Library but linked from other sources.
Q4: Is there a risk of losing image quality when downloading?
A4: Not at all! When you download images from your WordPress Media Library, you’ll get the original files in their full quality. Just make sure you keep them backed up, especially if you plan to use them for other projects or websites.
Q5: I still have questions! Where can I find more help?
A5: Don’t worry, you’re not alone! The WordPress community is vast and incredibly helpful. Check out the official WordPress support forums, or look into video tutorials on platforms like YouTube. There are also plenty of blogs dedicated to WordPress tips and tricks. And if you ever feel stuck, feel free to ask for help from a friend who’s more familiar with WordPress!
Q6: Can I get started right away?
A6: Absolutely! Just log into your WordPress dashboard, jump into your Media Library, and start exploring the methods we discussed. With just a few clicks, you’ll have your favorite images saved on your device. So what are you waiting for? Start downloading!
—
This Q&A approach not only addresses common concerns but also empowers readers to take action. Happy downloading!
Closing Remarks
downloading images from the WordPress Media Library doesn’t have to be a daunting task. With the three methods we’ve explored—using the Media Library directly, leveraging plugins, or even employing FTP—you have the flexibility to choose the option that best suits your needs. Whether you’re a seasoned blogger, a business owner, or someone just starting out, having access to your images is crucial for your creative projects.
So, why not give these methods a try? You’ll find that not only is it straightforward, but it also opens up new possibilities for your website and content creation. If you’ve enjoyed this guide and found it helpful, share it with fellow WordPress users! And don’t hesitate to leave a comment below with your experiences or any questions you might have. Happy downloading, and keep creating amazing content!