Are you tired of the same old font staring back at you from your WordPress site? Whether you’re running a blog, an online store, or a portfolio, the right font can make all the difference in how your content is perceived. It’s not just about aesthetics—your choice of typography can enhance readability, convey your brand’s personality, and keep your visitors engaged. But if you’re not a coding whiz or a design guru, changing fonts on your WordPress site might seem like a daunting task. Fear not! In this article, we’ll walk you through the simple steps to change fonts in WordPress, no matter which theme you’re using. Say goodbye to generic typography and hello to a fresh, personalized look that reflects your unique style. Let’s dive in and unlock the power of beautiful fonts together!
Understanding the Importance of Font Choices in Web Design
When it comes to web design, font choices play a pivotal role in defining the overall look and feel of your site. The right font can enhance readability, evoke emotions, and even strengthen your brand identity. Whether you opt for a sleek modern sans-serif or a classic serif, your font selection should align with your website’s purpose and target audience.
Consider the following aspects when choosing fonts:
- Readability: Ensure that your text is easy to read across all devices. Poor font choices can frustrate users and drive them away.
- Brand Alignment: Your font should reflect the personality of your brand. A playful font may suit a creative agency, while a more traditional typeface might be better for a law firm.
- Consistency: Use a limited number of fonts throughout your site to maintain visual harmony. Too many styles can make your site look cluttered.
To help you visualize effective font pairings, consider this table showcasing complementary font choices:
| Header Font | Body Font | Style Pairing |
|---|---|---|
| Montserrat | Open Sans | Modern & Clean |
| Playfair Display | Lato | Classic & Elegant |
| Raleway | Roboto | Stylish & Versatile |
Once you’ve settled on your fonts, implementing them in WordPress is straightforward. Many themes come with built-in options to change fonts under the customizer settings. However, if your theme lacks this feature, using a plugin like Google Fonts or Easy Google Fonts can provide flexibility. These plugins allow you to customize your font selections without needing to dive into code.
Ultimately, your font choices should enhance your website’s user experience. A well-thought-out typography strategy not only makes your site visually appealing but also ensures that your message is conveyed effectively. So, take the time to explore different font options and find the perfect match for your WordPress site!
Exploring the Different Methods to Change Fonts in WordPress
Changing fonts in WordPress can be a game-changer for your website’s design and user experience. Fortunately, there are several methods to update your typography, catering to users of all skill levels. Whether you’re a seasoned developer or a beginner, you can elevate your site’s aesthetics effortlessly.
One of the most straightforward methods to customize your fonts is through the WordPress Customizer. To access it, simply navigate to Appearance > Customize. Here, you’ll find a section dedicated to Typography or Fonts, depending on your theme. This allows you to:
- Select predefined font options.
- Adjust font sizes and styles.
- Preview changes in real-time.
Moreover, many themes offer Google Fonts integration, enabling you to choose from hundreds of font families. Just remember to hit Publish to save your changes!
If you’re looking for more flexibility, consider using a plugin. Plugins like Easy Google Fonts or WP Google Fonts provide robust options for customizing your typography without any coding knowledge. After installing a font plugin, you can:
- Add custom font families easily.
- Assign specific fonts to headings, paragraphs, or other elements.
- Utilize various text effects and styling options.
This method is particularly beneficial for those who want to keep their design cohesive and professional without diving into CSS.
For those who are comfortable with a bit of coding, using Custom CSS is a powerful approach. By adding your custom CSS in the Additional CSS section of the Customizer, you can target specific elements on your site. Here’s a basic example:
h1, h2, h3 {
    font-family: 'Your Font Name', sans-serif;
    color: #333;
}
With this method, you can achieve precise control over font styles, including weights, sizes, and colors.
| Method | Difficulty Level | Customization Options |
|---|---|---|
| WordPress Customizer | Easy | Basic font selections |
| Font Plugins | Easy to Moderate | Extensive font options |
| Custom CSS | Moderate to Advanced | Full control over styling |
Each of these methods has its own merits, allowing you to choose the one that fits your needs best. Whether you prefer a simple and quick solution or a more hands-on approach, WordPress provides the tools necessary to transform your site’s typography into a signature of your brand.
Using the WordPress Customizer for Effortless Font Changes
The WordPress Customizer is a powerful tool that empowers you to make font changes effortlessly, elevating your site’s design without needing extensive coding knowledge. By accessing the Customizer, you can preview the changes in real-time, ensuring your website aligns with your brand identity before going live. Here’s how to make those font changes simply and effectively:
- Access the Customizer: Navigate to your WordPress dashboard, hover over “Appearance,” and click on “Customize.” This will take you to the Customizer interface.
- Select Typography Settings: Look for sections labeled “Typography,” “Fonts,” or “Site Identity.” Depending on your theme, the exact wording can differ, but these sections allow you to modify the font family, size, weight, and style.
- Choose Your Fonts: Many themes offer a selection of Google Fonts or standard web fonts. Experiment with different options to see what resonates with your site’s personality.
- Adjust Size and Weight: Once you’ve picked a font, customize the size and weight. A larger font can create emphasis, while lighter weights can convey elegance. Be mindful of readability!
One of the best features of the Customizer is the live preview. As you adjust the settings, you can see how your changes affect the overall look of your site instantly. This interactive feature ensures you find the perfect font combination that aligns with your vision.
Additionally, if your theme supports it, you can change fonts for specific elements such as headings, body text, and buttons. This level of granularity allows for a more customized user experience. Here’s a simple table to illustrate typical font settings you can adjust:
| Element | Font Family | Font Size | Font Weight |
|---|---|---|---|
| Headings | Roboto | 36px | Bold |
| Body Text | Open Sans | 16px | Normal |
| Buttons | Lato | 18px | Medium |
after you’ve made your font adjustments, don’t forget to click the “Publish” button at the top of the Customizer to save your changes. This step ensures that your new typography shines on your live site. With these straightforward steps, you can transform your website’s appearance and create an inviting atmosphere for your visitors!
Customizing Fonts with the Gutenberg Block Editor
Customizing fonts in the Gutenberg Block Editor is not just about aesthetics; it’s about enhancing readability and making your content stand out. The editor allows you to seamlessly change fonts within specific blocks, giving your text a unique voice that resonates with your audience.
To begin, click on any text block you wish to edit. Under the Block Settings panel on the right, you’ll find a variety of options:
- Font Size: Adjust the size of your text to make it more prominent or subtle.
- Font Family: Choose from default font families or use custom fonts via plugins.
- Text Color: Change the color of your font to match your brand’s identity.
- Background Color: Add contrast with a background color that complements your text.
For a more cohesive look across your site, consider setting global styles. This can often be done through your theme customizer or additional CSS. However, if you’re looking for specific changes, the Gutenberg editor is quite versatile:
| Feature | Customization Options |
|---|---|
| Headings | Different font sizes and weights for hierarchy |
| Paragraphs | Line height and letter spacing adjustments |
| Buttons | Custom fonts for call-to-action buttons |
Moreover, if you wish to take customization a step further, consider integrating Google Fonts or Adobe Fonts into your WordPress website. Many plugins simplify this process, allowing you to select and use a broader range of fonts directly within the Gutenberg editor. Just remember, consistency is key; choose fonts that reflect your brand’s personality and maintain a harmonious look throughout your site.
with the Gutenberg Block Editor, customizing fonts is straightforward and intuitive. By leveraging the available tools, you can create a visually appealing and engaging experience for your readers. So, don’t hesitate to experiment with different styles until you find the perfect fit for your content!
Harnessing the Power of Plugins for Advanced Font Options
In the world of WordPress, enhancing your site’s typography can significantly impact user experience and brand perception. One of the most effective ways to achieve this is through the use of plugins, which offer a myriad of advanced font options that go beyond the basic settings. With a few clicks, you can transform the look and feel of your website, making it not only visually appealing but also aligned with your brand identity.
Choosing the right plugin is crucial. Here are a few popular plugins that can help you unlock advanced font options:
- Google Fonts Typography: Easily integrate thousands of Google Fonts into your website and customize them according to your needs.
- Easy Google Fonts: This user-friendly plugin allows you to add and customize fonts directly from the WordPress Customizer, offering a live preview of your changes.
- FontAwesome: Ideal for adding stylish icons alongside your text, enhancing your layout and interactive elements.
Once you’ve chosen a plugin, you can start experimenting with different font styles, sizes, and weights. Many of these plugins provide intuitive interfaces, enabling you to customize:
| Font Feature | Description |
|---|---|
| Font Family | Choose from a diverse range of fonts to reflect your brand’s personality. |
| Font Size | Adjust the size for better readability and aesthetic appeal. |
| Font Weight | Use different weights to emphasize key messages or sections. |
Aside from aesthetics, consider how font choices affect readability. For instance, serif fonts often convey a sense of tradition and reliability, while sans-serif fonts are typically seen as modern and clean. Using web-safe fonts ensures that your text displays correctly across all devices and browsers. It’s also wise to maintain a font hierarchy—using various sizes and weights to guide visitors through your content seamlessly.
don’t overlook the importance of mobile optimization. With more users accessing websites on mobile devices, your chosen fonts should be legible on smaller screens. Most plugins allow you to set specific styles for mobile, ensuring a consistent experience for all visitors. By harnessing the power of plugins, you can elevate your WordPress site’s typography to create a lasting impression on your audience.

Injecting Custom CSS for Tailored Font Styles
Customizing the font styles in your WordPress site can dramatically enhance your brand’s identity and improve the overall user experience. By injecting your own CSS, you can override default font settings and give your text the personalized touch it deserves. Whether you’re looking to make a bold statement or simply improve readability, here’s how you can do it effortlessly.
To get started, navigate to the WordPress Customizer by going to Appearance > Customize. Once there, you’ll find a section labeled Additional CSS. This is your playground. You can add your custom styles here, and they will be applied site-wide. Consider using the following CSS snippets to transform the typography:
- Change Font Family:
- Adjust Font Size:
- Style Links:
body { font-family: 'YourFont', sans-serif; }
h1, h2, h3 { font-size: 24px; }
a { color: #0073aa; text-decoration: none; }
Here’s a simple table that showcases various CSS properties for different text elements:
| Element | Font Family | Font Weight |
|---|---|---|
| Body | Arial, sans-serif | Normal |
| Headings | ‘Georgia’, serif | Bold |
| Links | ‘Helvetica’, sans-serif | Light |
Experimenting with font weights and line heights can also create a more visually appealing layout. For instance, you might want to use a heavier font weight for your headings to make them stand out and a lighter weight for the body text to improve readability. Here’s a quick example:
- Heading Font Weight:
- Body Font Weight:
h1 { font-weight: bold; }
p { font-weight: 300; }
Incorporating custom CSS into your WordPress theme allows for unlimited possibilities. Don’t shy away from playing around with styles until you find the perfect combination that reflects your brand’s personality. With just a few lines of code, you can elevate your site’s aesthetics and enhance user engagement.
Tips for Ensuring Font Readability and Accessibility
When it comes to ensuring your website’s text is easily readable and accessible to all users, there are several key elements to consider. A thoughtful approach to font selection and styling can make a significant difference in user experience.
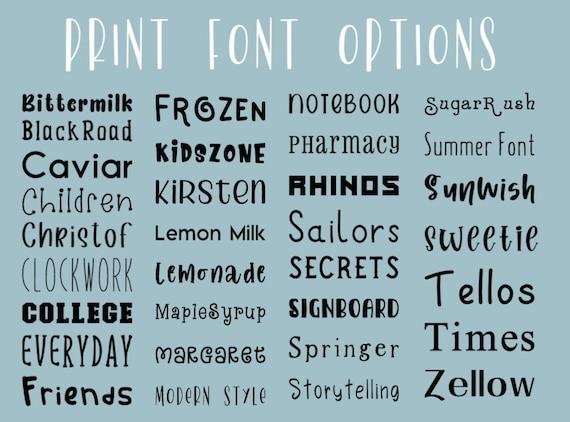
Choose the Right Font Family: It’s essential to select fonts that are known for their readability. Here are some popular options:
- Sans-serif: Fonts like Arial, Helvetica, and Open Sans are clean and modern.
- Serif: Times New Roman and Georgia bring a classic touch, often preferred in longer texts.
- Display Fonts: Use sparingly for headers or highlights, as they can be harder to read in large blocks of text.
Consider Size and Weight: Ensuring that your font size is adequate for reading is crucial. A good rule of thumb is to use a base size of at least 16px. Additionally, varying font weights can help create a visual hierarchy:
| Font Weight | Usage |
|---|---|
| Normal | Body text |
| Medium | Subheadings |
| Bold | Important points or calls to action |
Maintain Good Contrast: Ensure that your text stands out from the background. A contrast ratio of at least 4.5:1 for normal text and 3:1 for larger text is recommended. Tools like the WebAIM Contrast Checker can help you evaluate this.
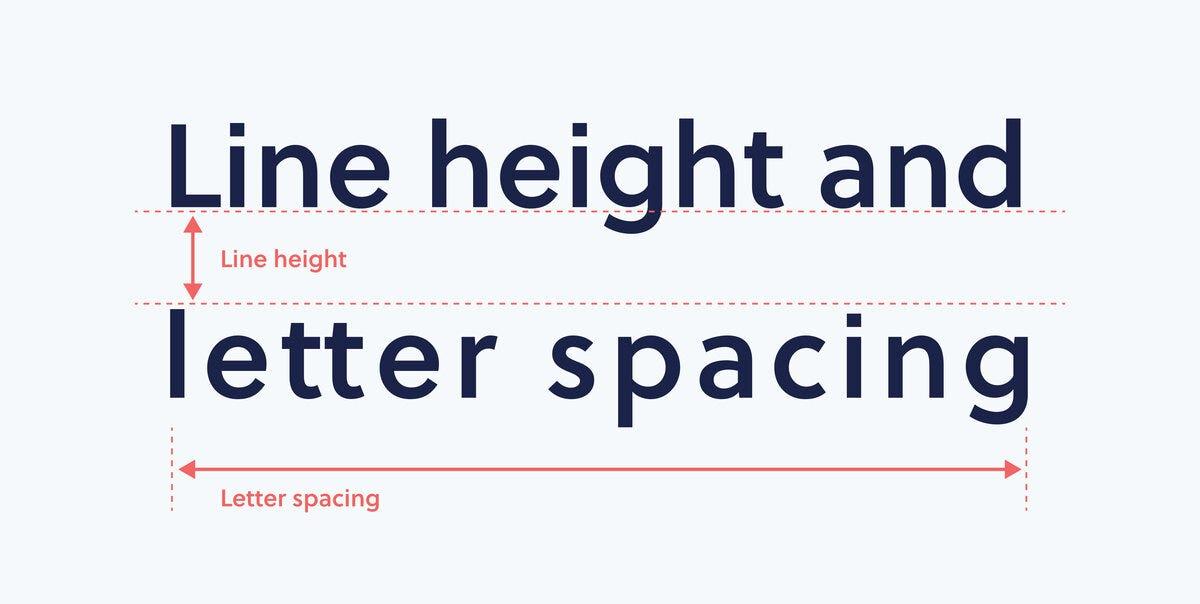
Use Adequate Line Spacing: Ample spacing between lines and paragraphs can significantly enhance readability. A line height of 1.5 to 1.6 times the font size is generally effective. Additionally, maintaining at least 20 pixels of space between paragraphs can help break up content for easier scanning.
Lastly, always consider the impact of screen sizes and devices. Responsive design allows your font to adjust gracefully across platforms, ensuring that all visitors enjoy a seamless reading experience. By prioritizing these aspects, you can create a website that is not only visually appealing but also accessible to a broader audience.
Previewing and Testing Font Changes Before Going Live
When it comes to altering the typography of your WordPress site, it’s crucial to ensure that your changes resonate with your audience before they go live. Testing font changes in a safe environment helps you gauge the aesthetic and functional impact without any risk to your site’s public-facing version. Here’s a walkthrough to help you effectively preview and test your font changes.
Start by utilizing the WordPress Customizer, which offers a live preview of your modifications. Navigate to Appearance > Customize, and look for the typography settings. As you tweak fonts, sizes, and styles, you can see immediate results on the screen. This iterative process allows you to:
– Experiment with different font families
– Adjust line heights and letter spacing
– Change colors to match your brand
Remember to keep an eye on readability. A font may look appealing, but if it’s hard to read, it could alienate your visitors. To assess readability, consider conducting informal tests by gathering feedback from friends or colleagues. You might ask them to rate the clarity of your text using various fonts.
If you’re looking for a more comprehensive testing approach, consider creating a staging site. This is a clone of your live site where you can make changes without affecting the actual website. Here’s a simple table summarizing the advantages of testing on a staging site versus live adjustments:
| Method | Advantages | Disadvantages |
|---|---|---|
| Live Adjustments |
|
|
| Staging Site |
|
|
Lastly, don’t forget to check how your font choices appear across various devices. Responsive design is key, and elements may look different on mobile screens versus desktops. Using tools like Google Chrome’s Developer Tools, you can easily toggle between devices to ensure that your fonts maintain their appeal no matter the platform.
Maintaining Consistency Across Your Site with Font Pairing
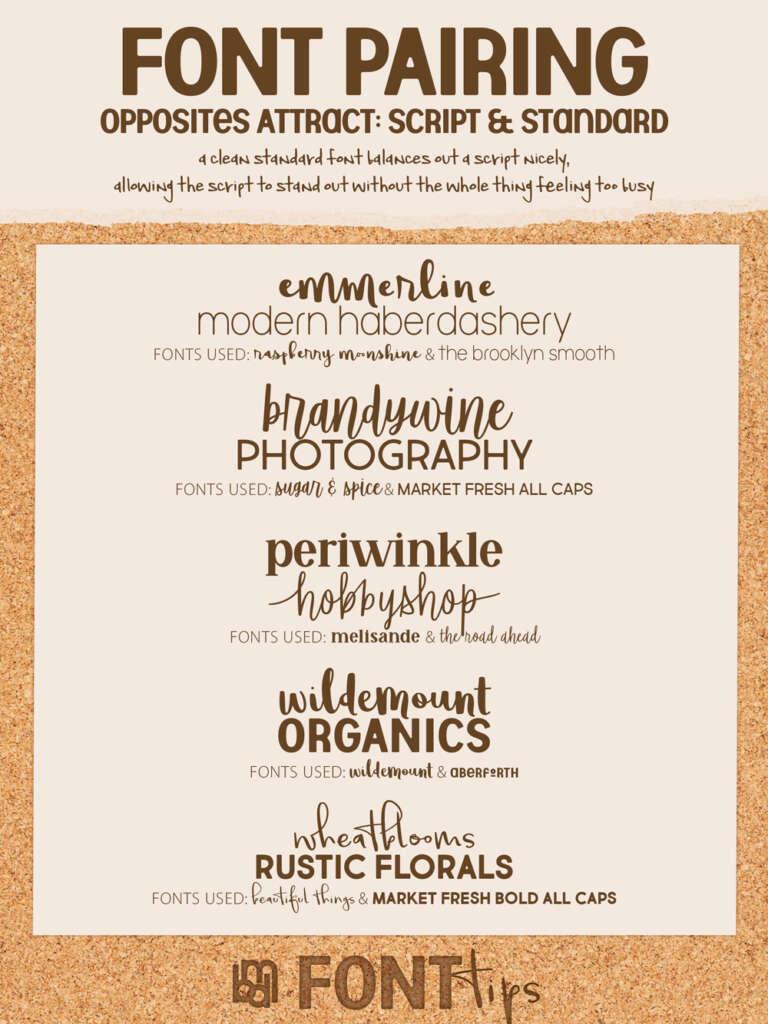
Font pairing plays a crucial role in creating a visually appealing and cohesive website. When selecting fonts, it’s essential to consider how they interact with each other to ensure they complement rather than clash. Using a combination of a serif font for headings and a sans-serif font for body text can create a harmonious balance that enhances readability and aesthetic appeal.
To maintain consistency across your site, focus on establishing a set of font styles that reflect your brand’s personality. Here are some tips to keep in mind:
- Limit Your Choices: Stick to 2-3 font families. Overusing different fonts can create a chaotic look.
- Hierarchy Matters: Use distinct styles (bold, italic) to differentiate headings, subheadings, and body text effectively.
- Color Coordination: Ensure your font colors align with your overall color scheme for a unified look.
In WordPress, changing your fonts is straightforward and can usually be accomplished through the Customizer or by using a plugin. If you’re using a theme that supports Google Fonts, you can easily add custom fonts and pair them directly from the theme settings. This allows you to preview the fonts in real-time, ensuring that your selections work well together.
Here’s a simple table to illustrate some effective font pairings:
| Heading Font | Body Font | Style |
|---|---|---|
| Montserrat | Open Sans | Modern & Clean |
| Playfair Display | Raleway | Elegant & Sophisticated |
| Lora | Arial | Classic & Readable |
After you’ve made your selections, ensure that all elements of your site, from headers to buttons, reflect your chosen fonts. This will not only enhance the visual consistency of your site but also improve user experience, making it easier for visitors to engage with your content.
Final Thoughts on Elevating Your Sites Aesthetic with Fonts
When it comes to enhancing your website’s aesthetic, the right font can make all the difference. Typography is not merely about readability; it is an essential element of your brand’s identity. By carefully selecting fonts that resonate with your target audience, you can create a more engaging and visually appealing site. Here are some key points to consider:
- Brand Voice: Your choice of font should reflect your brand’s personality. For instance, a playful font might suit a children’s product, while a sleek, modern font could enhance a tech company’s image.
- Readability: Ensure that your fonts are legible across all devices. Test different sizes and styles to find the perfect balance that maintains clarity without sacrificing style.
- Contrast and Color: Pay attention to how your font interacts with the background. High contrast not only improves readability but also draws the eye, guiding users through your content seamlessly.
One effective way to implement a variety of fonts is through the use of Google Fonts, which offers an extensive library of free fonts. Integrating these into your WordPress site is straightforward and can result in a significant upgrade to your site’s design. Simply choose fonts that complement each other, such as pairing a sans-serif for headings with a serif for body text. This combination can create visual interest and keep your pages looking polished.
Another important aspect to remember is font hierarchy. Establishing a clear hierarchy in your typography will help users navigate content effortlessly. Here’s a simple guide for structuring font sizes:
| Text Type | Font Size | Example |
|---|---|---|
| Heading 1 | 36px | Welcome to Our Site |
| Heading 2 | 24px | Latest Articles |
| Body Text | 16px | This is a sample paragraph of text. |
don’t forget to consider the overall user experience. Fonts that are too decorative or unusual might distract from your message. Always prioritize functionality alongside aesthetics. The ideal font choice will not only beautify your site but also serve your content effectively, guiding visitors effortlessly from one section to the next. Remember, your website is a reflection of your brand; let your fonts tell your story beautifully.
Frequently Asked Questions (FAQ)
Q&A: How to Change Font in WordPress (Works in All Themes)
Q: Why should I change the font on my WordPress site?
A: Great question! Changing the font can significantly impact your site’s aesthetics and readability. A well-chosen font can enhance your brand’s identity, make your content more engaging, and improve user experience. By personalizing your font choices, you can create a unique look that resonates with your audience and keeps them coming back for more.
Q: Is it complicated to change fonts in WordPress?
A: Not at all! While it might sound technical, changing fonts in WordPress is relatively straightforward. Whether you’re a complete beginner or a seasoned pro, you can customize your typography in just a few clicks. Plus, this article will guide you through every step, ensuring you feel confident in your abilities!
Q: Will changing the font affect my site’s performance?
A: You may be concerned about performance, but fear not! If you choose web-safe fonts or use a reliable font plugin, you’ll maintain fast loading times. In fact, enhancing your site’s readability might even keep visitors on your page longer, ultimately benefiting your SEO!
Q: Can I change fonts using any WordPress theme?
A: Absolutely! The beauty of WordPress is its flexibility. Whether you’re using a free theme or a premium one, the methods we’ll cover work seamlessly across all themes. So, you can rest easy knowing you won’t be limited by your theme choice.
Q: What tools or plugins do I need to change fonts in WordPress?
A: You have a few options! You can use built-in theme customizers, or you may opt for popular plugins like Google Fonts or Easy Google Fonts. These tools make it super easy to choose and apply fonts without needing to touch a line of code. We’ll outline the best tools in detail, so you can pick the one that suits your needs best.
Q: What if I don’t like the fonts I’ve chosen?
A: No worries! One of the best things about WordPress is that you can change your fonts as often as you like. Simply revisit your settings or plugin, and try out different fonts until you find the perfect match for your site’s vibe. Experimentation is key, and you can always revert back if something doesn’t feel right.
Q: Can I customize font sizes and styles as well?
A: Yes, indeed! Along with changing the font family, most plugins and theme customizers allow you to adjust font sizes, colors, and styles (like bold or italic). This means you can create a truly tailored look that aligns with your brand’s voice and enhances your content.
Q: Will I need coding skills to change my fonts?
A: Not at all! The methods we’ll discuss are designed for ease of use, requiring no coding skills. You’ll navigate through user-friendly interfaces, so you can focus on what you do best: creating amazing content!
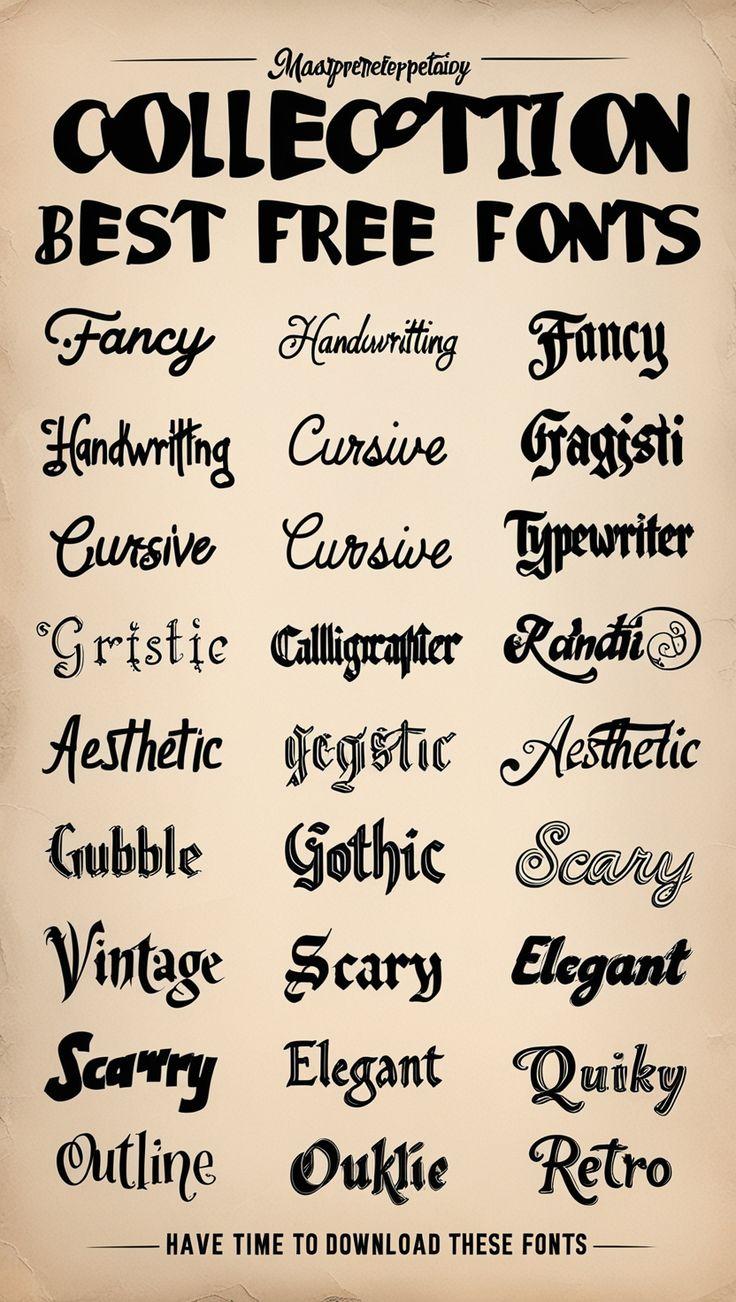
Q: Where can I find unique fonts that fit my brand?
A: There are plenty of resources to discover unique fonts! Google Fonts is a fantastic free option with a vast selection. Additionally, websites like Adobe Fonts or Font Squirrel offer premium choices. Just remember to choose fonts that reflect your brand personality and enhance readability!
Q: Is it worth investing time in changing fonts?
A: Absolutely! The right font choice can elevate your website in terms of design and user experience. Visitors are more likely to stay engaged with your content when it’s easy to read and visually appealing. Investing a little time to customize your fonts can pay off big time in retaining visitors and improving your overall site aesthetics.
changing fonts in WordPress is a simple yet powerful way to elevate your site’s design and user experience. With the right guidance, you can confidently transform your website’s typography to make a lasting impression on your audience. Ready to dive in? Let’s get started!
In Retrospect
And there you have it! Changing the font in WordPress is not only easy but also an essential step in personalizing your website and creating a unique identity that resonates with your audience. Whether you’re looking to enhance readability, make a bold statement, or simply align with your brand’s aesthetics, tweaking your fonts can significantly impact user experience and engagement.
So why wait? Dive into your WordPress dashboard and start experimenting with different fonts today! Remember, your website is a reflection of your style and vision, so make it yours. If you have any questions or need further assistance, feel free to reach out or leave a comment below. Happy customizing, and here’s to creating a stunning, font-friendly website that stands out from the crowd!