
Are you eager to dive into the world of web development but unsure where to start? If you’ve been dreaming of creating your own website or blog without the hassles of hosting and domain registration, you’re in the right place! In this beginner’s guide, we’ll walk you through the simple yet powerful process of installing WordPress on XAMPP locally. Imagine having a full-fledged WordPress site right on your own computer, allowing you to experiment, learn, and create without any limits. Whether you’re a complete novice or someone looking to brush up on your skills, this step-by-step approach will empower you to bring your ideas to life. So, grab a cup of coffee, and let’s get started on transforming your digital dreams into reality!
Choosing the Right Tools for Your Local WordPress Journey
When diving into the world of local WordPress development, the tools you choose can make or break your experience. While XAMPP serves as a solid foundation, enhancing your setup with the right additional tools can streamline your workflow and boost productivity. Here are some recommendations to elevate your local development journey.
- Text Editor: A good text editor is crucial. Consider using Visual Studio Code or Sublime Text for efficient coding. They offer syntax highlighting, extensions, and an intuitive interface.
- Browser Developer Tools: Familiarize yourself with built-in developer tools in browsers like Chrome or Firefox. These tools are invaluable for debugging and optimizing your websites.
- Version Control: Implement a version control system like Git. It helps manage changes and collaborate with others seamlessly.
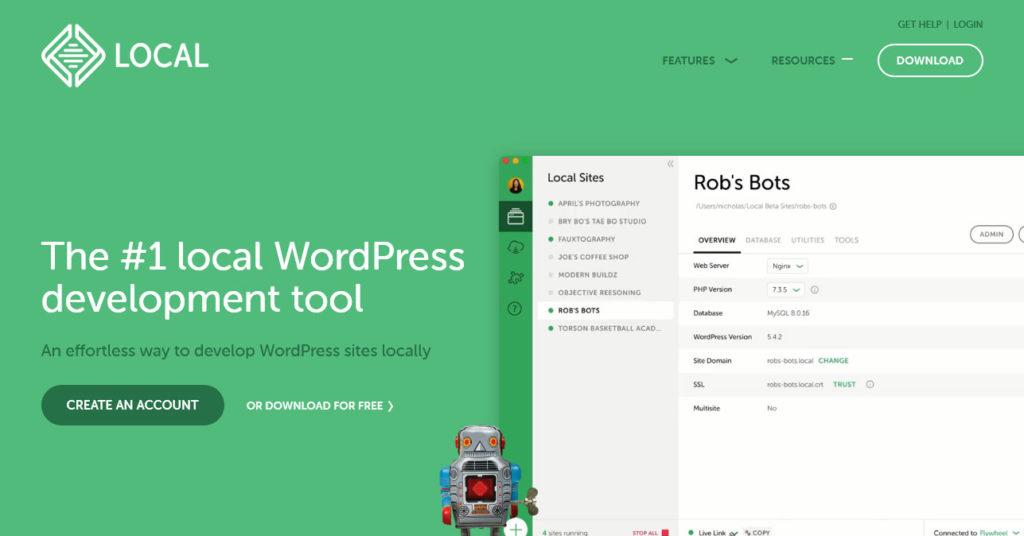
- Local Environment Manager: Tools like Local by Flywheel or DesktopServer can simplify the management of multiple WordPress sites.
Additionally, certain plugins can enhance your local development experience. Here’s a quick look at some must-have plugins:
| Plugin Name | Purpose |
|---|---|
| WP Migrate DB | For easy database migrations between local and live environments. |
| Query Monitor | Debugging tool to monitor database queries and performance. |
| Duplicator | For cloning and migrating WordPress sites effortlessly. |
Lastly, don’t overlook the importance of a reliable web browser. Using a browser that supports efficient web development tools will save you time and enhance your testing process. Opt for browsers that regularly update their developer features to stay ahead in your local development efforts.
By carefully selecting these tools, you’ll create a more efficient and enjoyable local WordPress development experience. Take the time to explore and experiment with different options to find what works best for you. After all, the right tools not only simplify your workflow but can also spark creativity and innovation in your projects!

Setting Up XAMPP: Your Local Server Made Easy
Setting up XAMPP for WordPress is a fantastic way to create a local development environment, allowing you to easily test themes, plugins, and site configurations without affecting your live website. Once you have XAMPP installed, launching your local server is as simple as a few clicks. Here’s how to get started!
First, ensure that you have XAMPP downloaded and installed on your computer. Here’s a quick checklist to follow:
- Download the latest version of XAMPP from the official website.
- Run the installer and follow the prompts to complete the installation.
- Launch the XAMPP Control Panel and start the Apache and MySQL modules.
With your server running, the next step is to create a database for your WordPress site. You can do this using phpMyAdmin, which is included with XAMPP. Access it by navigating to http://localhost/phpmyadmin in your web browser. From there:
- Click on the “Databases” tab.
- Enter a name for your new database (e.g., wp_local) and click “Create.”
Now, it’s time to download WordPress. Head to the WordPress.org website and download the latest version. Once downloaded:
- Extract the WordPress zip file.
- Copy the extracted folder into the
htdocsdirectory within your XAMPP installation folder (e.g.,C:xampphtdocswordpress).
To install WordPress, open your web browser and navigate to http://localhost/wordpress. You will be greeted with the WordPress installation wizard. Follow the steps to configure your site:
| Step | Action |
|---|---|
| 1 | Select your language. |
| 2 | Fill in your database details: |
| 3 | Choose a username and password for your admin account. |
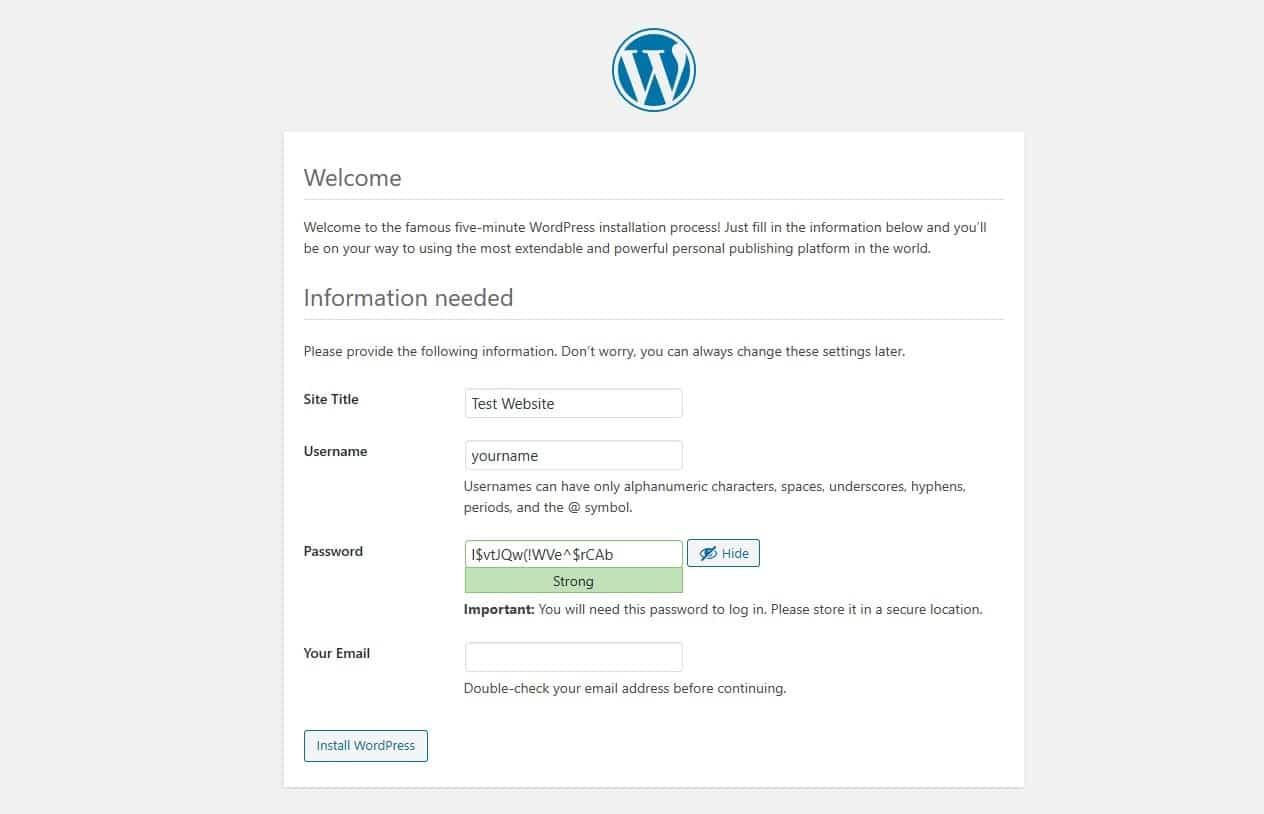
| 4 | Click “Install WordPress” to finish the setup. |
After successful installation, you can log in to your local WordPress site by navigating to http://localhost/wordpress/wp-admin. From here, you can experiment with themes, plugins, and settings at your own pace. Enjoy the freedom of customizing your site without any limitations!
Downloading WordPress: Where to Find the Latest Version
To kick off your journey of installing WordPress on XAMPP, the first step is to obtain the latest version of WordPress. Thankfully, finding and downloading it is a breeze. You can always access the official WordPress website, which is your best bet for ensuring that you get the most up-to-date version of the software.
Here’s how to grab the latest version:
- Visit the Official Site: Navigate to WordPress.org.
- Download the Zip File: Click on the “Download WordPress” button. This will provide you with a .zip file containing all the necessary files.
- Choose a Language: If you prefer a version in a different language, options are available on the same page.
Once you have the .zip file, it’s essential to verify that you have the latest stable release. This ensures you’re working with a version that includes the latest features and security updates. You can usually find the version number prominently displayed on the download page.
To make the process seamless, here’s a quick checklist to follow:
| Task | Status |
|---|---|
| Download WordPress | ✅ Completed |
| Extract Zip File | ✅ Completed |
| Move to XAMPP Folder | ❌ Pending |
After downloading, don’t forget to extract the .zip file and place the contents into the htdocs folder of your XAMPP installation. This location serves as the document root for your local server, making it crucial for running your WordPress site locally.
By following these straightforward steps, you’re setting a solid foundation for your WordPress installation on XAMPP. With the latest version at your fingertips, you’re now ready to dive into the exciting world of WordPress development!
Creating a Database for Your WordPress Site
Setting up a database for your WordPress site is a crucial step in ensuring your content is stored securely and efficiently. XAMPP provides an integrated environment that makes this task straightforward, even for beginners. Here’s how you can create a database to kickstart your WordPress installation.
First, launch the XAMPP control panel and start the MySQL service. This step is essential as it allows you to interact with the database management system. Once MySQL is running, you can access phpMyAdmin, a user-friendly interface that simplifies database management.
To create a new database, follow these steps:
- Open your web browser and navigate to
http://localhost/phpmyadmin. - On the phpMyAdmin homepage, look for the Database tab at the top of the page.
- In the Create database field, enter a name for your database. A good practice is to name it something related to your site, like
wp_yoursitename. - Select utf8_general_ci as the collation to support a wide range of characters.
- Click on the Create button to finalize the process.
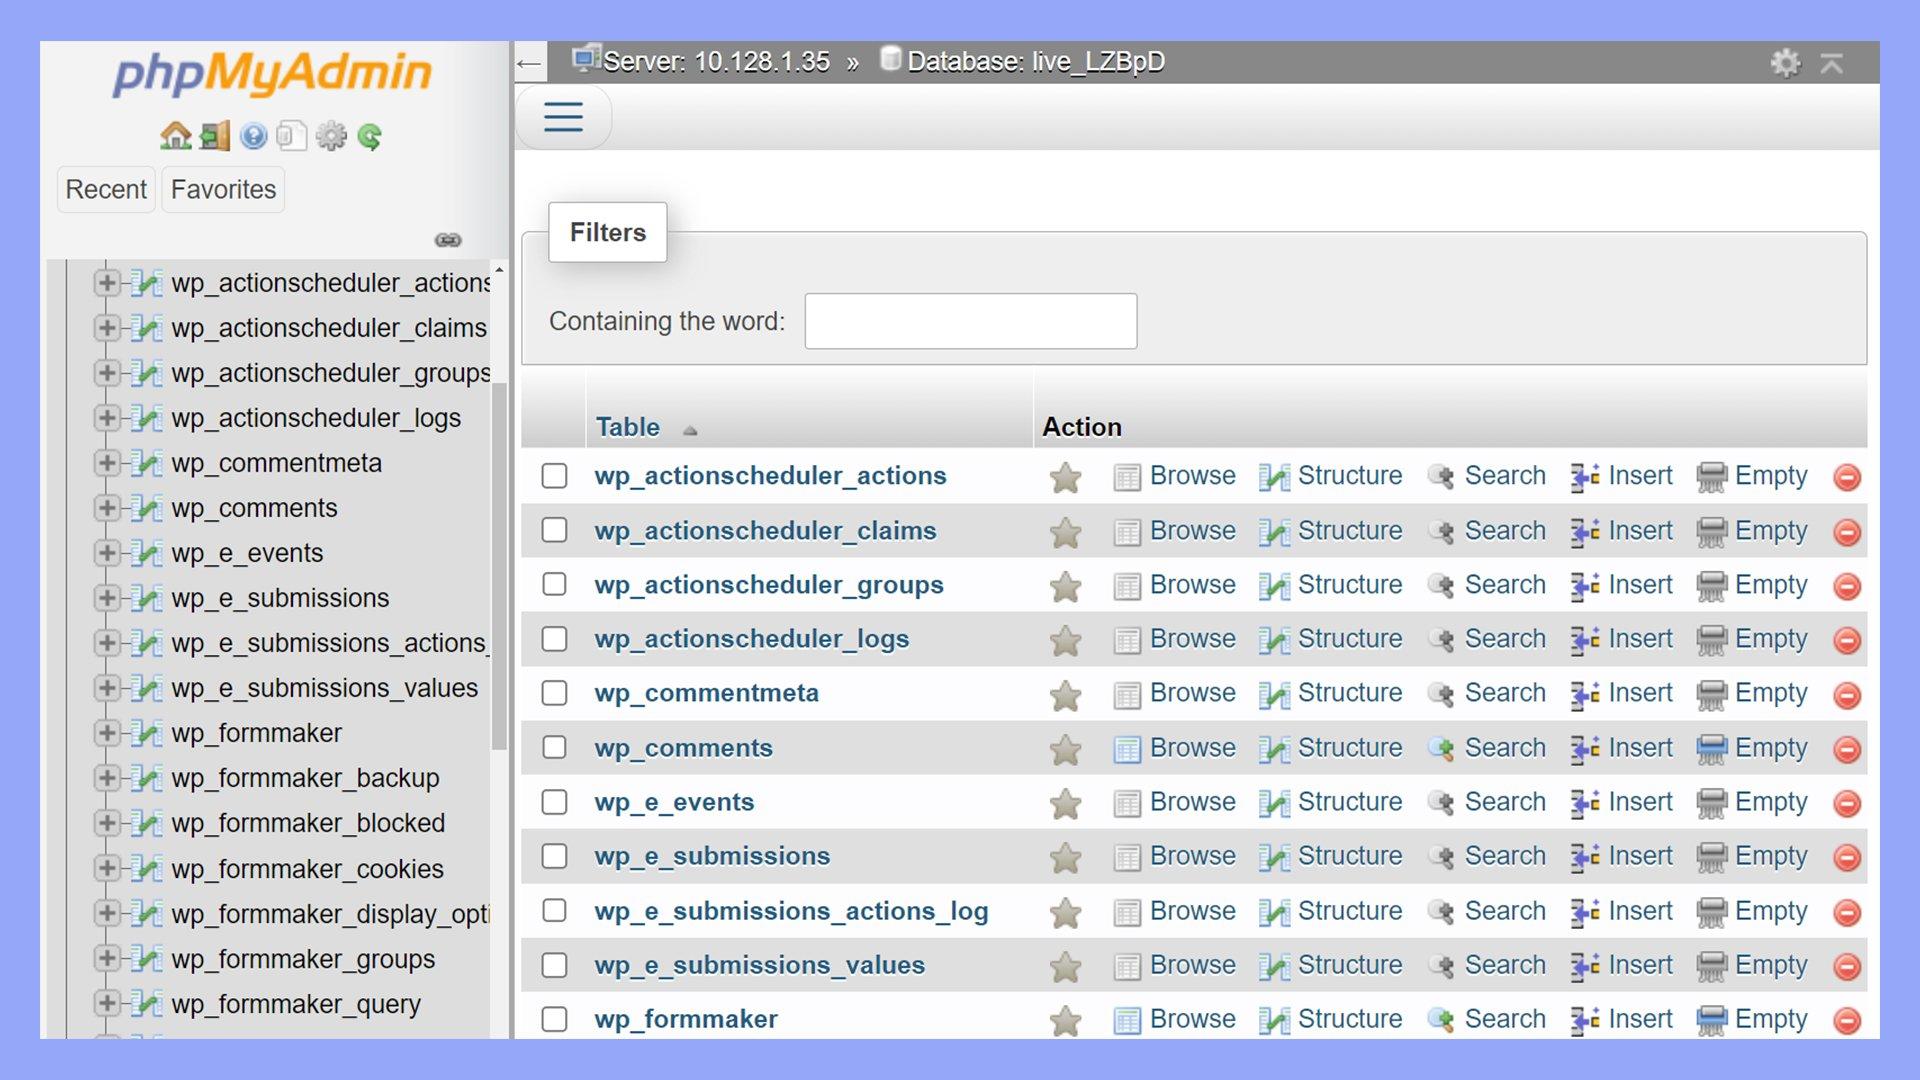
Once your database is created, you can easily manage it through phpMyAdmin. Here’s a handy table summarizing key actions:
| Action | Description |
|---|---|
| Create Database | Establish a new database for your WordPress site. |
| Drop Database | Delete an existing database if no longer needed. |
| Export Database | Backup your database by exporting it for safekeeping. |
| Import Database | Restore a database by importing a previously exported file. |
With your new database in place, you are one step closer to installing WordPress. When prompted during the WordPress setup, enter the database name you just created, along with the default user credentials (usually root with no password). This information connects your WordPress site to the database, enabling it to function seamlessly. Take pride in your progress—your local WordPress site is about to come to life!
Installing WordPress: A Step-by-Step Walkthrough
Setting up WordPress locally using XAMPP is an empowering experience that allows you to experiment and hone your skills without the pressure of a live environment. Here’s how to get started:
First, ensure you have XAMPP installed on your machine. If you haven’t done this yet, follow these steps:
- Download the latest version of XAMPP from the Apache Friends website.
- Run the installer and choose the components you want to install. Be sure to include Apache, MySQL, and PHP.
- Follow the installation prompts and launch XAMPP after installation.
Once XAMPP is up and running, you need to create a new database for your WordPress installation. Here’s how:
- Open your web browser and type localhost/phpmyadmin in the address bar.
- Click on the “Databases” tab.
- Enter a name for your new database (e.g., wordpress_db) and click “Create”.
Next, it’s time to download WordPress. This is a straightforward process:
- Visit the WordPress download page.
- Download the latest version of WordPress as a .zip file.
- Extract the .zip file and move the folder to C:xampphtdocs.
Now you’re ready to install WordPress:
- Open your web browser and access your local site by typing localhost/wordpress (or the name of your folder).
- Choose your language and click “Continue.”
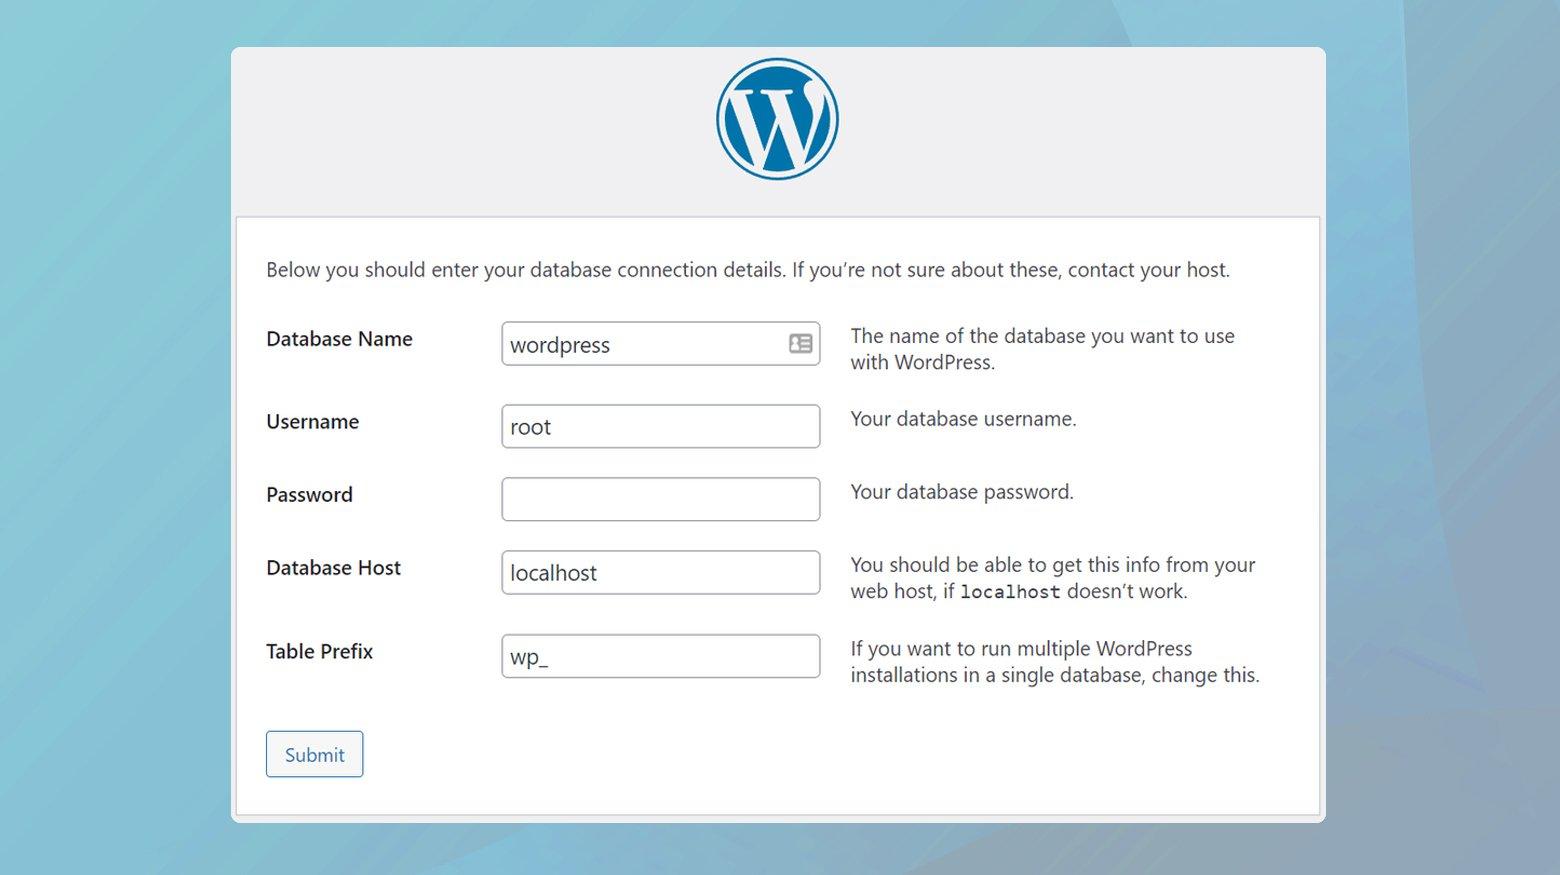
- On the next screen, enter the database details:
| Field | Value |
|---|---|
| Database Name | wordpress_db |
| Username | root |
| Password | (leave blank) |
| Database Host | localhost |
| Table Prefix | wp_ |
Once you fill in these details and click “Submit,” you will be guided through the rest of the installation process. Simply follow the prompts to set up your site title, username, and password. And just like that, you’ll have your very own local WordPress installation ready for exploration!
Configuring Your wp-config.php File Like a Pro
Once you’ve set up your local WordPress installation using XAMPP, it’s time to dive into the wp-config.php file. This essential configuration file controls the behavior of your WordPress site, ensuring everything runs smoothly. By tweaking a few settings, you can enhance your site’s security, optimize performance, and even improve your development workflow.
Here are some key elements you should consider customizing:
- Database Settings: Ensure that your database name, username, and password are correctly set. By default, XAMPP uses ‘root’ as the username with no password. Your database settings might look like this:
define('DB_NAME', 'your_database_name');
define('DB_USER', 'root');
define('DB_PASSWORD', '');
define('DB_HOST', 'localhost');
After you’ve made those changes, consider enabling debug mode. This will help you catch errors during development. Add the following line:
define('WP_DEBUG', true);
Another critical adjustment is to enhance your site’s security. Change your authentication keys and salts to strengthen user sessions and cookies. You can generate unique keys at the WordPress secret key generator. Replace the default values in your wp-config.php with the newly generated ones:
define('AUTH_KEY', 'put your unique phrase here');
define('SECURE_AUTH_KEY', 'put your unique phrase here');
define('LOGGED_IN_KEY', 'put your unique phrase here');
define('NONCE_KEY', 'put your unique phrase here');
define('AUTH_SALT', 'put your unique phrase here');
define('SECURE_AUTH_SALT', 'put your unique phrase here');
define('LOGGED_IN_SALT', 'put your unique phrase here');
define('NONCE_SALT', 'put your unique phrase here');
for performance optimization, consider setting the following constants to control memory limits and cache behavior:
- Memory Limit: Increase the memory limit to ensure smoother operation, especially if you plan to use resource-intensive themes or plugins.
- Cache Control: Define cache settings to speed up your site during development phase.
define('WP_MEMORY_LIMIT', '256M');
define('WP_CACHE', true);
By customizing your wp-config.php file, you’re not just configuring your site; you’re paving the way for a more secure and efficient local WordPress development environment. Don’t be afraid to experiment with these configurations to find the perfect settings that work for you!
Exploring Localhost: Accessing Your New Site
Once you have successfully installed WordPress on XAMPP, it’s time to dive into your local development environment. Accessing your new site is straightforward and an exciting step in your journey. By default, you can view your WordPress site by navigating to your web browser and entering http://localhost/wordpress, assuming you installed WordPress in the “wordpress” directory of XAMPP.
Here are a few tips to ensure smooth access:
- Start XAMPP: Before accessing your site, make sure that the XAMPP Control Panel is running. You need to start both Apache and MySQL modules. If these aren’t running, your site won’t load.
- Check Your Database: If you encounter issues, double-check that you set up your database correctly in phpMyAdmin. Ensure that the database name matches what you used in the
wp-config.phpfile. - Clear Your Cache: Occasionally, your browser may cache old files. If your site doesn’t show the latest changes, try clearing your browser cache or check in an incognito window.
As you explore your site, familiarize yourself with the WordPress dashboard, where you can manage posts, pages, and settings. This vibrant interface gives you access to a wide variety of customization options, allowing you to tailor your site to your needs. Here’s a breakdown of some essential sections:
| Dashboard Section | Purpose |
|---|---|
| Posts | Create and manage your blog posts. |
| Pages | Build static pages like About Us or Contact. |
| Appearance | Customize your theme and layout. |
| Plugins | Add functionality to your site. |
| Settings | Adjust site preferences and configurations. |
Experiment with adding new posts and pages. Try out different themes and plugins to see how they affect your site’s appearance and functionality. Remember, this is your local environment; feel free to make mistakes and learn from them! The beauty of working locally is that you can perfect your site before it goes live.
Lastly, don’t hesitate to reach out to the vast WordPress community. Countless forums and resources are available to help you troubleshoot issues or enhance your skills. Enjoy the process of building and exploring your new WordPress site!
Troubleshooting Common Installation Issues
Encountering problems during your WordPress installation on XAMPP can be frustrating, but many of these issues have straightforward solutions. Below are some common hiccups and their fixes to help you get your local WordPress site up and running smoothly.
1. XAMPP Not Starting
If XAMPP won’t start, it might be due to port conflicts. Check if another application is using the same ports (like Apache on port 80). Here’s how to troubleshoot:
- Open the XAMPP Control Panel.
- Click on the ‘Config’ button next to Apache and open
httpd.conf. - Look for the line
Listen 80and change it toListen 8080(or another port). - Do the same for the line
ServerName localhost:80.
2. Database Connection Error
A common error encountered is the “Error establishing a database connection.” This usually means that the database details in your wp-config.php file are incorrect. Ensure you have the following:
- Database name matches the one you created in phpMyAdmin.
- Username is set to
root(unless you have a different user setup). - Password is empty by default for XAMPP.
3. White Screen of Death
This infamous blank page can be caused by various factors, including plugin conflicts or PHP errors. To address this:
- Disable all plugins by renaming the
pluginsfolder inwp-content. - Switch to a default theme by renaming your active theme folder.
- Enable debugging by adding
define('WP_DEBUG', true);in yourwp-config.phpfile to see the error messages.
4. PHP Version Compatibility
Make sure that your version of PHP is compatible with the version of WordPress you are trying to install. As of now, WordPress recommends PHP 7.4 or higher. To check and change your PHP version in XAMPP:
- Open the XAMPP Control Panel.
- Click on the ‘Config’ button next to Apache and open
php.ini. - Check the current version and consider updating if it’s below the recommended version.
If issues persist, consult the XAMPP and WordPress support forums for additional insights. Chances are, someone else has faced the same problem and can guide you to a solution!
Making the Most of Your Local WordPress Environment
Once you have WordPress installed on XAMPP, the real fun begins! You can explore, experiment, and create without worrying about any consequences affecting a live site. Here’s how to really make the most of your local WordPress environment:
- Experiment with Themes: Browse through free and premium themes, install them, and test how they look with your content. This is a great opportunity to see which design elements resonate with you and your audience.
- Plugin Playground: Install various plugins to see what features you can integrate. Whether it’s SEO tools, social media enhancements, or eCommerce capabilities, this is your chance to play around without limits.
- Create Custom Post Types: Dive into custom post types and taxonomies. This can enhance your site structure and make it more tailored to specific content needs.
- Build and Test Forms: Use plugins like Contact Form 7 or WPForms to create interactive forms. This can help you understand user engagement and data collection.
- Learn to Debug: Familiarize yourself with debugging tools in WordPress to troubleshoot common issues. Understanding how to debug can save you time and headaches in the future.
In addition to these fun activities, don’t underestimate the power of content creation. Use your local environment to:
- Write and Organize Content: Develop your blog posts and pages, organizing them in a way that makes sense for your site structure.
- Practice SEO Techniques: Familiarize yourself with on-page SEO tactics, like using proper meta tags and optimizing images.
- Utilize Analytics: Set up Google Analytics locally to track how visitors would interact with your site if it were live. Although the data will be limited, it’s a great way to practice.
To help you keep track of your project, consider creating a simple table to outline your progress:
| Task | Status | Notes |
|---|---|---|
| Choose Theme | In Progress | Testing two options |
| Install Plugins | Completed | SEO and forms added |
| Create Content | Pending | Outline drafted |
By utilizing your local WordPress environment effectively, you not only enhance your development skills but also set the stage for a successful live site launch. Remember, this is a sandbox for your creativity, so don’t hold back!
Ready to Go Live? Transitioning from Local to Online
Transitioning from a local development environment to an online platform is an exciting step for any budding website creator. You’ve spent hours configuring your WordPress site on XAMPP, and now it’s time to share your creation with the world. This leap can feel daunting, but with a few straightforward steps, you can make the process seamless and stress-free.
First, ensure you have a reliable web hosting service selected. Not all hosts are created equal, so consider the following factors when making your choice:
- Performance: Choose a host with fast servers to ensure your site loads quickly.
- Support: Look for 24/7 customer support to assist with any potential issues.
- Scalability: Make sure the host can grow with your site if you anticipate increased traffic.
- Backup Solutions: Opt for hosts that offer automatic backup services for peace of mind.
Once you’ve secured a hosting provider, the next step is to transfer your local WordPress files to the server. This typically involves:
- Exporting your local database using phpMyAdmin.
- Importing the database into your online server’s phpMyAdmin.
- Uploading your WordPress files from your local XAMPP directory to the server via FTP.
- Updating the wp-config.php file with your new database credentials.
After you’ve completed these steps, be sure to check your website’s functionality. The transition can sometimes lead to broken links or missing images, so it’s crucial to run a thorough check. Consider using a tool like the Broken Link Checker to easily identify issues.
don’t forget to configure your permalinks and set up essential plugins, such as SEO and caching tools, to enhance your site’s performance. By following these guidelines, you can confidently take your local WordPress site live, ready to engage visitors and showcase your hard work.
Frequently Asked Questions (FAQ)
Q&A: How to Install WordPress on XAMPP Locally – Beginner’s Guide
Q: Why should I install WordPress on XAMPP locally?
A: Installing WordPress on XAMPP locally is a fantastic way to dip your toes into web development without any risks. It allows you to experiment, learn, and create your own website right on your computer. Plus, it’s free! You can test themes, plugins, and customizations without worrying about affecting a live site.
Q: What is XAMPP, and why do I need it?
A: XAMPP is a free, open-source cross-platform web server solution stack package. It makes it super easy to set up a local server on your computer to run PHP applications like WordPress. Think of it as a cozy little home for your website where you can build and play around without the need for an internet connection.
Q: What do I need to get started?
A: To get started, you’ll need to download and install XAMPP, which is compatible with Windows, Mac, and Linux. You’ll also need the latest version of WordPress, which you can download from the official website. A bit of patience and eagerness to learn will go a long way, too!
Q: Is the installation process complicated?
A: Not at all! The installation process is straightforward and user-friendly. With our step-by-step guide, you’ll be up and running in no time! If you can follow simple instructions, you can definitely set up WordPress locally on XAMPP.
Q: What are the steps to install WordPress on XAMPP?
A: Here’s a quick overview of the steps:
- Download and install XAMPP on your computer.
- Start the XAMPP Control Panel and initiate the Apache and MySQL modules.
- Create a database for your WordPress site using phpMyAdmin.
- Download WordPress and extract it into the XAMPP’s ‘htdocs’ folder.
- Configure wp-config.php to connect WordPress to your database.
- Run the WordPress installation wizard by navigating to your local site in a web browser.
Q: Do I need any coding skills to set this up?
A: Not at all! The beauty of WordPress is that it’s designed for everyone, not just tech-savvy folks. You don’t need coding skills to install it on XAMPP. Just follow our guide, and you’ll be amazed at how easy it is!
Q: What if I run into issues during installation?
A: Don’t worry! It’s completely normal to hit a few bumps along the way. Our guide includes troubleshooting tips for common issues. Plus, there’s a vast community of WordPress users and forums out there that can offer support and advice.
Q: Can I use my local WordPress site for real projects eventually?
A: Absolutely! Once you’re comfortable with your local setup, you can easily migrate your site to a live server when you’re ready. This local development environment is a great way to perfect your site before sharing it with the world.
Q: What next after I install WordPress on XAMPP?
A: Once your WordPress site is up and running, the sky’s the limit! You can start customizing your site, exploring themes and plugins, and even creating content. This is your playground—learn, experiment, and have fun!
Q: Why should I choose this method over other hosting options?
A: Installing WordPress locally with XAMPP saves you money and allows for a risk-free environment to learn and grow. It’s perfect for beginners who want to explore without the pressure of going live. Plus, you have complete control over your development process!
Q: Ready to start your WordPress journey?
A: Absolutely! With our guide in hand, you’re all set to embark on your WordPress adventure. Dive in, enjoy the process, and watch your skills flourish. Happy blogging!
The Conclusion
And there you have it! Installing WordPress on XAMPP locally might seem daunting at first, but as you’ve seen, it’s a straightforward process that opens up a world of possibilities for your web development journey. Whether you’re looking to build your portfolio, test themes, or experiment with plugins, having a local WordPress environment is an essential skill for any budding developer or hobbyist.
Now that you’ve followed our step-by-step guide, take some time to explore and customize your local site. Dive into the vast ocean of themes and plugins, and don’t hesitate to get creative! Remember, the more you practice, the more confident you’ll become.
If you have any questions or run into any hiccups along the way, don’t hesitate to reach out to the community. There are countless resources and forums filled with helpful folks ready to assist you.
So, what are you waiting for? Go ahead and unleash your creativity! Your WordPress journey starts now, and the possibilities are endless. Happy blogging!