Are you concerned about the security of your WordPress site? If so, you’re not alone. Many website owners are increasingly wary of the potential risks associated with the WordPress REST API, which, while powerful and useful for developers, can also expose your site to vulnerabilities. The good news is that you have the power to control access to this feature. In this article, we’ll explore two expert-tested methods for disabling the WordPress REST API, empowering you to enhance your site’s security without sacrificing performance. Whether you’re a seasoned developer or a beginner, these straightforward techniques will help you safeguard your valuable content and keep unwanted intruders at bay. Let’s dive in and take charge of your WordPress security!
Understanding the Importance of Disabling the WordPress REST API
Disabling the WordPress REST API can be a crucial step for enhancing your website’s security. The REST API is a powerful feature that allows developers to interact with your WordPress site remotely, but this capability can also expose your site to vulnerabilities. When left enabled, it can serve as a potential entry point for malicious actors looking to exploit weaknesses in your site’s architecture.
Consider the following reasons for taking action:
- Enhanced Security: Limiting access to the REST API can reduce the risk of unauthorized data exposure and attacks, such as brute force attempts or data harvesting.
- Control Over Data: By disabling the API, you gain better control over who can access your content. This is particularly important for membership sites or those dealing with sensitive information.
- Performance Improvement: Disabling unnecessary features may lead to improved site performance, as it reduces the overhead associated with API requests.
Additionally, keep in mind that certain plugins or themes may rely on the REST API to function correctly. Therefore, it’s essential to assess your website’s specific needs before proceeding. If you decide to disable it, ensure that your critical functionalities remain intact, perhaps by conducting thorough testing or consulting with a developer.
For those who are concerned about inadvertently breaking their site, there are ways to selectively disable the REST API. You can restrict access based on user roles, allowing only trusted users or administrators to interact with it. This approach maintains the benefits of the API for your team while minimizing exposure to outside threats.
Ultimately, understanding the implications of the REST API is vital in making an informed decision. By taking proactive measures, you can safeguard your website without sacrificing its functionality. Evaluate your security needs and consider whether disabling the REST API aligns with your overall website strategy.

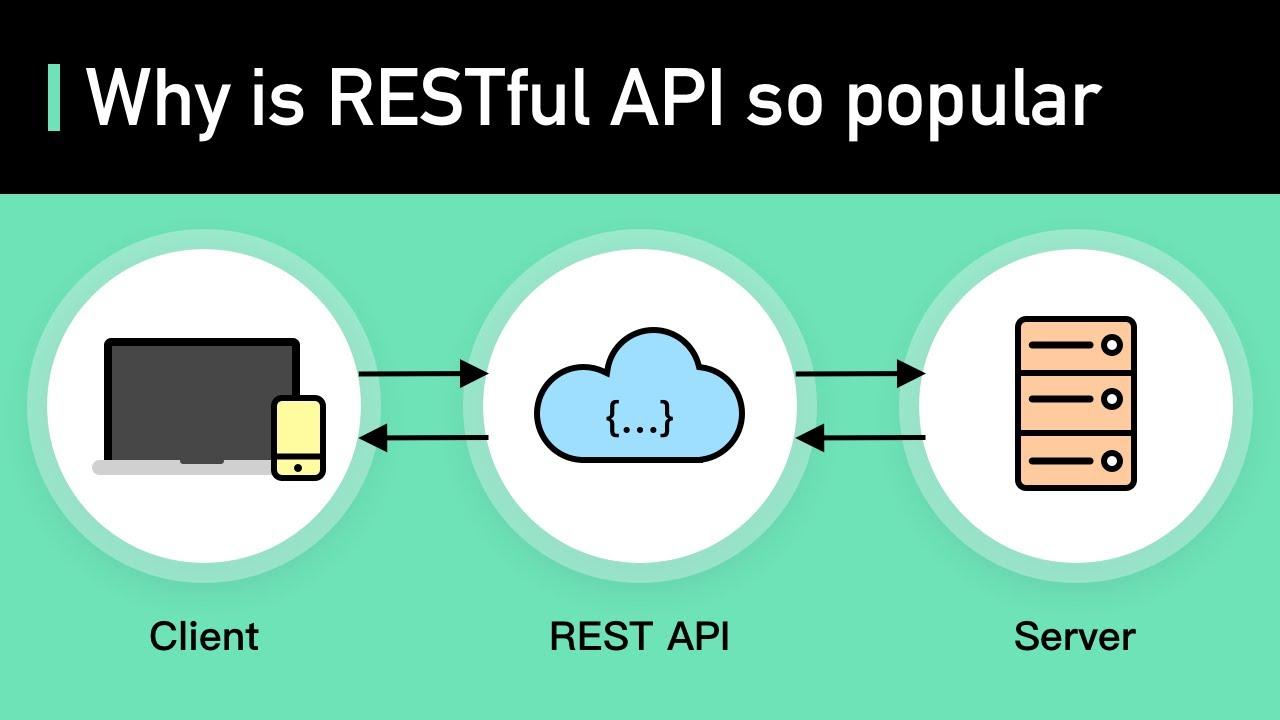
Exploring the Security Risks of an Open REST API
The open nature of a REST API can facilitate seamless integration and enhance functionality, but it also introduces a range of security risks that website owners must take seriously. One of the most significant concerns is unauthorized access to sensitive data. With an open REST API, malicious actors can exploit endpoints to gain access to user information, including personal data and credentials.
Another pressing risk is the potential for abuse through DoS attacks (Denial of Service). Attackers can overwhelm your API with excessive requests, leading to performance degradation or complete outages. This not only affects the functionality of your website but can also damage your brand’s reputation and user trust.
Additionally, the lack of proper authentication mechanisms can expose your API to vulnerabilities. If your endpoints are accessible without robust authentication and authorization processes, it opens the door for exploitation. Attackers can perform actions as if they were legitimate users, leading to data manipulation or even complete site takeover.
To mitigate these risks, it’s crucial to implement strict controls and limitations on your REST API. Here are a few measures to consider:
- Implement API Authentication: Use OAuth or JWT (JSON Web Tokens) to secure access to your API.
- Rate Limiting: Set thresholds on how many requests can be made to the API within a certain timeframe.
- Data Validation: Ensure that all inputs to the API are validated and sanitized to prevent injection attacks.
By understanding these risks and taking appropriate steps to secure your API, you can significantly reduce your exposure to potential threats while enjoying the benefits of an open REST API. Remember, security is not a one-time effort but an ongoing process that requires regular updates and vigilance.
Expert Method One: Using a Simple Plugin to Disable the REST API
If you’re looking for a quick and effective way to disable the WordPress REST API, utilizing a plugin is one of the simplest methods available. There are several plugins specifically designed for this purpose, allowing you to manage your website’s functionality without diving deep into code. Here’s how to get started:
- Choose a plugin: Look for reputable plugins like Disable REST API or WP Disable. These are well-rated and user-friendly.
- Install the plugin: Navigate to your WordPress dashboard, go to Plugins > Add New, and search for your chosen plugin. Click Install Now and then Activate.
- Configure settings: After activation, locate the plugin in the settings menu. Most plugins will provide a simple toggle or checkbox to disable the REST API.
Once you have configured the settings, the REST API will be disabled, enhancing your site’s security by limiting access to sensitive data. It’s important to note that some plugins may still rely on the REST API for functionality, so ensure you test your site thoroughly after making these changes. This step is crucial, especially if you rely on other plugins that might interact with the API.
If you’re concerned about performance and maintaining compatibility with other functionalities, many of these plugins allow you to selectively disable the REST API for specific user roles or endpoints. This flexibility ensures you can keep the API functional for plugins that require it while protecting your site from unwanted access.
In essence, using a plugin to disable the REST API is a straightforward approach that many WordPress users appreciate. It not only simplifies the task but also provides an added layer of security with minimal effort. Just remember to regularly update the plugin to ensure you maintain maximum security and compatibility.
How to Configure Your Plugin for Maximum Security
Ensuring your WordPress plugin is configured for maximum security is essential in protecting your website from unwanted intrusions. Here are some effective strategies you can implement:
- Keep Your Plugin Updated: Regular updates often include security patches that fix vulnerabilities. Make it a habit to check for updates and apply them promptly.
- Limit Access: Use user roles wisely. Grant access only to those who need it and restrict permissions for lower-level users. This minimizes the risk of unauthorized changes or data breaches.
- Utilize Nonces: Nonces are unique tokens that help protect URLs and forms from misuse. Make sure your plugin generates and checks these tokens for form submissions and sensitive actions.
Additionally, you should consider configuring your plugin’s API settings effectively:
| Setting | Description |
|---|---|
| Disable REST API Access | Prevent unauthorized users from making requests to your API. |
| Enforce Authentication | Require authentication for accessing sensitive endpoints. |
Monitoring and logging are also crucial components of a security strategy. Implement logging features within your plugin to track changes and user activity, which can help you identify suspicious behavior quickly. You can use plugins that offer logging capabilities or integrate logging directly into your plugin code.
Lastly, consider implementing security headers such as X-Content-Type-Options and X-Frame-Options. These headers can help mitigate certain types of attacks, including clickjacking and MIME type sniffing. By layering these security measures, you can significantly enhance the resilience of your WordPress plugin.
Expert Method Two: Custom Code to Disable the REST API
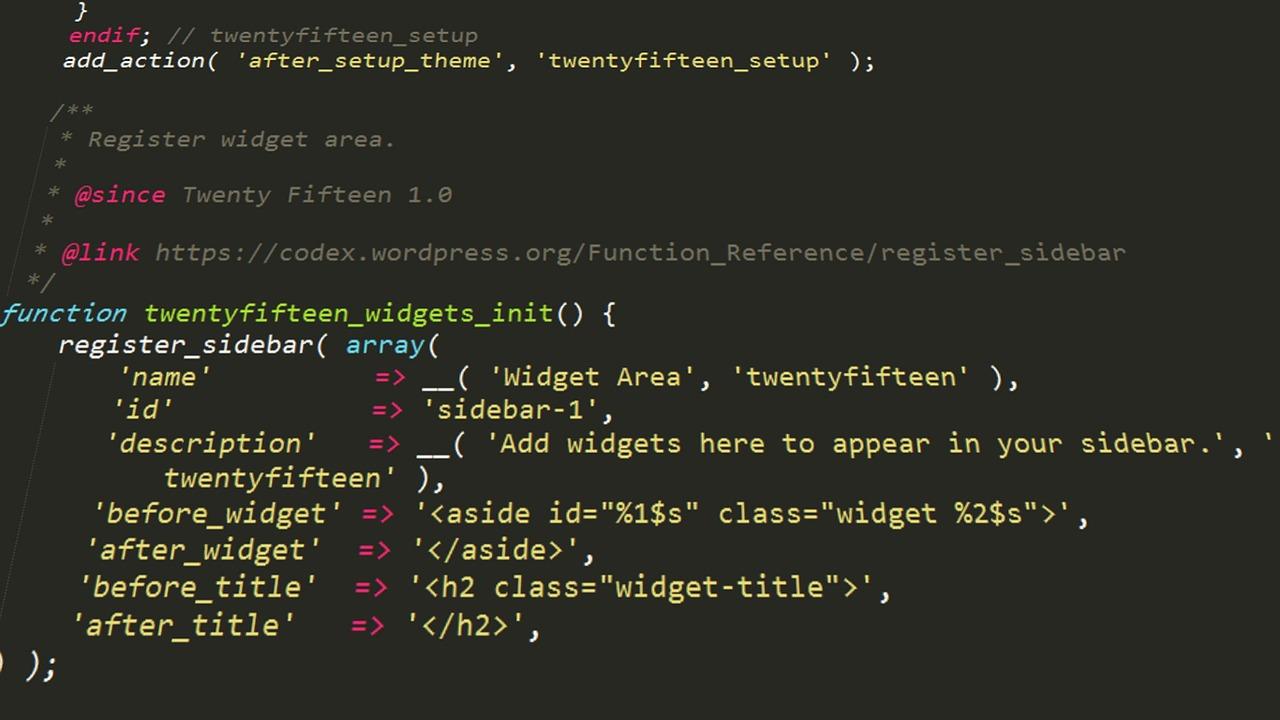
If you’re looking to take a more hands-on approach to disable the WordPress REST API, custom coding offers a powerful solution. By adding a few lines of code to your theme’s functions.php file, you can effectively shut down access to the REST API, ensuring only the visitors and users you want can interact with it. Here’s how to get started.
First, you’ll want to access your WordPress dashboard and navigate to the Appearance section. From there, click on Theme Editor, and locate the functions.php file in the right-hand sidebar. Before making any changes, it’s wise to create a backup of this file. Making a mistake here could lead to errors on your site, so proceed with caution!
Next, you can insert the following code snippet in your functions.php file:
// Disable the REST API for non-logged in users
add_filter('rest_authentication_errors', function($result) {
    if (!is_user_logged_in()) {
        return new WP_Error('rest_not_logged_in', __('You are not allowed to access the REST API.'), array('status' => 401));
    }
    return $result;
});
This code checks if a user is logged in before granting access to the REST API. If they aren’t, it returns a 401 error, effectively blocking them. This is a straightforward yet powerful method to ensure that only authenticated users can interact with your site’s API endpoints.
In addition to this, you can further enhance your security by disabling specific REST API features. For instance, you might want to disable access to certain endpoints entirely. Here’s how you can achieve that:
// Disable specific REST API endpoints
add_action('rest_api_init', function() {
    remove_action('rest_api_init', 'create_initial_rest_routes', 0);
});
By incorporating these snippets, you’ll not only strengthen your website’s defenses but also retain full control over who can access your site’s data. Remember, custom coding gives you the flexibility to tailor your site’s functionality to meet your unique needs, ensuring it remains a safe space for your visitors.
Step-by-Step Guide to Adding Code in Your Theme’s Functions.php
Adding code to your theme’s functions.php file can be a powerful way to customize your WordPress site. Here’s how to do it safely and effectively:
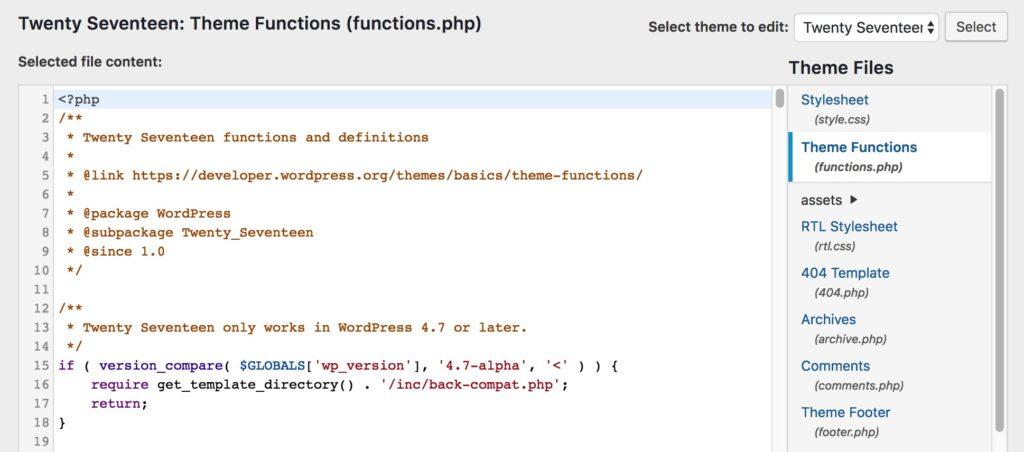
- Access Your Theme Files: Log in to your WordPress dashboard, navigate to Appearance > Theme Editor. Here, you’ll find a list of files on the right side, including
functions.php. - Backup Your Site: Before making any changes, it’s crucial to back up your website. You can use plugins like UpdraftPlus or BackupBuddy to ensure you can restore your site if something goes wrong.
- Add Your Code: Scroll to the bottom of the
functions.phpfile. Place your custom code above the line that says?>(if it exists). Ensure your code is wrapped in the appropriate PHP tags:and?>. - Save Changes: After pasting your code, click the Update File button. This will save your changes to the
functions.phpfile. - Test Your Site: Visit your website to ensure everything is functioning correctly. If you encounter issues, you may need to revert to your backup.
Here’s a quick reference table for common code snippets that you might want to add:
| Action | Code Snippet |
|---|---|
| Disable REST API | add_filter('rest_authentication_errors', function() { return new WP_Error('rest_disabled', 'REST API is disabled', array('status' => 403)); }); |
| Remove Admin Bar for All Users | add_filter('show_admin_bar', '__return_false'); |
| Disable Emoji Script | remove_action('wp_head', 'print_emoji_detection_script', 7); |
Remember, the functions.php file is theme-specific. If you switch themes, you’ll need to reapply any custom code. If you’re looking for a more permanent solution, consider creating a child theme to preserve your changes. Happy coding!
Testing Your Changes: Ensuring the REST API is Disabled
Once you've implemented the necessary changes to disable the WordPress REST API, it's crucial to ensure that these modifications are functioning correctly. Testing your changes is not just about confirming that the API is off; it’s about verifying that your website remains robust and that everything runs smoothly without it.
Here are some effective methods to verify that the REST API has been successfully disabled:
- Use Postman: This powerful tool allows you to send requests to your API endpoints. Simply enter your site’s URL followed by
/wp-json/and observe the response. If you’ve done it right, you should encounter a 404 error or a similar message indicating that the endpoint is no longer accessible. - Browser Inspection: Navigate to your website and open the browser's developer tools. Check the console for any log messages related to the REST API. If everything is working as it should, you won’t see any messages indicating the API is still active.
- Check for Plugin Interference: Sometimes, other plugins might depend on the REST API. Disable all plugins temporarily and re-enable them one by one to see if any are causing unexpected behavior related to the API.
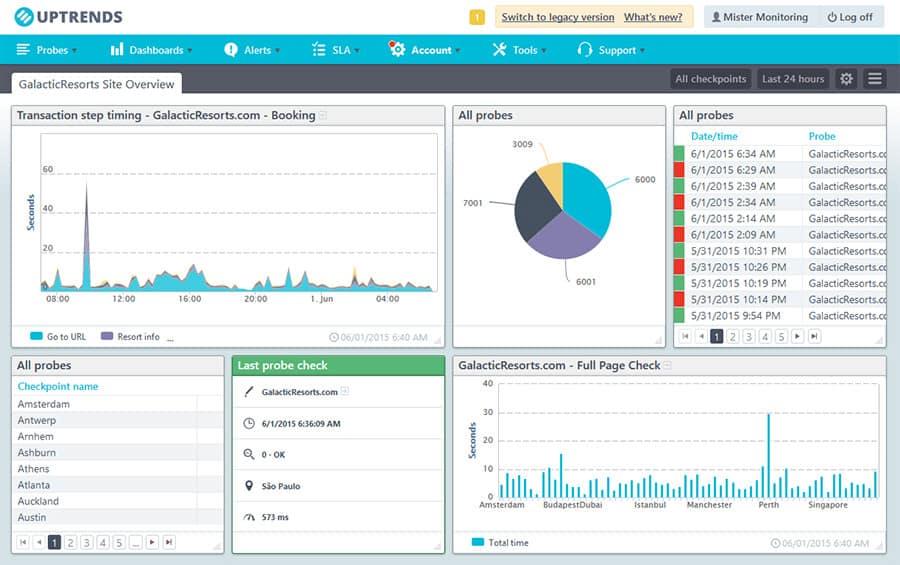
It’s also a good idea to monitor your website’s performance post-disabling. Use tools like Google PageSpeed Insights or GTmetrix to analyze load times and overall efficiency. A drop in performance could indicate that something is amiss with your site’s architecture after the API has been disabled.
Lastly, it’s wise to inform your team or clients about this change. Make sure they are aware of the new limitations and how it might affect certain functionalities. This proactive communication can prevent confusion down the line, especially if they attempt to use features that rely on the REST API.
By following these methods and keeping an eye on your site’s health, you can be confident that disabling the REST API was a successful move towards improving your WordPress site's security and performance.
Monitoring for Issues After Disabling the REST API
After you’ve taken the crucial step of disabling the REST API in your WordPress site, it’s essential to keep a keen eye on its performance and functionality. While many users disable the API for security purposes, it’s important to monitor for any unexpected issues that may arise post-implementation. Here are a few strategies to ensure your site runs smoothly:
- Regularly Check Website Functionality: Test essential features like comment posting, plugin functionalities, and any AJAX-based operations. Ensure everything is working as intended without the REST API.
- Monitor Site Performance: Use tools like Google PageSpeed Insights or GTmetrix to keep track of your site’s loading speed and responsiveness. A sudden drop in performance could indicate conflicts caused by disabling the API.
- Review Error Logs: Regularly check your server and WordPress error logs for any unexpected warnings or errors. Issues stemming from plugin or theme incompatibility may not surface immediately.
In addition to functionality checks, consider keeping track of user interactions. This can help you identify any areas where users may face challenges, such as:
| User Interaction | Potential Issue | Resolution |
|---|---|---|
| Form Submissions | Forms not processing | Check for JavaScript errors or fallback methods. |
| Commenting | Users unable to comment | Ensure comment features are not reliant on REST functions. |
| Plugin Features | Incompatibility | Update plugins or find alternatives that don't require the REST API. |
gather feedback from your users. It’s vital to listen to their experiences, as they can provide insights that you may not discover through technical monitoring alone. Encourage users to report any issues they might encounter, and address them promptly. This proactive approach not only helps in maintaining a high-quality user experience but also reinforces trust with your audience.

Final Thoughts: Weighing the Benefits of Disabling the REST API
When considering whether to disable the REST API in WordPress, it's essential to weigh the pros and cons carefully. While the REST API offers powerful capabilities for developers and enhances the overall functionality of WordPress, there are scenarios where disabling it might be beneficial for your site’s security and performance. Here are some factors to consider:
- Enhanced Security: By disabling the REST API, you can potentially reduce exposure to vulnerabilities that may be exploited by malicious users. This is particularly significant for sites that do not use any plugins or themes relying on REST API features.
- Performance Improvements: For certain websites, especially those with limited server resources, disabling the REST API could lead to a decrease in unnecessary requests, improving load times and overall performance.
- Control Over Data Access: Disabling the REST API can help you maintain tighter control over who can access and use your WordPress site’s data, which is crucial for sites that handle sensitive information.
However, it's essential to recognize that disabling the REST API might come with its own set of challenges. For instance, websites that rely on modern JavaScript frameworks, mobile applications, or specific plugins may experience functionality issues if the API is turned off. Therefore, before making a decision, consider the following:
| Factor | Enable REST API | Disable REST API |
|---|---|---|
| Security | Potentially higher risk | Lower risk of exposure |
| Site Functionality | Full access to features | Limited functionality |
| Performance | May slow down under heavy load | Possible speed increase |
| Developer Flexibility | Enhanced integration options | Reduced integration capabilities |
In essence, the decision to disable the REST API should align with your site's specific needs and goals. If you prioritize security and have a straightforward website that doesn’t rely heavily on external integrations, disabling the API may serve you well. Conversely, if your site thrives on interactivity and integrates with other platforms, keeping the REST API enabled might be the way forward. Always remember to assess the unique dynamics of your website before implementing such changes.
Frequently Asked Questions (FAQ)
Sure! Here’s a Q&A format for an article titled "How to Disable WordPress REST API (2 Expert-Tested Ways)" that maintains a persuasive and conversational tone:
Q1: Why would I want to disable the WordPress REST API?
A1: Great question! The WordPress REST API is a powerful feature that allows developers and applications to interact with your site. However, it can also expose your site to potential vulnerabilities if not managed properly. By disabling it, you can enhance your site’s security, especially if you don’t need any external applications to interact with it. Plus, if you’re looking to streamline your site’s performance, disabling unnecessary features can help. It’s all about taking control!
Q2: Are there different methods to disable the REST API?
A2: Absolutely! In fact, there are two expert-tested methods that we recommend. The first involves adding a simple code snippet to your theme’s functions.php file, while the second utilizes a plugin for those who prefer a no-code solution. Both methods are effective, but your choice might depend on how comfortable you are with coding or managing plugins.
Q3: Can you walk me through the code method?
A3: Of course! Here’s how it works: you’ll add a snippet of code to your theme’s functions.php file. This code will effectively block access to the REST API for unauthorized users. Just make sure to back up your site before making changes! It’s a straightforward process, and once you’re done, you’ll have peace of mind knowing that the REST API is disabled.
Q4: What about the plugin method? Is it easy to set up?
A4: Yes, it’s incredibly easy! If coding isn’t your thing, using a plugin is the way to go. There are several plugins available specifically designed to disable the REST API. Simply install your chosen plugin, activate it, and voilà! You’re all set. This method is perfect if you want to manage your site with minimal fuss while still boosting security.
Q5: Will disabling the REST API affect my site’s functionality?
A5: It can, but it really depends on your site's needs. If you’re using themes or plugins that rely on the REST API for features like real-time updates or external integrations, you might experience some limitations. However, if you're not using these features, disabling the API should have no adverse effects. Always test your site after making changes to ensure everything works smoothly!
Q6: Is it difficult to reverse these changes if I decide to re-enable the REST API?
A6: Not at all! If you’ve used the code method, simply remove the snippet from your functions.php file to re-enable the API. For the plugin method, just deactivate or uninstall the plugin. It’s as simple as that. Flexibility is key, and you can always reassess your needs as your site evolves!
Q7: Any final tips for someone considering disabling the REST API?
A7: Definitely! Before making any changes, evaluate your site's specific needs. If you're uncertain, consider consulting with a developer to weigh the pros and cons. And remember, security is an ongoing process—keep your themes and plugins updated, and regularly review your site’s settings. You’ve got this!
Feel free to adjust any part of the Q&A to better suit your article's style or focus!
Insights and Conclusions
disabling the WordPress REST API can be a crucial step in enhancing your site’s security and ensuring that your content remains private. Whether you choose to implement the code snippet method or opt for a plugin, both expert-tested techniques are straightforward and effective.
Remember, every additional layer of security you put in place is a step toward safeguarding your valuable content and user data. Don’t underestimate the power of a well-protected website!
Now that you’re equipped with these practical solutions, why not take a moment to review your site’s security settings? If you found this article helpful, consider sharing it with fellow WordPress users who could benefit from improved security practices. Together, let’s create a safer and more robust online community! If you have any questions or need further assistance, feel free to leave a comment below—we’re here to help! Happy blogging!