Are you tired of your WordPress site cluttered with featured images that don’t quite fit your aesthetic or branding? You’re not alone! Many website owners find themselves wrestling with the decision of whether to showcase a featured image on their posts. The good news is that there are simple, effective ways to hide that image without sacrificing the overall look and feel of your site. In this article, we’ll explore two easy methods to conceal your featured images, allowing you to create a cleaner, more streamlined presentation. Whether you’re aiming for a minimalist design or simply want to maintain a consistent visual style, you’ll find the perfect solution right here. Let’s dive in and transform your WordPress experience!
Understanding the Importance of Featured Images in WordPress
When it comes to crafting a compelling post on WordPress, understanding the role of featured images can significantly impact the overall aesthetics and engagement of your content. Featured images serve as the visual hook that draws readers in, providing a preview of what to expect in your article. However, there are occasions when you might want to hide these images to maintain a cleaner look or focus on the text.
Here are a few reasons why featured images are essential:
- First Impressions Matter: A striking featured image can entice readers to click on your post. It’s often the first thing they see, so it plays a crucial role in attracting attention.
- Brand Identity: Consistent use of images can help establish your brand’s visual identity, making your posts instantly recognizable.
- Social Media Sharing: Featured images are typically used when links are shared on social platforms, influencing shareability and engagement.
Nevertheless, there are times when a featured image might not align with the content you wish to present. For example, if you are creating a minimalist aesthetic or a specific type of content that doesn’t require imagery, hiding the featured image can enhance the reading experience. In such cases, it’s essential to know how to effectively manage this aspect of your posts.
Here’s a quick comparison of the two methods you can use to hide featured images:
| Method | Description |
|---|---|
| CSS Method | Add custom CSS to your theme that targets the featured image and hides it from display. |
| Plugin Method | Use a dedicated plugin that allows you to customize the visibility of featured images on a post-by-post basis. |
By understanding the importance of featured images while also recognizing when to hide them, you can enhance your WordPress content strategy. This balance allows you to leverage the visual appeal of your posts, ensuring they remain engaging and aligned with your overall message.
Why You Might Want to Hide Your Featured Image
There are several reasons why you might consider removing or hiding the featured image on your WordPress posts. While featured images can enhance a post’s visual appeal, they may not always align with your content strategy or user experience goals. Here are some compelling points to consider:
- Focus on Content: Sometimes, a featured image can distract from the main message of your post. By hiding it, you direct the reader’s attention to the content itself, making it easier for them to engage with your ideas.
- Design Consistency: If your website follows a minimalist design or if the featured image clashes with your site’s overall aesthetic, hiding it can help maintain a cohesive look and feel.
- Performance Optimization: Loading images can slow down your site’s performance. By not displaying a featured image, you can improve page load times, which is crucial for retaining visitors and boosting SEO.
- Mobile Responsiveness: On mobile devices, large images may take up valuable screen space, leading to a less enjoyable reading experience. Hiding the featured image can create a cleaner layout.
Additionally, some posts may not require a featured image at all. For instance, when you’re sharing a listicle or a text-heavy article, it may be more beneficial to keep the layout straightforward. This approach can enhance readability and user engagement. Consider the following scenarios:
| Post Type | Featured Image Needed? | Reason |
|---|---|---|
| Tutorials | No | Focus on step-by-step instructions. |
| Opinion Pieces | Sometimes | Depends on the impact of the image. |
| News Updates | No | Prioritize timely information presentation. |
| Product Reviews | Yes | Visuals enhance the product experience. |
Ultimately, the decision to hide a featured image should be guided by your unique content strategy and the needs of your audience. Remember, every element on your site should serve a purpose, and if the featured image doesn’t align with your goals, it’s perfectly acceptable to hide it and provide a cleaner, more focused reading experience.
Exploring the First Method: Using Custom CSS
If you’re looking to hide the featured image on your WordPress site without sacrificing the aesthetics or functionality of your theme, using custom CSS can be an effective solution. This method is particularly useful for those who may not be familiar with coding or who want a quick fix without delving deep into the backend of their site.
To get started, you’ll need to access the Additional CSS section in your WordPress Customizer. Here’s how:
- Log in to your WordPress dashboard.
- Navigate to Appearance and then Customize.
- Look for the Additional CSS option on the left sidebar.
- Click on it to open the CSS editor.
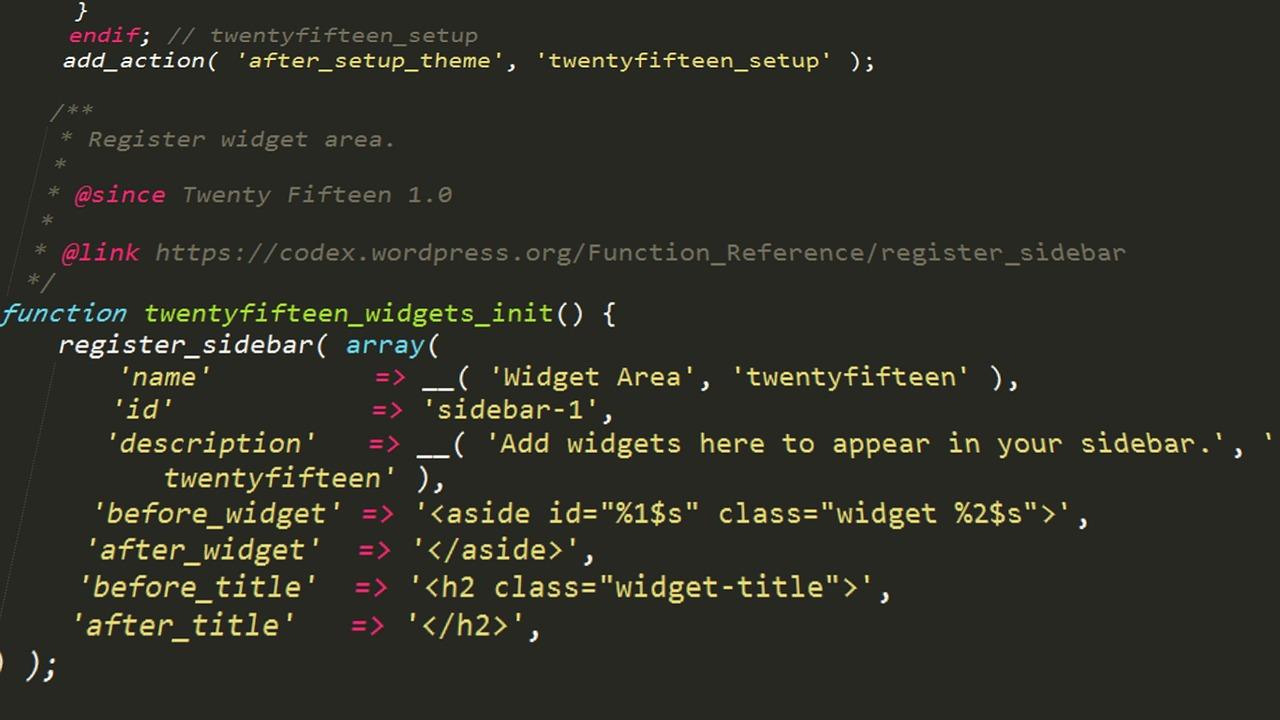
Once you’re in the editor, you can add a simple CSS rule to hide the featured image. For most themes, the following code should work:
.post-thumbnail {
    display: none;
}
This CSS snippet targets the featured image container and sets its display property to none, effectively hiding it from view. However, if your theme uses a different class or ID for the featured image, you might need to inspect the code to find the correct selector. Here’s a quick table to help you troubleshoot common class names for featured images across various themes:
| Theme | Featured Image Class |
|---|---|
| Twenty Twenty-One | .wp-block-post-featured-image |
| Astra | .ast-post-thumbnail |
| OceanWP | .post-thumbnail |
| GeneratePress | .post-image |
After adding your CSS code, make sure to click Publish to apply the changes. Refresh your site to see the featured image hidden from your posts. Remember, this method solely affects the front end; the featured image will still be present in the WordPress backend and visible in other contexts, like social sharing or RSS feeds.
Using custom CSS is a straightforward and effective way to customize your site without extensive coding knowledge. It gives you the flexibility to tailor your website’s appearance while keeping your content organized and visually appealing.
Step-by-Step Guide to Add Custom CSS in WordPress
Adding custom CSS to your WordPress site is a straightforward process that allows you to enhance the visual appeal and functionality of your website. Whether you want to hide the featured image or implement other design tweaks, custom CSS can be a powerful tool. Here’s how to do it:
- Access the WordPress Dashboard: Log in to your WordPress admin area. This is where all the magic happens!
- Navigate to the Customizer: Go to
Appearance>Customize. This will open the WordPress Customizer where you can make various design changes. - Find the Additional CSS Section: In the Customizer menu, look for the
Additional CSSoption. Click on it to open a text box where you can input your custom styles.
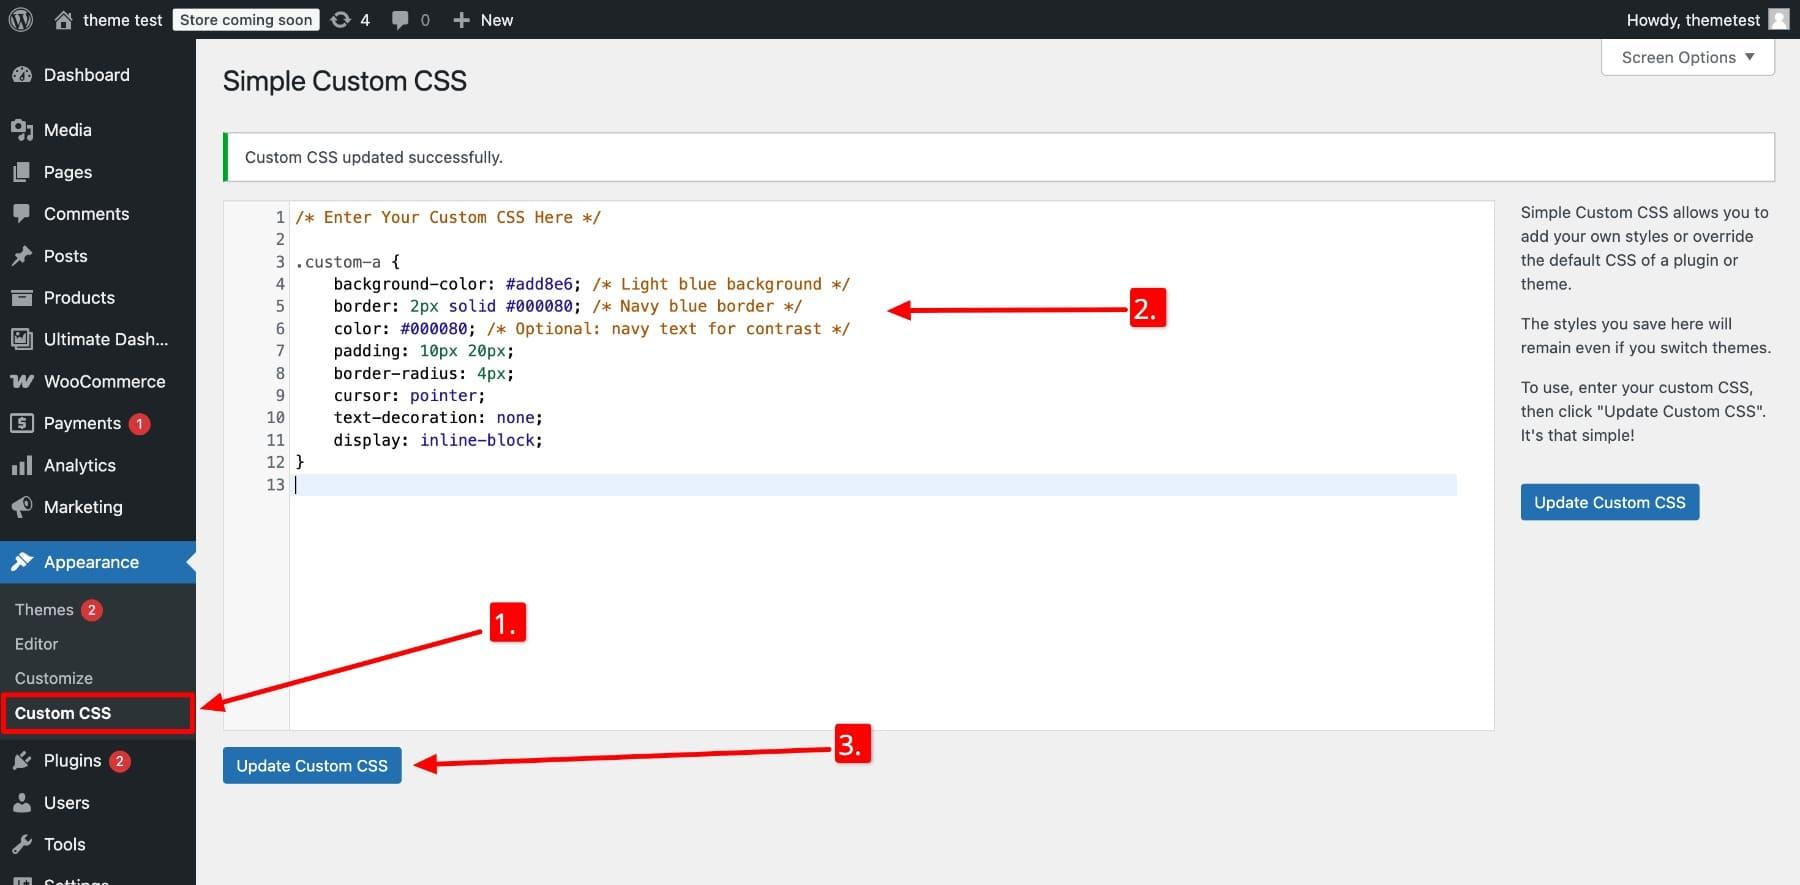
Now that you’re in the right place, it’s time to add the CSS to hide the featured image. Use the following CSS code:
.post-thumbnail {
    display: none;
}
This simple code snippet hides the featured image from your posts. Remember, the changes you make here are live and can be seen in the preview window. If everything looks good, just click the Publish button to make the changes permanent.
For more complex modifications, you might want to add more CSS rules. Here’s a quick reference table for some common CSS properties you might use:
| CSS Property | Description |
|---|---|
| color | Changes the text color. |
| background-color | Sets the background color of an element. |
| font-size | Adjusts the size of the text. |
| padding | Adds space inside an element. |
After applying your custom CSS, always check your site on different devices to ensure that everything appears as intended. Custom CSS is an excellent way to personalize your WordPress site and make it uniquely yours!

The Second Method: Utilizing a Plugin for Hidden Images
Using a plugin is one of the most effective ways to manage your featured images in WordPress, especially when it comes to hiding them from your site’s front end. With just a few clicks, you can achieve the desired look for your posts while maintaining the integrity of your media library. Here’s a walkthrough on how to utilize a plugin effectively.
Choosing the Right Plugin
When it comes to hiding featured images, not all plugins are created equal. Here are a few popular options that you can consider:
- Hide Featured Image: A lightweight plugin specifically designed for this purpose.
- WP Hide Post: More versatile, allows you to hide posts and featured images based on various criteria.
- Elementor: If you’re using a page builder, it has built-in options to customize visibility settings.
Be sure to read the reviews and check compatibility with your current theme and other plugins before making a selection.
Installing and Configuring the Plugin
Once you’ve chosen a plugin, installation is often as simple as navigating to your WordPress dashboard and following these steps:
- Go to Plugins > Add New.
- Search for the plugin you’ve chosen.
- Click Install Now and then Activate it.
After activation, you’ll typically find a new menu item added to your dashboard or within the settings of the plugin area. Here, you can configure the options according to your needs.
Hiding the Featured Image
After setting up the plugin, the next step is to hide the featured image on your posts. For most plugins, this process is straightforward:
- Navigate to the post editor for the post you want to modify.
- Locate the settings provided by the plugin, often found in the sidebar or below the post content area.
- Check the option to hide the featured image.
You’ll usually have the flexibility to hide the image on specific posts or globally across your site.
Testing Your Changes
Don’t forget to preview your changes! After saving or updating your post, click on View Post to ensure the featured image is hidden as expected. This is also a great time to check how the post appears on various devices, ensuring your site looks polished and professional.
Utilizing a plugin not only simplifies the process but also allows you to maintain more control over your content presentation. With just a little bit of setup, you can significantly enhance the visual appeal of your site without losing any functionality.
How to Choose the Right Plugin for Your Needs
Choosing the right plugin for your WordPress site can feel overwhelming, especially when there are thousands of options available. However, understanding your specific needs and doing a bit of research can help you find the perfect solution. Here are some key factors to consider:
Identify Your Goals
Before you dive into the plugin repository, take a moment to clarify what you want to achieve. Are you looking to hide featured images from specific posts, or do you wish to customize your site’s visual appearance? By pinpointing your goals, you can narrow down your options and focus on plugins that cater specifically to those needs.
Check Compatibility
Not all plugins play nicely with every theme or existing plugin. It’s crucial to check compatibility with your current WordPress version and theme. A simple way to do this is by looking at user reviews and support forums to see if others have encountered issues. Additionally, many reputable plugins will display compatibility information right in the plugin details, making it easier for you to make an informed decision.
Evaluate User Ratings and Reviews
User feedback is invaluable when choosing a plugin. Look for plugins with high ratings and read through a few reviews to gauge overall satisfaction. Pay attention to comments about ease of use, reliability, and support. A plugin that has a strong community backing can offer peace of mind, knowing you’re choosing a tool that others trust.
Consider Performance Impact
While functionality is important, it’s equally essential to consider how a plugin might impact your site’s performance. Some plugins can slow down your site if they’re not optimized well. Look for lightweight options and check if the plugin developers provide details on performance metrics. You can also use tools like GTmetrix or Google PageSpeed Insights to see how your site performs with the plugin installed.
Support and Documentation
A great plugin should come with solid support and comprehensive documentation. Before making a choice, check if the developers offer tutorials, FAQs, or a dedicated support forum. This can be especially helpful if you run into issues or have questions as you implement the plugin. Good support can save you time and frustration in the long run.
By evaluating these aspects, you can make a more informed choice that aligns with your website’s goals and enhances its functionality without compromising performance. Remember, the right plugin will not only help you hide featured images as needed but also contribute positively to your overall site experience.
Testing Your Changes: Ensuring Everything Looks Perfect
After implementing your changes to hide the featured image in your WordPress posts, it’s crucial to conduct thorough testing to ensure everything functions as intended. Here are some key steps you can take:
- Preview Your Changes: Use the preview feature to see how your posts will look without the featured image. This step allows you to identify any layout issues that may arise.
- Check Across Devices: Test your site on various devices—desktops, tablets, and smartphones—to ensure the absence of the featured image does not disrupt your site’s design.
- Browser Compatibility: View your site in different browsers (Chrome, Firefox, Safari) to catch any inconsistencies in appearance or functionality.
- Seek Feedback: Ask a friend or a colleague to review the changes. A fresh pair of eyes can often spot issues you might have overlooked.
To ensure your posts maintain visual appeal, examine the surrounding elements. If hiding the featured image changes the layout, consider adjusting margins or padding through CSS. A simple tweak to your CSS can make a significant difference:
.post {
    margin-bottom: 20px;
    padding: 10px;
}
It’s also wise to check for any SEO implications. Confirm that removing the featured image does not affect your post’s visibility or ranking. You can utilize tools like Google Search Console to analyze page performance and ensure everything remains in top shape.
| Testing Aspect | Details |
|---|---|
| Layout | Ensure no gaps or awkward spaces appear. |
| Responsiveness | Check on mobile and tablet views. |
| SEO Impact | Use tools to analyze page performance. |
| User Feedback | Gather insights from other users. |
By carefully testing your changes across these dimensions, you can rest assured that your WordPress site not only looks great but also functions seamlessly, delivering an optimal experience for your audience.
Final Touches: Keeping Your Site User-Friendly
When it comes to enhancing your website’s usability, subtle yet effective tweaks can make a significant difference. After hiding your featured image in WordPress, consider focusing on other elements that improve user experience. Keeping navigation intuitive is essential. You can achieve this by:
- Simplifying the Menu: Limit the number of items in your navigation bar to prevent overwhelming visitors. Highlight the most important sections to guide users seamlessly.
- Utilizing Clear Call-to-Actions (CTAs): Make your CTAs stand out with contrasting colors and clear text. Whether it’s signing up for a newsletter or exploring more articles, clarity is key.
- Optimizing for Mobile: Ensure that your design is responsive. A significant portion of users accesses content via mobile devices; optimal mobile usability is crucial.
In addition to navigation, consider enhancing loading times, as this is critical for retaining user attention. Users tend to bounce off sites that take too long to load. You can improve loading speed by:
- Compressing Images: Use image optimization plugins to reduce file sizes without losing quality.
- Minimizing HTTP Requests: Limit the number of elements on your pages to reduce the number of requests made to your server.
Another area to focus on is the readability of your content. The easier it is for users to digest your information, the longer they’ll stay on your site. Consider the following:
- Using Short Paragraphs: Break up large blocks of text into shorter, digestible paragraphs to improve readability.
- Incorporating Bullet Points: Use bullet points for lists to make information easier to scan and understand.
- Choosing the Right Font: Ensure your font type and size are legible across all devices and browsers.
always keep your content updated. Regularly revisiting your site to refresh outdated information not only engages returning users but also boosts SEO performance. Consider maintaining a simple schedule for reviewing and updating content:
| Frequency | Content Type | Action |
|---|---|---|
| Monthly | Blog Posts | Review for updates |
| Quarterly | Static Pages | Check for relevance |
| Annually | SEO Strategy | Revise keywords |
By implementing these final touches, your site will not only look polished but will also provide a user-friendly experience that encourages visitors to explore more of what you have to offer.
Frequently Asked Questions About Hiding Featured Images
If you’re considering hiding featured images on your WordPress site, you’re not alone! Many users have questions about this practice. Here are some common queries and their answers to help you make an informed decision.
Why would I want to hide the featured image?
There are several reasons you might choose to hide featured images:
- Design Consistency: Maintaining a clean look can help your content stand out.
- Page Load Speed: Fewer images can lead to quicker load times, enhancing user experience.
- Focus on Content: Sometimes, text needs to take center stage, especially in blogs or articles.
Are there any drawbacks to hiding featured images?
While hiding featured images can be beneficial, there are some potential downsides:
- SEO Impact: Featured images can contribute to SEO. Hiding them may affect your rankings.
- User Engagement: Images often help engage readers; removing them could lead to lower engagement rates.
Can I hide featured images for specific posts only?
Yes! Most methods allow you to selectively hide featured images. You can use conditional CSS or plugin settings to ensure only certain posts are impacted. For example, you can use the following CSS snippet to hide the featured image on a particular post:
.post-id-123 .featured-image { display: none; }Just replace “123” with your post ID.
What if I change my mind later?
Changing your mind is completely normal! If you decide to show your featured images again, simply remove the CSS or adjust the plugin settings. WordPress makes it easy to revert changes, so you won’t have to worry about losing any content.
Can I still use featured images in other parts of my site?
Absolutely! Even if you choose to hide them on specific posts, featured images can still be utilized in other areas, like archives or sliders. This flexibility allows you to have the best of both worlds.
Empowering Your WordPress Experience with Customization
Customizing your WordPress site can significantly enhance your user experience, and hiding the featured image is a simple yet effective way to tailor your content presentation. Whether you want to create a clean look or direct focus towards your text, there are two straightforward methods you can employ. Let’s dive into these techniques and see how easy it can be to achieve the desired aesthetic for your site.
Method 1: Using the WordPress Customizer
One of the simplest ways to hide the featured image is through the WordPress Customizer. This method works well for those who prefer not to touch any code. Here’s how you can do it:
- Navigate to Appearance and click on Customize.
- Look for the Additional CSS section.
- Enter the following CSS code:
.post .featured-image {
    display: none;
}
That’s it! This code snippet will hide the featured image for all your posts. Remember to click Publish to save your changes.
Method 2: Using a Plugin
If you prefer a more user-friendly interface without dealing with CSS, using a plugin can be the route to take. Here’s how you can hide your featured image using a plugin:
- Install and activate a plugin like Hide Featured Image or Remove Featured Image.
- Once activated, go to the post editor of the post you want to modify.
- Look for the plugin options in the post settings and select the option to hide the featured image.
This method is particularly beneficial if you want to selectively hide featured images on specific posts without affecting the rest of your site.
Both methods offer a straightforward way to enhance your WordPress design. Tailoring your site to reflect your unique style not only improves aesthetics but also increases engagement by ensuring that your audience’s focus remains where you want it. Choose the method that best fits your comfort level and enjoy a more personalized WordPress experience!
Frequently Asked Questions (FAQ)
Q: Why would someone want to hide the featured image in WordPress?
A: Great question! There are several reasons. Maybe the featured image doesn’t align with your design choices, or perhaps it distracts from your content. Some users prefer a more minimalistic approach, focusing on the text rather than visuals. Hiding the featured image can also improve the readability of your posts, especially on mobile devices. Whatever your reason, it’s quite easy to achieve!
Q: Are there multiple methods to hide the featured image?
A: Absolutely! In this article, we’ll explore two simple methods. The first involves using a little bit of custom CSS, and the second method utilizes a plugin. Both are user-friendly and effective, so you can choose the one that suits you best!
Q: Do I need any coding skills to hide the featured image with CSS?
A: Not at all! While having some basic understanding of CSS can be helpful, we’ll provide clear, step-by-step instructions that anyone can follow. You’ll be amazed at how straightforward it is!
Q: What if I decide to change my mind later and want to show the featured image again?
A: No worries! Whether you use CSS or a plugin, reverting back to displaying your featured image is just as easy. For CSS, you can simply remove the code; for the plugin, you can deactivate it. Flexibility is key!
Q: Will hiding the featured image affect my SEO?
A: Hiding the featured image itself won’t directly impact your SEO, but keep in mind that featured images can enhance user engagement. If your audience enjoys visuals, consider balancing your desire for a clean look with the benefits of having eye-catching images.
Q: Can I hide the featured image for specific posts only?
A: Yes, you can! If you’re using the CSS method, you can target specific post IDs to hide the featured image only on those posts. This gives you complete control over your site’s appearance. The plugin method may also offer options to select which posts to affect.
Q: What if I want to hide the featured image site-wide?
A: That’s totally doable! Both methods we’ll discuss can be applied site-wide. Just follow the steps closely, and you’ll be able to create a cohesive look throughout your entire website.
Q: How do I know which method to choose?
A: If you’re comfortable with a bit of coding, the CSS method might be the way to go. It’s quick and requires no additional plugins. However, if you prefer a more straightforward approach without touching any code, the plugin option is user-friendly and perfect for beginners.
Q: Is there anything else I should consider before hiding the featured image?
A: Definitely! Always think about your overall design and user experience. Before making changes, try to visualize how it will affect your layout and content flow. It’s all about enhancing the reader’s experience while maintaining the aesthetic of your website!
Ready to dive in and learn how to hide your featured image? Let’s get started!
Key Takeaways
hiding a featured image in WordPress might seem daunting at first, but with the two easy methods we’ve explored, you can effortlessly achieve the look you desire for your website. Whether you prefer to dive into the code or take advantage of user-friendly plugins, you now have the tools at your fingertips to customize your site just the way you want it.
Remember, the aesthetics of your website are just as important as its content. By mastering these techniques, you not only enhance the visual appeal of your posts but also improve the overall user experience. So, why not give it a try? Experiment with these methods and see how they can elevate your site’s design.
If you found this article helpful, don’t hesitate to share it with fellow WordPress users who might be looking for a similar solution. And as always, keep exploring and customizing—after all, your website is an extension of your creativity! Happy blogging!