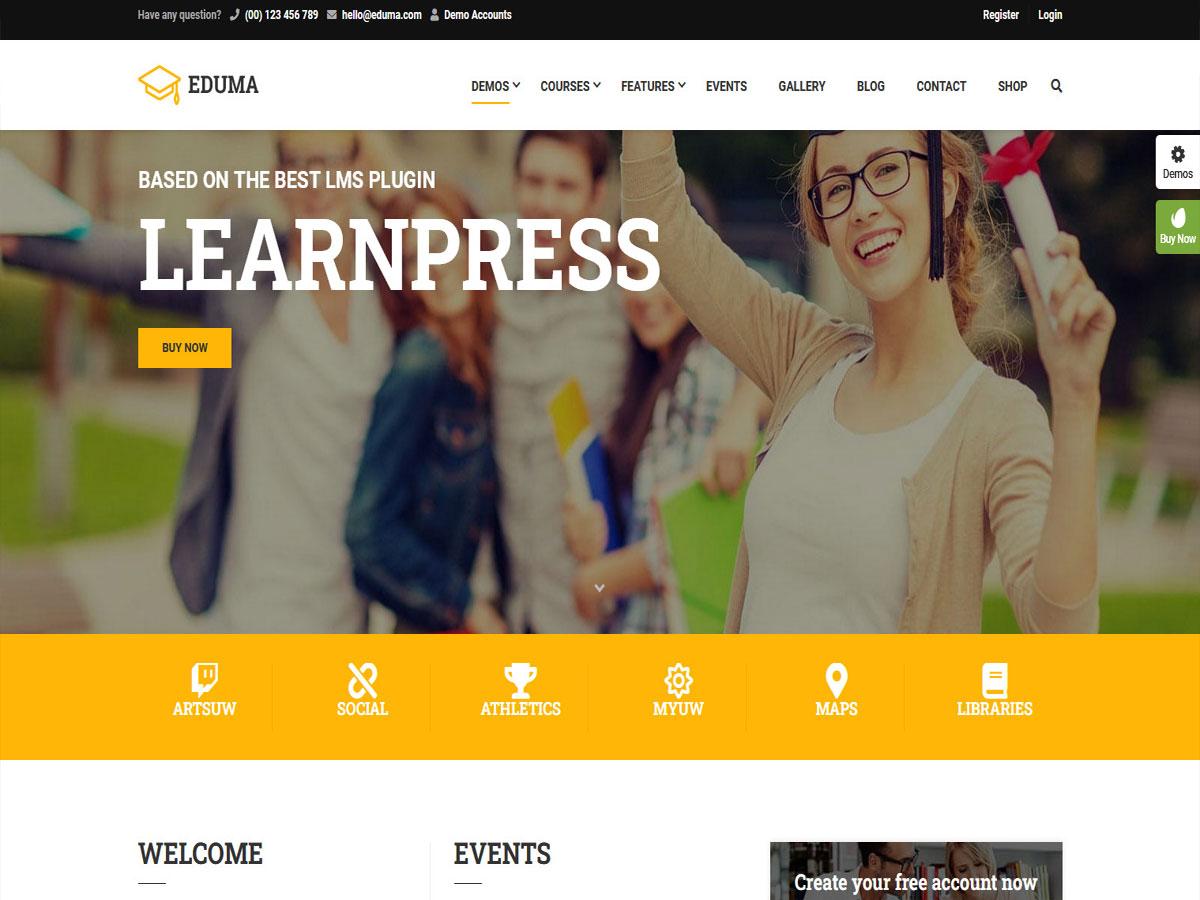
Are you ready to showcase your stunning images and creative projects in a way that captivates your audience? Look no further! In today’s digital landscape, a well-organized gallery can make all the difference in presenting your work and engaging your visitors. If you’re using the Eduma theme for your WordPress site, you’re in luck! This versatile and user-friendly theme makes it a breeze to create eye-catching galleries that not only look great but also enhance the overall user experience. In this step-by-step guide, we’ll walk you through everything you need to know about creating a captivating gallery in the Eduma theme. Whether you’re a seasoned developer or a complete beginner, our easy-to-follow instructions will empower you to display your masterpieces with confidence. So, let’s dive in and transform your website into a visual delight!
Creating a Stunning Gallery with Eduma Theme Made Easy
Creating a visually appealing gallery in the Eduma theme is not just about showcasing images; it’s about crafting an experience that resonates with your audience. With its user-friendly interface and powerful features, building a stunning gallery can be a breeze. Here’s how to do it step-by-step.
First things first, head over to your WordPress dashboard. Navigate to Eduma Settings and select the Gallery Options. Here, you will find several customizable settings that allow you to adjust the layout, spacing, and style of your gallery. Consider the following options:
- Grid Layout: Choose between a classic grid or a masonry layout to best suit your aesthetic.
- Image Size: Select the size of images that will be displayed, ensuring they maintain their quality.
- Hover Effects: Add captivating hover effects to engage viewers when they mouse over images.
Next, it’s time to add your images. Go to the Media Library and upload the images you want to feature in your gallery. Once uploaded, return to the gallery settings and select the images for inclusion. Choosing the right images is crucial; aim for high-quality visuals that complement each other. After selecting, make sure to categorize your images appropriately, allowing users to filter through them easily.
Now, let’s enhance the gallery with captivating captions and descriptions. You can edit each image within the gallery settings to provide context or tell a story. This not only adds depth to your visuals but also improves SEO, making it easier for potential students to find your gallery through search engines.
If you want to take it a step further, consider integrating social sharing buttons. This will allow visitors to share your stunning gallery on various platforms, increasing visibility and engagement. To do this, simply enable the social share option in the gallery settings.
preview your gallery before publishing to ensure everything looks just right. Check for responsiveness on different devices, and make any tweaks as necessary. With these simple steps, you’ll create a striking gallery that not only showcases your work but also enhances your website’s overall appeal.
Understanding the Basics of the Eduma Theme Setup
Creating a stunning gallery in the Eduma theme is a straightforward process that can elevate your website’s visual appeal. With its user-friendly interface and powerful features, Eduma allows you to showcase your images in a way that captivates visitors. Here’s how you can set up a gallery effortlessly.
First, navigate to the WordPress Dashboard. From there, go to Media and select Add New. You can either upload new images or choose from the existing media library. Make sure to organize your images effectively, as this will help when creating the gallery.
Once your images are ready, it’s time to create the gallery. Head over to the page or post where you want the gallery to appear. In the editor, click on the Add Media button, and then select Create Gallery. Here, you can select the images you want to include. Make sure to check each box for the images you wish to display.
After selecting your images, click on the Create a new gallery option. You’ll find various settings that allow you to customize your gallery’s appearance. Some options include:
- Number of Columns: Choose how many columns to display for your images.
- Image Size: Select the size of the images in the gallery.
- Link To: Decide if you want the images to link to the media file or an attachment page.
Once you’ve customized your gallery, hit the Insert Gallery button. Your gallery will now be embedded in the post or page. You can preview it to see how it looks and adjust settings as necessary. Remember, a well-organized gallery can significantly enhance user engagement!
Lastly, don’t forget to optimize your images for faster loading speeds. Utilize plugins that can compress your images without sacrificing quality. This will ensure that your gallery not only looks great but also performs well, providing a seamless experience for your visitors.

Choosing the Right Gallery Type for Your Needs
When it comes to showcasing your work or organizing your images, selecting the right type of gallery can make all the difference. Each gallery type serves a unique purpose and can enhance the viewer’s experience in various ways. Here are a few types to consider:
- Grid Gallery: This layout is perfect for displaying a large number of images in a neat and organized fashion. It creates a visually appealing mosaic that draws the viewer’s eye to each photo.
- Slider Gallery: If you want to highlight specific images while maintaining a clean interface, a slider gallery is your best bet. It allows users to click through images at their own pace, keeping the focus on one image at a time.
- Masonry Gallery: For a more dynamic feel, the masonry layout gives a modern twist to image displays. It allows images of varying sizes to fit together seamlessly, creating an artistic vibe.
Each gallery type has its own strengths, and understanding your audience’s preferences can guide your choice. For example, if you are a photographer showcasing a portfolio, a slider gallery might allow potential clients to focus on your best work without distractions. Conversely, if you’re running an online store, a grid layout can effectively display multiple products side by side, facilitating easy browsing.
To help you make the decision, consider creating a comparison table that lays out the pros and cons of each gallery type:
| Gallery Type | Pros | Cons |
|---|---|---|
| Grid Gallery | Organized, visually appealing | Can be overwhelming with too many images |
| Slider Gallery | Focuses on individual images | May require user interaction, which some may find tedious |
| Masonry Gallery | Dynamic and modern look | Not as structured, which may confuse some viewers |
By weighing the pros and cons of each type, you can choose a gallery that aligns with your goals and the preferences of your viewers. Whether you aim to impress potential clients, sell products, or simply share your artistic vision, the right gallery format can enhance user engagement and elevate your content.
Step-by-Step Guide to Adding Images and Media
When creating a gallery in the Eduma theme, adding images and media is a crucial step to showcase your content effectively. Here’s a straightforward approach to ensure your gallery stands out.
First, navigate to your WordPress dashboard. From there, go to Media and select Add New. You can either drag and drop your images or click Select Files to upload from your device. Ensure that the images are optimized for the web to maintain fast loading times, which enhances user experience.
Once your images are uploaded, organize them in the Media Library. You can create categories or tags for easier management. This is especially useful if you plan to add multiple galleries in the future. Next, select the images you want to include in your gallery by clicking the checkboxes next to each image.
After selecting your images, go to the page or post where you want to insert the gallery. Click on the Add Media button above the content editor. This will bring up the Media Library where you can choose the images you just uploaded. Once selected, click on Create Gallery on the left sidebar.
In the gallery settings, you have various customization options. You can decide the layout style, set the number of columns, and add captions to each image. Make sure to preview how your gallery looks. Adjust settings to match your website’s aesthetic, ensuring that it remains cohesive with the Eduma theme. When satisfied, click on Insert Gallery.
don’t forget to add alt text to your images for better SEO and accessibility. This ensures users who rely on screen readers can understand the content of your images. Once everything is set, publish or update your post, and enjoy your beautifully crafted gallery!
Customizing Your Gallery: Tips for a Unique Look
Creating a gallery that stands out requires a blend of creativity and thoughtful design. Start by choosing a cohesive color palette that complements your theme. Bold colors can create excitement, while soft hues can evoke calmness. To help keep your gallery looking polished, consider the following tips:
- Image Consistency: Use images that share a similar style or tone. This could mean sticking to photos with a similar filter or opting for illustrations that share a theme.
- Creative Layouts: Experiment with different grid layouts. Use asymmetry to create visual interest or maintain symmetry for a classic look.
- Hover Effects: Add engaging hover effects to your images to create an interactive experience. Subtle animations can draw attention without overwhelming visitors.
Typography can also play a crucial role in the overall aesthetic of your gallery. Pairing fonts can add personality and draw attention to your captions or titles. Aim for a balance between readability and style by following these tips:
- Font Pairing: Choose a bold typeface for titles and a more understated font for descriptions. This contrast can help important information stand out.
- Text Size: Ensure your text is large enough to be legible, but not so large that it overshadows the images.
- Color Contrast: Make sure there is enough contrast between your text and background so that your captions are easy to read.
Lastly, don’t forget about the functionality of your gallery. Incorporating user-friendly features can enhance the viewing experience. Consider adding:
- Filters: Allow users to sort through images based on categories, making it easier for them to find what they’re looking for.
- Lightbox Effects: Implement lightbox features that let visitors view images in full screen without navigating away from the gallery.
- Download Options: If applicable, provide options for users to download images. This can encourage engagement and sharing.
| Tip | Description |
|---|---|
| Image Consistency | Maintain a uniform style for a cohesive look. |
| Creative Layouts | Experiment with grid styles for visual impact. |
| Hover Effects | Add animations to enhance interactivity. |
Optimizing Gallery Performance for a Seamless Experience
To create a stunning gallery that not only looks good but performs seamlessly, you need to focus on a few key aspects that can significantly enhance the user experience. Proper optimization ensures that your visitors enjoy fast loading times and smooth navigation, which can lead to increased engagement and lower bounce rates. Here are some effective strategies to consider:
- Image Compression: Reduce the file sizes of your images without sacrificing quality. Tools like TinyPNG or Image Compressor can help you achieve this.
- Responsive Design: Ensure your gallery adapts to various screen sizes. The Eduma theme provides built-in responsiveness, but always test your gallery on different devices.
- Lazy Loading: Implement lazy loading to delay the loading of images until they are about to enter the viewport. This can greatly improve initial page load times.
Another essential factor is the organization of your gallery. Well-structured galleries not only improve loading times but also enhance user navigation. Here are some tips:
- Categories and Tags: Use categories and tags to organize your images. This helps visitors find what they’re looking for quickly.
- Pagination vs. Infinite Scroll: Decide whether pagination or infinite scrolling works better for your audience. Pagination allows for easier navigation, while infinite scroll can keep users engaged longer.
Lastly, monitor your gallery’s performance using tools like Google PageSpeed Insights or GTmetrix. These tools provide valuable insights into areas that may need improvement. Consider tracking metrics such as:
| Metric | Ideal Value | Action |
|---|---|---|
| Load Time | Under 3 seconds | Optimize images and leverage browser caching. |
| First Contentful Paint | Under 1 second | Implement lazy loading for images. |
| Server Response Time | Under 200ms | Consider upgrading your hosting plan. |
By focusing on these optimization strategies, you will create a gallery that is not only visually appealing but also functional and efficient, ensuring a delightful experience for your users.

Mobile Responsiveness: Ensuring Your Gallery Shines on All Devices
In today’s digital landscape, a gallery is more than just a collection of images; it’s a vital part of your website’s visual storytelling. With the Eduma theme, ensuring your gallery is mobile responsive is essential for captivating your audience, regardless of the device they’re using. Here are some key strategies to make your gallery shine across all screen sizes:
- Utilize Flexible Layouts: The Eduma theme offers various grid options that automatically adjust to the screen size. Opt for a layout that maintains visual balance, ensuring images retain their aspect ratio without excessive cropping.
- Optimize Image Sizes: Large images can slow down load times on mobile devices. Use tools to compress images without losing quality, making sure they load quickly, which is crucial for retaining visitors.
- Implement Touch-Friendly Navigation: Touchscreens require larger clickable areas. Ensure that navigation elements in your gallery are easy to tap, enhancing user experience on mobile devices.
- Test Across Devices: Regularly check how your gallery appears on various devices. Tools like Google’s Mobile-Friendly Test can help you identify areas for improvement.
Incorporating responsive design elements is not just about aesthetics; it’s also about functionality. As you customize your gallery in the Eduma theme, consider the following:
| Device Type | Image Size (px) | Recommended Compression |
|---|---|---|
| Mobile | 640 x 480 | 70-80% |
| Tablet | 1280 x 720 | 60-70% |
| Desktop | 1920 x 1080 | 50-60% |
By implementing these strategies, you can create a visually appealing and functional gallery that resonates with users, whether they’re browsing on a smartphone, tablet, or desktop. The goal is to ensure that your content shines brightly on every device, providing an engaging experience that keeps visitors coming back for more.
don’t forget to leverage the power of CSS for further refinements. Simple adjustments like changing padding, margins, or even hover effects can significantly enhance the aesthetic appeal of your gallery while ensuring it remains responsive. With the right techniques, your gallery can become a stunning centerpiece of your Eduma theme website.
Enhancing User Engagement with Interactive Features
When it comes to creating a gallery in the Eduma theme, incorporating interactive features can drastically enhance user engagement. These elements not only draw visitors in but also encourage them to explore your content further. By integrating features that allow users to interact with your gallery, you create an immersive experience that keeps them on your site longer.
Consider adding the following interactive elements to your gallery:
- Hover Effects: Implementing subtle animations when users hover over images can pique their curiosity and invite them to click for more details.
- Lightbox Feature: Allowing users to click on images to view them in a larger format can elevate their experience. This simple touch can make a significant difference in how they perceive your content.
- Filter Options: Providing users with the ability to filter images by categories or tags empowers them to find exactly what they’re looking for, enhancing their overall satisfaction.
Moreover, you can utilize user-generated content to further engage your audience. For instance, consider creating a section where visitors can submit their own photos related to your niche. This not only diversifies the content but also builds a community around your gallery:
| User Submission Category | Description |
|---|---|
| Student Projects | Share your latest projects and showcase your learning journey. |
| Event Highlights | Post memorable moments from school events or workshops. |
| Art Showcase | Display student artwork and creative endeavors. |
don’t forget about the power of social sharing. Adding social media buttons to your gallery encourages users to share their favorite images, effectively promoting your content to a broader audience. You can also host polls or quizzes related to your gallery images, allowing users to interact and share their opinions, making them feel more connected to your content.
By thoughtfully integrating these interactive features into your Eduma gallery, you not only enhance user engagement but also cultivate a vibrant online community that keeps returning for more.
Best Practices for Organizing Your Gallery Content
When organizing your gallery content, it’s essential to create a visual narrative that resonates with your audience. Here are some practices to ensure that your gallery is not only visually appealing but also easy to navigate:
- Define a Theme: Choose a consistent theme or style for your gallery. This could be based on color schemes, subject matter, or even a specific event. A cohesive look helps in creating a memorable experience for your viewers.
- Utilize Categories: Group your images into categories. This makes it easier for visitors to find what they’re looking for. For example, if you have a photography gallery, you might categorize images into landscapes, portraits, and events.
- Prioritize Quality Over Quantity: Select only the best images to feature. High-quality visuals will draw more attention than a large number of average shots. Aim for a balance that showcases your skills without overwhelming the viewer.
- Incorporate Descriptions: Provide context for your images with brief descriptions. A short narrative can enhance the viewer’s understanding and appreciation of the artwork.
- Ensure Mobile Friendliness: Make sure your gallery looks great on mobile devices. A responsive design ensures that users can enjoy your content no matter where they are.
Another critical aspect of gallery organization is the order in which you present your content. Consider the flow of images—either chronologically, thematically, or by popularity. This will guide visitors through a natural progression and enhance their overall experience. Below is a simple table to visualize an effective gallery structure:
| Category | Featured Images | Notes |
|---|---|---|
| Landscapes | Image 1, Image 2, Image 3 | Stunning views from various locations |
| Portraits | Image 4, Image 5 | Capturing emotions and personalities |
| Events | Image 6, Image 7, Image 8 | Highlights from recent gatherings |
Lastly, never underestimate the power of feedback. Encourage visitors to leave comments or ratings on your gallery. This interaction not only builds community but can also provide insights into what resonates most with your audience. Regularly updating your content based on this feedback keeps your gallery fresh and engaging.

Showcasing Your Gallery: Promoting It Across Your Site
Once you’ve created your stunning gallery with the Eduma theme, it’s essential to make sure it gets the attention it deserves. Here’s how to effectively promote your gallery across your site:
- Feature on the Homepage: Make your gallery the star of your homepage. Use a striking image or a slideshow that links directly to your gallery to grab visitors’ attention right away.
- Utilize Widgets: Leverage sidebar or footer widgets to display a mini-gallery or a selection of featured images. This keeps your gallery front and center as users navigate your site.
- Create a Dedicated Page: Develop a separate page that showcases your gallery in detail. Include information about the images, such as their significance or the story behind them, to engage visitors further.
- Incorporate Calls to Action: Encourage your visitors to explore your gallery by using persuasive calls to action. Phrases like “Discover Our Latest Creations” or “Explore the Gallery Now!” can entice clicks.
- Engage through Blog Posts: Write blog posts that highlight specific pieces in your gallery. Share behind-the-scenes stories or the inspiration that led to the works, encouraging readers to visit the gallery for more.
To give your gallery an extra boost, consider integrating social sharing buttons. This allows visitors to easily share their favorite images on platforms like Instagram, Facebook, or Pinterest. You can also include a hash tag associated with your gallery to create a community around it.
| Promotion Method | Benefits |
|---|---|
| Homepage Feature | Increases visibility and first impressions. |
| Widgets | Keeps gallery accessible on every page. |
| Dedicated Page | Provides detailed context and engagement. |
| Calls to Action | Motivates users to explore further. |
| Blog Integration | Builds a narrative and encourages sharing. |
Remember, the key to promoting your gallery is consistency. Regularly update your content, share new images, and interact with your audience. By creating an engaging experience around your gallery, you’ll not only attract visitors but also keep them coming back for more.
Frequently Asked Questions (FAQ)
Q&A for “How To Make Gallery In Eduma Theme: A Step-by-Step Guide”
Q1: Why should I use the Eduma theme for my gallery?
A1: Great question! The Eduma theme is not just visually appealing; it’s also incredibly user-friendly and designed specifically for educational purposes. By using Eduma, you can create a gallery that not only showcases your content beautifully but also enhances the overall user experience on your site. Plus, it’s highly customizable, allowing you to align your gallery perfectly with your brand.
Q2: Is it difficult to create a gallery in the Eduma theme?
A2: Not at all! One of the best features of the Eduma theme is its intuitive interface. Even if you’re not a tech expert, our step-by-step guide will walk you through the process seamlessly. You’ll be amazed at how easy it is to set up a stunning gallery that captures the attention of your visitors.
Q3: What types of content can I include in my gallery?
A3: The possibilities are endless! You can include images, videos, and even links to other resources. Whether it’s showcasing student projects, highlighting events, or displaying course materials, the Eduma gallery can adapt to your needs. It’s all about presenting your content in a way that engages and excites your audience.
Q4: Can I customize the layout of my gallery?
A4: Absolutely! One of the standout features of the Eduma theme is its customization options. You can choose from various layouts, adjust the size of images, and even select different themes to match your website’s look and feel. This means you can create a gallery that not only looks fantastic but also reflects your unique style.
Q5: Will my gallery be mobile-friendly?
A5: Yes! The Eduma theme is fully responsive, which means your gallery will look great on any device, whether it’s a desktop, tablet, or smartphone. In today’s mobile-driven world, having a mobile-friendly gallery is crucial, and Eduma ensures your content is accessible to everyone, everywhere.
Q6: What if I run into issues while creating my gallery?
A6: No worries at all! The Eduma theme comes with excellent support and documentation. Our community is also very active, so you can find help and tips from fellow users. If you encounter any challenges, you won’t be left on your own—you’ll have plenty of resources to guide you.
Q7: How can a gallery enhance my website’s overall appeal?
A7: A well-designed gallery does more than just display images; it creates a visual story that captures your audience’s attention. It can showcase the vibrancy of your educational programs, engage visitors with compelling visuals, and ultimately keep them on your site longer. An appealing gallery can also boost your website’s credibility and professionalism, making a lasting impression on your visitors.
Q8: Ready to get started? Where can I find the guide?
A8: You’re just a few steps away from creating your stunning gallery! Check out our detailed step-by-step guide, and you’ll be on your way to showcasing your content like never before. Trust us, once you see how easy it is, you’ll wonder why you didn’t start sooner!
Ready to unleash your creativity? Dive into our guide, and let’s make something amazing together!
The Way Forward
creating a stunning gallery in the Eduma theme is not just a task—it’s an opportunity to showcase your creativity and engage your audience in a visually captivating way. By following the steps outlined in this guide, you’re well on your way to transforming your website into a vibrant space that highlights your content beautifully.
So, why wait? Dive into the process and start experimenting with different layouts, images, and styles that reflect your unique vision. Remember, a well-crafted gallery not only enhances your site’s appeal but also leaves a lasting impression on visitors, encouraging them to explore more of what you have to offer.
If you found this guide helpful, feel free to share it with fellow Eduma users and let your creativity inspire others! And don’t hesitate to reach out with questions or to share your gallery creations—we’d love to see what you come up with. Happy designing!