
Are you ready to take your online education platform to the next level? If you’ve been considering Eduma as your go-to theme for WordPress, you’re on the right track! But before you dive into the exciting world of creating your courses, you might be wondering: how much time does it actually take to import a demo in Eduma? Well, you’re in luck! In this article, we’ll break down the process step-by-step, giving you all the insights you need to get started without any hiccups. Whether you’re a tech novice or a seasoned pro, we’ll guide you through the timeline, tools, and tips to ensure your demo import is as smooth and efficient as possible. So grab a cup of coffee, get comfy, and let’s explore how quickly you can transform your educational vision into reality!
Understanding the Import Process for Eduma Demos
Importing demo content in Eduma can be a seamless experience if you understand the process and what to expect. The time required to import a demo largely depends on several factors, including your hosting environment, your internet speed, and the specific demo content you are working with. Generally, you can expect the entire process to take anywhere from a few minutes to over an hour. Here’s a deeper look into the essential aspects of the import process.
First, ensure that your website is prepared for the import. This includes:
- Updating WordPress and Plugins: Always make sure your WordPress installation and all plugins are up to date. This minimizes compatibility issues.
- Back Up Your Site: Before importing new demo content, back up your current website to avoid losing any existing data.
- Check Hosting Limits: Different hosting providers have various resource limits; ensure yours can handle the demo import without crashing.
Once you have prepared your site, you can begin the import process. Typically, this involves:
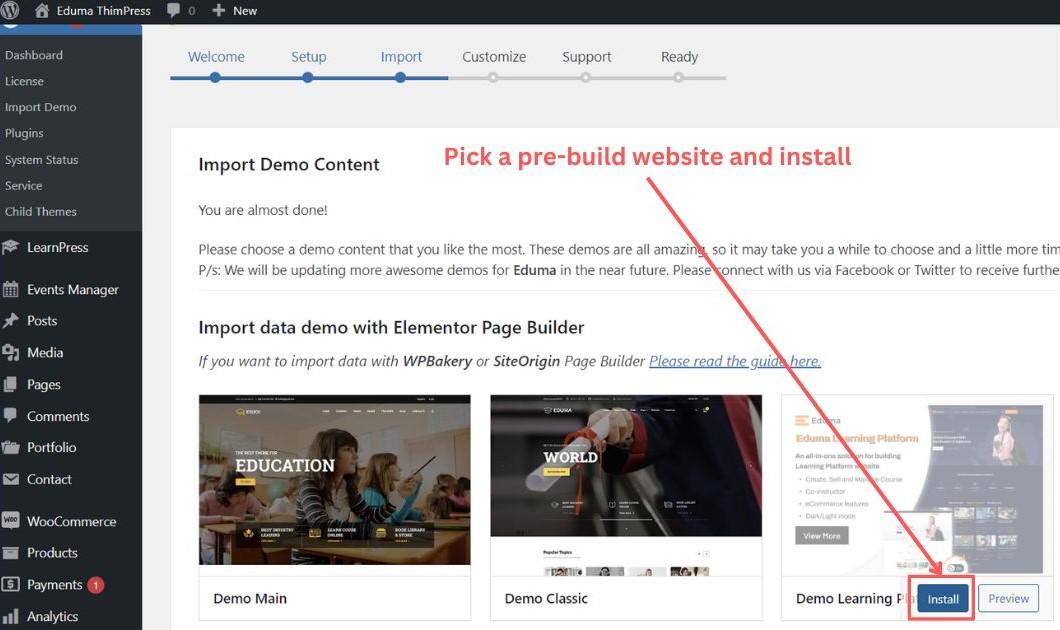
- Choosing the Right Demo: Eduma offers multiple demos tailored to different educational purposes. Select the one that fits your needs best.
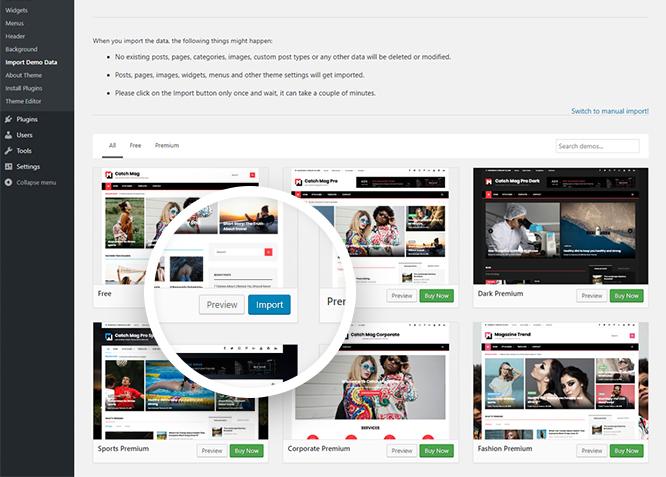
- Using One-Click Import: Most demos come with a one-click import feature, simplifying the process significantly. Just click, and the system will handle the rest.
- Monitoring Progress: Keep an eye on the progress bar during import. If the import takes longer than expected, don’t panic; it’s often due to server performance.
Here’s a quick overview of the possible time frames for importing different types of demos:
| Type of Demo | Estimated Import Time |
|---|---|
| Basic Demo | 5-15 minutes |
| Advanced Demo with Multiple Features | 15-30 minutes |
| Complex Demo with Extensive Content | 30-60 minutes |
patience is key during the import process. If the import seems to stall, it may be worth refreshing the page or checking your server’s performance. After the import is complete, take a moment to review your site and make any necessary adjustments. With the right preparation and understanding, importing a demo in Eduma can set you on the path to creating a stunning online educational platform.
Factors That Influence Import Time for Eduma Demos
When considering the import time for Eduma demos, several key elements come into play that can significantly affect how quickly the process occurs. Understanding these factors can help you manage expectations and streamline the setup of your educational website.
- Hosting Environment: The performance of your web hosting service is crucial. Higher-quality hosting solutions, such as dedicated or managed WordPress hosting, can reduce import time compared to shared hosting environments.
- Server Speed: The speed of the server where your website is hosted directly impacts how fast demo content can be imported. Faster servers can handle larger files and execute scripts more efficiently.
- File Size: Larger demo files will naturally take more time to upload and import. Depending on the demo package, be prepared for variations in size, which can alter the import duration.
- Internet Connection: Your own internet speed plays a vital role. A slow connection can prolong the import process, while a high-speed connection can facilitate a quicker upload.
- WordPress Configuration: A well-optimized WordPress setup, including appropriate settings for PHP memory limit and execution time, can significantly enhance the import speed. Ensure that your PHP settings are aligned for optimal performance.
Additionally, the complexity of the demo content itself can affect import times. Demos with numerous plugins, custom post types, and extensive media libraries may take longer to fully import. If you’re importing a demo with lots of custom settings or elements, it’s wise to allocate more time for the process.
To give you an idea of potential import times, here’s a simple comparison table based on typical scenarios:
| Scenario | Estimated Import Time |
|---|---|
| Basic Demo (small file size) | 5 – 15 minutes |
| Standard Demo (medium file size) | 15 – 30 minutes |
| Complex Demo (large file size) | 30 – 60 minutes |
Ultimately, managing these factors effectively can lead to a smoother and quicker demo import experience. By proactively addressing these aspects, you can set the stage for a successful website launch with Eduma.
Tips to Streamline Your Demo Import Experience
Importing a demo in Eduma can significantly enhance your website’s functionality and appearance, but ensuring a smooth import process is essential. Here are some practical :
- Pre-Import Backup: Always create a backup of your current website before starting the import process. This precaution protects your existing data and settings in case anything goes awry.
- Check Server Requirements: Ensure your hosting environment meets the necessary requirements for Eduma. Verify PHP version, memory limits, and upload file size to avoid import issues.
- Plugin Management: Disable any unnecessary plugins before importing. This helps to minimize conflicts and ensures that the demo import runs smoothly.
When you’re ready to begin, follow these steps:
- Use One-Click Import: Eduma offers a one-click demo import feature. Take advantage of this tool to save time and eliminate manual setup.
- Choose the Right Demo: Select a demo that closely matches your intended design and functionality. This reduces the need for extensive customization after import.
- Monitor Import Progress: Keep an eye on the import status. If the process stalls or errors occur, you can address them immediately rather than later.
Sometimes, the import process can be affected by server configurations. To further streamline the experience, consider the following:
| Configuration | Recommended Setting |
|---|---|
| PHP Version | 7.4 or higher |
| Memory Limit | 256 MB or higher |
| Max Upload Size | 64 MB or higher |
After successfully importing your demo, take the time to review all components. Check for missing images or settings that might not have transferred correctly. This final step ensures that your website is fully operational and visually appealing.
Common Pitfalls to Avoid When Importing Eduma Demos
When importing demos in Eduma, it’s easy to overlook a few crucial aspects that can lead to frustration and wasted time. Understanding these common pitfalls can help streamline your setup process, ensuring a smooth transition to your new theme.
One frequent mistake is failing to check the system requirements before beginning the import. Eduma has specific hosting and compatibility needs that must be met for the demo import to function properly. Ensure your server meets the following requirements:
| Requirement | Recommended Value |
|---|---|
| PHP Version | 7.4 or higher |
| MySQL Version | 5.6 or higher |
| Memory Limit | 256 MB or higher |
Another misstep is neglecting to back up your website before importing the demo. It’s essential to create a backup of your site, especially if you have already added content or customized settings. This way, you can easily revert back if anything goes wrong during the import process.
Additionally, be cautious with the demo content you choose to import. Often, demos come with a large volume of data, which can slow down your site. Consider selecting only the components you truly need, such as specific pages or templates, rather than importing everything at once. This selective approach will help maintain your site’s performance and keep loading times fast.
Lastly, do not ignore the importance of following the official documentation. Eduma provides comprehensive guides and tutorials to assist you through the import process. By adhering to these resources, you can avoid common errors and ensure that the demo is imported as intended, setting the stage for a successful site launch.
Maximizing Efficiency: Best Practices for Faster Imports
When it comes to importing demos in Eduma, several strategies can dramatically enhance your efficiency. By following these best practices, you can reduce the time spent on importing while ensuring a smooth setup process.
First and foremost, ensure your server meets the recommended specifications. A robust server setup can make a significant difference in processing times. Here are some things to consider:
- PHP Version: Use the latest stable version of PHP for improved performance.
- Memory Limit: Increase your PHP memory limit to handle larger imports without hiccups.
- Execution Time: Adjust the max execution time settings to allow for longer import processes.
Next, before importing your demo content, it’s essential to clean up your WordPress environment. Remove any unnecessary plugins or themes that may slow down the import process. A clutter-free environment not only enhances performance but also minimizes potential conflicts during the import.
Additionally, consider using a staging environment for testing the import before going live. This approach allows you to identify and resolve any issues without affecting your primary site. Here’s why a staging site is beneficial:
- Testing Ground: Safely experiment with different import settings.
- Error Resolution: Quickly troubleshoot errors without disrupting user experience.
- Backup: Always have a fallback option if something goes wrong.
keep your import files optimized. Large files can significantly slow down the process. To ensure quicker imports, compress images and reduce the overall size of your demo content. A well-structured import file can lead to faster processing times.
| Best Practice | Impact on Import Time |
|---|---|
| Optimized Server Settings | High |
| Clean WordPress Environment | Medium |
| Staging Environment Testing | Medium |
| Compressed Import Files | High |
By implementing these strategies, you can significantly reduce the time required to import demos in Eduma. A well-planned approach not only enhances efficiency but also contributes to a smoother user experience on your site.
Setting Realistic Expectations for Import Times
When it comes to importing a demo in Eduma, managing your expectations is key. It’s easy to get swept up in the excitement of building your online course, but understanding the time commitment involved in the import process can save you from unnecessary frustration. Here’s what to realistically anticipate:
- Preparation Stage: Before you even start the import, take some time to assess your needs. Are you ready with all the necessary plugins and themes? This preparatory phase typically takes 1-2 hours depending on your familiarity with the platform.
- Import Duration: The actual import process usually lasts between 10 minutes to 1 hour. Factors such as your server speed and the size of the demo content can significantly affect this timeframe.
- Post-Import Adjustments: Once the demo is imported, you’ll likely need to spend an additional 1-3 hours tweaking settings, adding personal touches, and ensuring everything looks just right. This is where you create the unique identity of your course.
Moreover, consider the following table that outlines common factors impacting your total import time:
| Factor | Impact on Time |
|---|---|
| Server Speed | Higher speeds reduce import time |
| Demo Content Size | Larger sizes increase import duration |
| Plugin Compatibility | Incompatible plugins may lead to delays |
| User Experience | Familiarity with Eduma can expedite the process |
By keeping these timelines and factors in mind, you can approach the demo import with a clearer understanding of what to expect. Remember, while it might feel daunting, every moment spent fine-tuning your course contributes to creating a richer learning experience for your students. Enjoy the journey!
How to Prepare Your Site for a Smooth Demo Import
When preparing your site for a demo import, it’s essential to lay a solid groundwork to ensure a hassle-free experience. Start by backing up your current site. This step is crucial, as it allows you to restore your original settings in case anything goes awry during the import process. Use reliable backup plugins that create comprehensive backups, covering your themes, plugins, and database.
Next, ensure that your WordPress installation is up to date. Running the latest version helps avoid compatibility issues with the demo content. Check your themes and plugins as well; outdated elements could lead to conflicts during the import. It’s advisable to disable any unnecessary plugins temporarily, as they may interfere with the demo’s setup.
Another key factor is your hosting environment. Ensure that your server meets the necessary requirements for importing demo content. This includes adequate PHP memory limits, execution time, and file upload sizes. You might need to tweak these settings through your hosting control panel. Here’s a quick checklist:
- PHP Version: Ensure it is at least 7.2 or higher.
- Memory Limit: Set to a minimum of 256M.
- Max Execution Time: Increase to at least 300 seconds.
- File Upload Size: Set to 64MB or higher.
Once your preparations are complete, consider using the one-click demo import feature if your theme supports it. This method saves time and ensures that all demo data, including images and settings, are imported correctly. If you prefer manual importing, follow the guidelines provided by the theme documentation to avoid missing any critical components.
after the demo import, take some time to review your site. Check for any missing elements or layout inconsistencies. This is the perfect opportunity to customize the demo content to fit your brand’s identity. With these steps in place, you’ll be well-prepared for a seamless demo import experience.

Troubleshooting Slow Imports: Solutions You Can Try
Experiencing slow imports while setting up a demo in Eduma can be frustrating, but there are several effective solutions you can implement to speed things up. Here are some strategies to consider:
- Optimize Your Hosting Environment: Ensure that your hosting provider offers sufficient resources, including CPU, RAM, and disk space. Upgrading to a dedicated server or a VPS can significantly enhance performance.
- Use a Caching Plugin: Installing a caching plugin can help store static versions of your pages, reducing load times during the import process. Popular options include WP Super Cache and W3 Total Cache.
- Check Your Internet Connection: Sometimes, the problem isn’t with your site but with your connection. A slow or unstable internet connection can hinder the import process. Consider switching to a wired connection or a more stable Wi-Fi network.
- Reduce Demo Content Size: If possible, try importing a smaller subset of the demo content. This can be particularly useful for larger sites or those with extensive media libraries.
If you’ve tried the above and still face issues, consider the following advanced techniques:
- Disable Plugins: Temporarily deactivate any unnecessary plugins during the import. Some plugins can conflict with the import process, slowing it down.
- Increase PHP Limits: Modify your `php.ini` file to increase memory limits and execution time. Values like `memory_limit = 256M` and `max_execution_time = 300` can help.
For a quick reference, here’s a table summarizing the solutions along with their benefits:
| Solution | Benefit |
|---|---|
| Optimize Hosting | Better resource allocation |
| Use Caching | Reduced load times |
| Check Connection | Improved stability |
| Reduce Content Size | Faster imports |
| Disable Plugins | Minimized conflicts |
| Increase PHP Limits | Enhanced performance |
By following these practical solutions, you will likely see a marked improvement in your import speed, making the setup of your Eduma demo a smoother and more efficient process.

When to Seek Help: Knowing When to Reach Out for Support
When diving into the world of Eduma and importing demo content, it’s essential to recognize the signs that indicate it’s time to seek assistance. Navigating the intricacies of theme importation can sometimes feel overwhelming, and knowing when to reach out for help can make all the difference. Here are a few scenarios where enlisting support could be beneficial:
- Technical Glitches: If you encounter persistent errors or loading issues that prevent you from completing the demo import, it’s a clear signal to consult with a support team or a knowledgeable friend.
- Time Constraints: If you find yourself dedicating more hours than anticipated without significant progress, don’t hesitate to ask for guidance. This can save you time and frustration in the long run.
- Lack of Familiarity: If you’re new to WordPress or Eduma, and the instructions seem complex, seeking help from forums or support could provide clarity and speed up the process.
- Specific Requirements: If your project has unique demands that default demo content doesn’t fulfill, consider reaching out to a professional who can tailor the import to your specifications.
Additionally, understanding the resources available to you is key. Many users overlook the wealth of information in community forums, video tutorials, and the official documentation provided by Eduma. Here’s a simple breakdown of where to find help:
| Resource Type | Description | Availability |
|---|---|---|
| Community Forums | Interactive discussions with other users who may have faced similar issues. | 24/7 |
| Video Tutorials | Step-by-step guides that visually walk you through the demo import process. | On-Demand |
| Official Documentation | Comprehensive guides that cover various aspects of using Eduma. | Always Accessible |
| Customer Support | Direct assistance from the Eduma support team for specific issues. | Business Hours |
recognizing when to seek help during the demo import process is crucial for a smoother experience. Don’t hesitate to leverage available resources and connect with others. Whether you’re facing technical hurdles or simply need a bit of extra guidance, reaching out can transform your project from daunting to manageable. Remember, you’re not alone on this journey.
The Benefits of a Quick Demo Import for Your Eduma Site
For educators and institutions venturing into the online learning space, the speed and efficiency of setting up a site can make all the difference. A quick demo import offers a seamless way to kickstart your Eduma site, enabling you to focus on what truly matters—providing quality education.
One of the primary advantages of a rapid demo import is time savings. Instead of spending hours or even days configuring your website’s settings and layout, you can have a fully functional site up and running in a matter of minutes. This means that you can channel your energy into creating engaging course content and connecting with your audience rather than getting bogged down in the technicalities of setup.
Moreover, using a demo import helps in visualizing your site’s potential. You get a clear picture of how various elements such as courses, quizzes, and user profiles are arranged. This insight not only helps in making informed decisions but also inspires creativity in customizing your site’s appearance and functionality according to your unique brand identity.
Additionally, a quick demo import can significantly enhance the user experience. By leveraging pre-built templates, students and educators will find navigation intuitive and engaging. A smooth user journey can lead to higher retention rates and satisfaction, as users are more likely to return to a platform that is both visually appealing and easy to use.
| Benefit | Description |
|---|---|
| Time Efficiency | Set up your site in minutes, not days. |
| Visual Inspiration | Understand layout and design possibilities. |
| User Engagement | Enhanced navigation leads to better user retention. |
Lastly, implementing a quick demo import can simplify the learning curve for those unfamiliar with website management. With a ready-made framework, even individuals with limited technical skills can effortlessly manage and update their site. This accessibility opens doors for more educators to enter the online space, ultimately enriching the educational experience for all.
Frequently Asked Questions (FAQ)
Q&A: How Much Time is Required to Import a Demo in Eduma?
Q1: What is Eduma, and why should I consider importing a demo?
A1: Eduma is a robust WordPress theme designed specifically for educational institutions, online courses, and learning management systems. Importing a demo can be a game-changer for you! It allows you to kickstart your website with professional layouts, stunning visuals, and pre-configured settings—all tailored to enhance the learning experience. By importing a demo, you can save hours of design time and jump straight into customizing your content!
Q2: How much time does it typically take to import a demo in Eduma?
A2: The demo import process in Eduma is designed to be quick and efficient. On average, you can expect the import to take anywhere from 5 to 30 minutes. This time frame can vary based on your internet speed, the size of the demo content, and your hosting capabilities. Rest assured, it’s a small investment of time for a huge payoff in functionality and aesthetics!
Q3: What factors could influence the time it takes to import a demo?
A3: Several factors can affect the duration of the import process:
- Internet Speed: A faster connection will dramatically reduce the time it takes to download demo files.
- Hosting Quality: If you’re using a high-performing hosting service, the import will be smoother and quicker.
- Demo Size: Some demos are more extensive, containing numerous pages and assets, which could take longer to import.
- Server Configuration: If your server has restrictions or limitations, it might slow down the import process.
Q4: Is there anything I should do before starting the demo import?
A4: Absolutely! Here are a few steps to ensure a seamless process:
- Backup Your Site: If you’re importing the demo on an existing site, always back up your data to avoid any loss.
- Check Requirements: Make sure your WordPress version and plugins are up to date to prevent compatibility issues.
- Choose the Right Demo: Take a moment to browse the available demos and select one that best fits your vision and needs.
- Increase PHP Limits: If possible, adjust your PHP settings for memory and upload limits to accommodate larger demos.
Q5: What happens after the demo import is complete?
A5: Once the demo has been successfully imported, you’ll have a fully functional site framework! From here, you can customize various elements—edit text, replace images, adjust colors, and add your courses. It’s your canvas! With the foundation laid out, you can focus on what truly matters: creating engaging content and connecting with your audience.
Q6: Can I import multiple demos, and will it take a long time?
A6: Yes, you can import multiple demos if you wish to experiment with different designs. However, keep in mind that each import will take a bit of time—usually similar to your first import. It’s essential to consider whether you want to overwrite your existing content or start fresh with each demo. Take your time, and enjoy the creative process!
Q7: Why is it worth investing my time into importing a demo in Eduma?
A7: Investing a little time to import a demo in Eduma is an investment in your success! You’ll gain access to beautifully designed templates that have been crafted for maximum impact in the educational space. Plus, with a demo in place, you’ll reduce the trial-and-error phase of building your site from scratch. This means you can launch faster, engage your students sooner, and start making a difference right away. So why wait? Dive in and watch your vision come to life!
To Conclude
importing a demo in Eduma doesn’t have to be a daunting task. With a clear understanding of the steps involved and a bit of preparation, you can streamline the process and get your website up and running in no time.
Whether you’re launching a new online course or revamping your current site, the time you invest in importing a demo is well worth it, as it sets the foundation for an engaging and professional-looking platform. Remember, patience is key; while you may be eager to get started, taking the time to follow the necessary steps will pay off in the long run.
So, roll up your sleeves, grab a cup of coffee, and dive in! With the right approach, you’ll not only save time but also create an impressive online presence that captivates your audience. Happy importing, and here’s to your success with Eduma! If you have any questions or need further assistance, don’t hesitate to reach out. We’re all in this together!