Are you tired of those pesky image links cluttering your WordPress posts? You’re not alone! Many bloggers and website owners find themselves frustrated by images that link back to their media files instead of enhancing the user experience. Whether you want to improve your site’s aesthetics or boost your SEO, removing those image links can make a world of difference. In this article, we’ll guide you through the simple steps to declutter your posts and give your website a cleaner, more professional look. Say goodbye to unwanted distractions and hello to a seamless browsing experience! Let’s dive in and transform your WordPress site together.
Understanding the Need to Remove Image Links in WordPress
When managing a WordPress site, the way images are linked can significantly impact user experience and SEO. Removing image links can be vital for several reasons, enhancing both the functionality and aesthetic of your website. Consider the following points:
- Improved User Experience: By eliminating unnecessary links, users can focus on the image content without distractions. This helps in creating a cleaner layout that encourages visitors to stay longer on your site.
- Boosted SEO Performance: Search engines may prioritize websites that provide a seamless browsing experience. Reducing image links can contribute to lower bounce rates and higher engagement, which are crucial factors in SEO rankings.
- Enhanced Site Speed: Removing image links may lead to faster loading times. Since linked images require additional loading processes, a streamlined site can be more responsive, which is essential for retaining visitors.
Moreover, there are situations where images don’t necessarily need to link to another page. For instance, if the images are purely decorative or serve illustrative purposes, linking them can be redundant. In such cases, it’s beneficial to:
- Keep images inline with text to enhance readability.
- Use images to break up content without prompting clicks, which can detract from the primary message.
- Avoid potential confusion caused by unexpected navigation when users click on an image.
Ultimately, assessing the role of images on your site is crucial for aligning with your overall content strategy. You can start by considering a few simple questions:
| Question | Consideration |
|---|---|
| Is the image providing value? | Determine if it conveys important information or merely serves as decoration. |
| Does the link serve a purpose? | Evaluate whether the link enhances user navigation or confuses the audience. |
| How does it impact SEO? | Check if the linked images contribute positively or detract from search engine visibility. |
By thoughtfully considering these elements, you can create a more refined, user-friendly website that effectively communicates your message and meets the needs of your audience. Removing unnecessary image links is not just about aesthetics; it’s about fostering a better overall digital experience.

Identifying Image Links in Your Content
When managing your WordPress site, it’s common to find image links embedded within your content that may not serve any purpose. Identifying these links is the first step towards optimizing your posts and enhancing user experience. By streamlining your content, you not only improve site performance but also boost SEO rankings. Here’s how to spot those pesky image links:
- Use the Text Editor: Switch to the text editor in WordPress to view HTML code. This will allow you to see image links clearly, as they’ll typically appear as
- Inspect Elements: Right-click on the image in your post and select “Inspect” to see its link. This tool reveals the HTML structure, helping you identify any unwanted links.
- Media Library Check: Visit your Media Library and review attached links for each image. This will help you determine which images are linked and if they are necessary.
Once you’ve identified the image links, it’s time to evaluate their relevance. Consider the following criteria:
| Criteria | Relevant | Remove |
|---|---|---|
| Is the link driving traffic? | Yes | No |
| Does it enhance user experience? | Yes | No |
| Is the image crediting the right source? | Yes | No |
After evaluating, you’ll find that some image links are outdated or irrelevant, while others may still hold value. For those to keep, consider updating them to ensure they direct viewers appropriately. Utilize plugins that can help manage image links efficiently, or do it manually if you prefer a hands-on approach.
Lastly, regular audits of your content for image links will keep your site clean and user-friendly. Make it a habit to revisit older posts periodically. By doing so, you maintain the integrity of your content and provide a seamless experience for your audience.

Quick Guide to Removing Image Links from Posts
Removing image links from your WordPress posts can enhance the visual appeal and improve the user experience on your site. Whether you want to declutter a post or prevent users from navigating away, the following steps will help you achieve a clean look.
To begin, navigate to the WordPress Dashboard. From there, follow these simple steps:
- Go to Posts and select the post you wish to edit.
- In the post editor, click on the image you want to remove the link from.
- A small toolbar should appear above the image; click on the edit icon.
- In the pop-up window, look for the Link To option.
- Select None to unlink the image.
- Save or update your post to apply the changes.
Alternatively, if you want to remove links from multiple images across various posts, consider using a plugin. Here are some popular options:
| Plugin Name | Description |
|---|---|
| Remove Link from Images | Automatically removes links from all images in your posts. |
| Bulk Edit Images | Allows bulk editing of image properties including links. |
| Image Link Remover | A lightweight plugin designed specifically for unlinking images. |
Once you’ve chosen a method that suits your needs, ensure you preview your changes by clicking on the Preview button before publishing. This will allow you to see exactly how the images will appear without links, ensuring a cleaner and more professional look for your site. Keeping your content visually engaging is key to retaining visitors!
Utilizing the WordPress Editor for Easy Image Link Removal
Removing image links in WordPress can be a breeze, especially with the intuitive features of the WordPress Editor. If you’ve accidentally linked an image or want to remove a link for aesthetic reasons, the process is simple and straightforward.
To start, navigate to the page or post where your image is located. Once the WordPress Editor is open, locate the image you want to modify. Click on the image; this action will bring up the image settings on the right side of the editor. Here, you can easily see if your image has a link attached.
To remove the link:
- Click on the image. This will highlight it and allow you to access its settings.
- Look for the link options. If the image is linked, you’ll see an option to edit or remove the link.
- Select “Remove link.” This option will typically appear as a chain link icon or text indicating the removal of the link.
Once you’ve removed the link, you can preview your changes to ensure that the image is displayed without any hyperlink. This is a great opportunity to enhance the presentation of your content. You can also use the options to align or add captions to your images to make them more engaging.
If you want to go a step further, consider organizing your images and their links in a table format for better clarity, especially if you’re managing multiple images:
| Image Description | Current Link | Action |
|---|---|---|
| Image 1 | Link | |
| Image 2 | Link |
By following these steps, you can ensure that your images are free from unwanted links, enhancing the user experience on your site. Remember, a clean and organized presentation is key to keeping your visitors engaged!
Leveraging Plugins for Bulk Image Link Removal
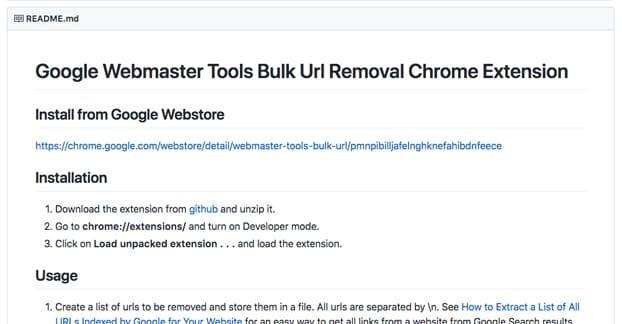
If you’re looking for a streamlined way to remove image links from your WordPress site, leveraging plugins can save you time and effort. With the right tools, you can quickly address multiple images without having to edit each post individually. This approach not only enhances site performance but also improves user experience by eliminating unnecessary links.
Here are some popular plugins that can help you manage bulk image link removal effectively:
- Remove Link From Images: This simple plugin allows you to remove links from all images on your site with a single click, making it an ideal choice for bulk actions.
- SEO Image Optimizer: While primarily focused on image optimization, it also provides an option to remove links, ensuring your images are not only fast-loading but also clean.
- Bulk Image Link Remover: Specifically designed for this task, it lets you select images and remove links in bulk, saving you considerable time.
To get started, follow these straightforward steps:
- Install your chosen plugin from the WordPress repository.
- Activate the plugin and navigate to its settings.
- Select the option for bulk image link removal.
- Review your selections and confirm the action.
It’s wise to back up your site before proceeding. A simple backup can prevent potential issues should anything go wrong during the removal process. Moreover, consider conducting a quick review of your posts after completing the task to ensure that everything appears as expected—this extra step can save you from future headaches.
| Plugin Name | Features | Price |
|---|---|---|
| Remove Link From Images | Easy removal, fast setup | Free |
| SEO Image Optimizer | Optimizes images, removes links | Free with premium options |
| Bulk Image Link Remover | Specific for bulk actions | Premium |
By utilizing these plugins, you can maintain a clean, professional-looking website without the hassle of manual edits. Don’t let outdated practices weigh you down—embrace the power of automation and watch your workflow improve exponentially!
Preventing Future Image Link Issues in WordPress
To ensure a seamless experience for your website visitors and maintain the integrity of your content, it’s crucial to implement strategies that prevent future image link issues. Here are some effective measures you can take:
- Optimize Image Upload Settings: Configure your media settings to prevent automatic linking of images. By default, WordPress may create linked versions of your images, so adjust settings to keep images unlinked.
- Use Plugins Wisely: Consider utilizing plugins designed for image management. Tools like Media Library Assistant or Smush can help you manage and optimize images without creating unnecessary links.
- Maintain Consistent Content Management: Establish a content management workflow that includes regular audits of images and links. This practice will help you stay ahead of potential issues and ensure that all media is correctly implemented.
- Educate Your Team: If multiple contributors are involved in your site, provide training on proper image handling and the implications of linking images. A well-informed team is less likely to create link issues in the first place.
Additionally, consider setting up a perpetual monitoring system for your website. You can either use automated plugins that scan for broken links and image issues or perform regular manual checks. Here’s a simple table to help you keep track of your monitoring schedule:
| Monitoring Task | Frequency | Responsible Party |
|---|---|---|
| Check for Broken Links | Weekly | Content Manager |
| Review Image Uploads | Monthly | Webmaster |
| Optimize Existing Images | Quarterly | SEO Specialist |
| Team Training Sessions | Biannually | Admin Manager |
By proactively implementing these strategies, you can significantly reduce the risk of image link issues on your WordPress site, ultimately enhancing user satisfaction and engagement. Remember, a well-maintained image library not only contributes to a better user experience but also supports your site’s overall SEO efforts.
Best Practices for Managing Images in Your Media Library
Maintaining a well-organized media library is essential for any WordPress site owner, especially when it comes to managing images. Efficient image management not only enhances the user experience but also improves site performance and SEO. Here are some best practices to keep your media library in tip-top shape.
One of the first steps in managing your media library is to establish a consistent naming convention for your images. Use descriptive, keyword-rich file names that accurately represent the content of the image. This practice benefits both search engines and users. Consider the following tips:
- Be Specific: Instead of naming an image “IMG_1234.jpg,” use “blue-widget-product-shot.jpg.”
- Avoid Special Characters: Stick to letters, numbers, and hyphens to ensure compatibility.
- Use Lowercase Letters: This helps avoid potential issues with servers that are case-sensitive.
Regularly auditing your media library is another critical practice. This involves identifying and deleting any unused or outdated images. Here’s how to conduct a thorough audit:
- Sort by Date: Review older images that may no longer be relevant.
- Check for Duplicates: Remove any duplicated files to save storage space.
- Assess Quality: Eliminate low-quality images that do not meet your current standards.
When it comes to image links, it’s essential to ensure they serve a purpose. If an image is linked to another page, ask yourself:
- Does it add value? Ensure that every link leads to relevant content.
- Is it functional? Periodically test your links to ensure they are not broken.
- Is it SEO-friendly? Use descriptive alt text and anchor text to enhance your site’s SEO.
For those looking to remove links from images efficiently, consider using plugins designed for bulk actions. This can save you precious time and effort, especially for larger libraries. Look for plugins that offer features like:
- Batch Removal: Remove links from multiple images in one action.
- Easy Interface: A user-friendly design makes the process smooth.
- Preview Options: Allowing you to see changes before applying them.
By following these best practices, you can significantly enhance the functionality and efficiency of your media library. A well-managed library not only boosts your site’s performance but also ensures a seamless experience for your visitors.
Enhancing User Experience by Cleaning Up Image Links
When it comes to optimizing your WordPress site, one of the often-overlooked aspects is the management of image links. These links can clutter your website’s code, leading to slower load times and a less pleasant browsing experience for your visitors. By streamlining image links, you not only enhance performance but also improve overall user satisfaction.
First and foremost, it’s important to recognize the impact of broken or outdated image links. These can result in unsightly error messages and broken images that frustrate users. To tackle this, consider using plugins like Broken Link Checker, which can automatically detect and notify you of any issues. By routinely checking for broken links, you can maintain a clean and visually appealing site.
Moreover, reducing the number of links to external images can significantly enhance loading times. Many users are accustomed to fast-loading content, and if your images are pulling from unreliable sources, it can result in delays. Instead, opt to upload images directly to your media library. This not only ensures that your images are always accessible but also allows for easier management and organization.
To make the process even smoother, consider creating a short checklist to guide your image link cleanup:
- Audit Your Media Library: Regularly review images and their links.
- Delete Unused Images: Free up space and reduce clutter.
- Use Descriptive Filenames: Improve SEO and accessibility.
- Optimize Image Sizes: Enhance load times and user experience.
Additionally, you can implement a table to effectively display image-related data, helping you keep track of your optimizations:
| Image Name | Status | Action Required |
|---|---|---|
| example-image1.jpg | Active | None |
| broken-image-link.jpg | Broken | Replace |
| old-image.png | Unused | Delete |
By taking these steps to clean up your image links, you’ll create a more streamlined and user-friendly experience on your site. Remember, happy visitors are more likely to return and engage with your content, so take the time to enhance their experience through effective image management.
Taking Control of Your Content: The Importance of Image Management
Managing your images in WordPress is not just about aesthetics; it’s about optimizing your website’s performance and ensuring a seamless user experience. Over time, your media library can become cluttered with unnecessary image links that can slow down your site and confuse your audience. Here’s why taking the time to streamline your image management is crucial:
- Improved Site Speed: Removing unused image links can significantly enhance your site’s loading times, which is essential for retaining visitors.
- Better SEO: Properly managed images, with no broken links, contribute positively to your search engine rankings.
- Enhanced User Experience: A clean, organized media library makes it easier for you to find and use images, resulting in more engaging content for your audience.
To begin the process of removing image links, first, navigate to your WordPress dashboard and head to the Media section. From there, you can identify images that are no longer relevant. Consider creating a simple table to track which images you plan to delete:
| Image | Status | Action |
|---|---|---|
| Image 1 | Unused | Remove |
| Image 2 | In use | Keep |
| Image 3 | Unused | Remove |
Once you’ve identified images to delete, you can either remove them individually or in bulk. To delete images in bulk, simply select multiple images in your media library and choose the Delete Permanently option. This not only cleans up your library but also frees up space on your server.
don’t forget to check for any broken image links in your posts. You can use plugins or manual checks to ensure that all image links are functional. Fixing or removing broken links is vital for maintaining your site’s credibility and user trust.
Frequently Asked Questions (FAQ)
Q&A: How to Remove Image Links in WordPress
Q1: Why should I remove image links in my WordPress posts?
A: Great question! Removing image links can enhance user experience by preventing visitors from being redirected to another page when they click on an image. This keeps them engaged with your content. Additionally, it can improve your site’s SEO, as it helps you control the flow of traffic and ensures your images serve their original purpose: to complement your content!
Q2: Isn’t it easier to leave the links as they are?
A: While it might seem easier to leave the links intact, you could be missing out on a more seamless experience for your readers. By removing unnecessary image links, you keep their focus where it belongs—on your valuable content. Plus, it’s a quick fix that can make a big difference in how users interact with your site!
Q3: How do I remove image links in WordPress?
A: You can easily remove image links in WordPress by following these steps: First, go to the post or page where your image is located. Click on the image, and then select the pencil icon to edit it. In the attachment display settings, you’ll see a field labeled “Link To.” Change this option to “None.” Voila! Your image will no longer have a hyperlink. It’s super simple and takes just a minute!
Q4: What if I have multiple images to edit? Is there a quicker way?
A: Absolutely! If you have multiple images across different posts, consider using the bulk edit feature. Go to your media library, select the images you want to edit, and choose “Edit.” Here, you can set the link options for all selected images at once. This can save you a ton of time!
Q5: Can I remove image links from my entire site at once?
A: Yes, you can! If you’re comfortable using plugins, look for one that offers bulk editing features or specific options for media links. Plugins like “Remove Image Links” can do the trick. Just remember to back up your site first, so you can easily undo anything if needed.
Q6: What if I change my mind later? Can I restore the image links?
A: Of course! If you ever decide that you want your images to link somewhere, you can always edit them again and re-establish the links. WordPress makes it easy to tweak and update your content, ensuring that you’re always in control of your site’s functionality.
Q7: Are there any downsides to removing image links?
A: The primary downside is the potential loss of additional traffic to other relevant pages or posts on your site. However, if the goal is to keep visitors focused on your content rather than navigating away, the benefits often outweigh this concern. Just weigh your options based on your specific goals and audience behavior!
Q8: Where can I learn more about optimizing my WordPress site?
A: There are plenty of resources available online! Check out WordPress forums, blogs, and tutorials that focus on site optimization. You’ll find a wealth of tips and tricks to enhance your site’s performance and user experience. And remember, the more you learn, the better your website will become!
By following these steps and engaging with your audience through thoughtful content, you’re not only improving the usability of your site but also enhancing your reputation as a reliable source of information. Happy blogging!
In Summary
removing image links in WordPress doesn’t have to be a daunting task. With the simple steps we’ve outlined, you can tidy up your content, enhance your site’s usability, and improve your readers’ experience. Remember, a clean and user-friendly website not only keeps your visitors engaged but also encourages them to browse longer and return for more.
So why wait? Take a moment to apply these techniques and watch your website transform. If you’re ever unsure or encounter a hiccup along the way, don’t hesitate to reach out to the WordPress community or consult resources available online. Your website is a reflection of your brand, and investing in its cleanliness and functionality pays off in the long run.
Now it’s your turn! Dive into your WordPress dashboard and start refining those images. Your readers will appreciate the effort, and who knows? You might just inspire someone else to do the same. Happy blogging!


